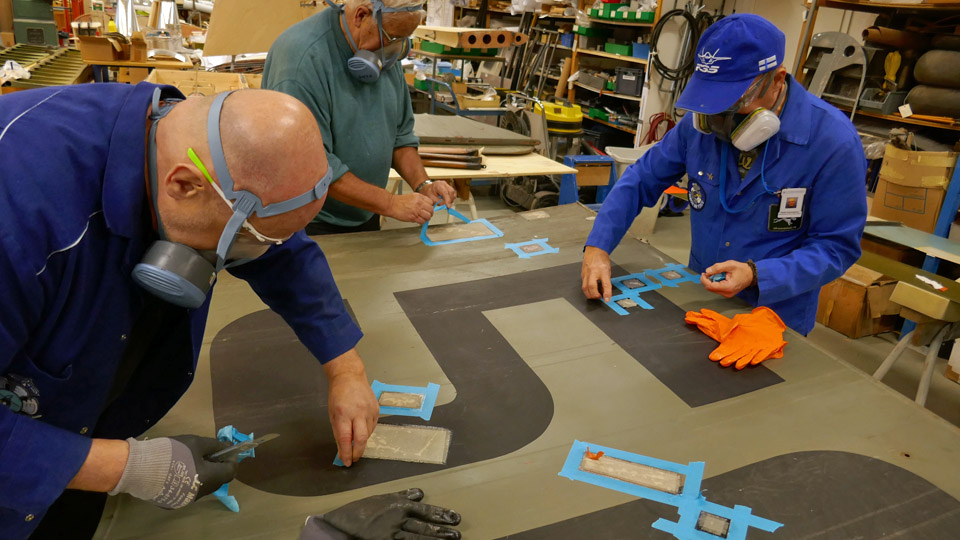
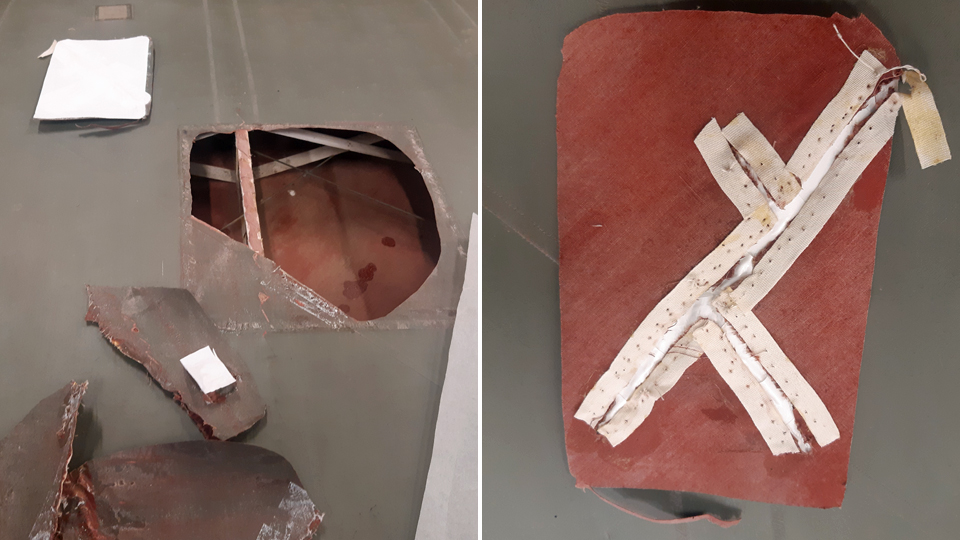
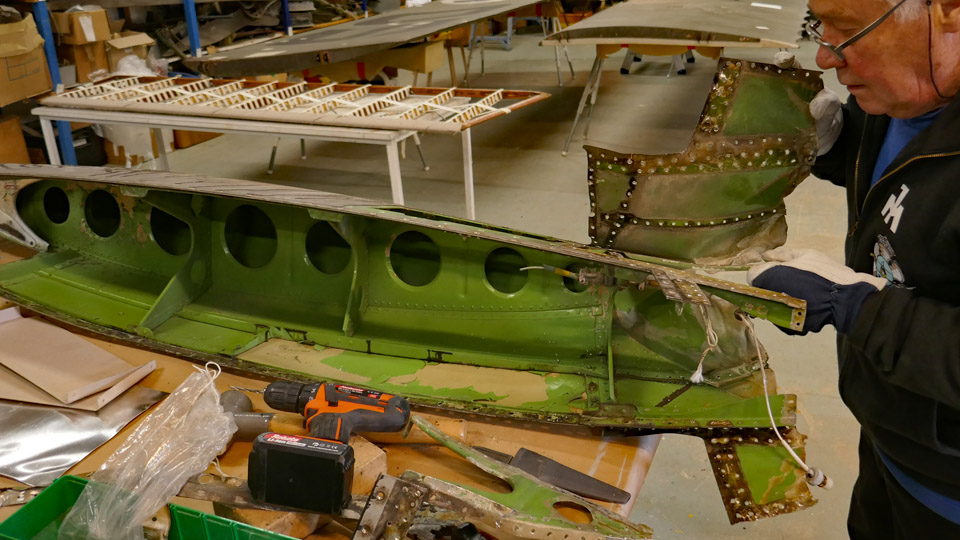
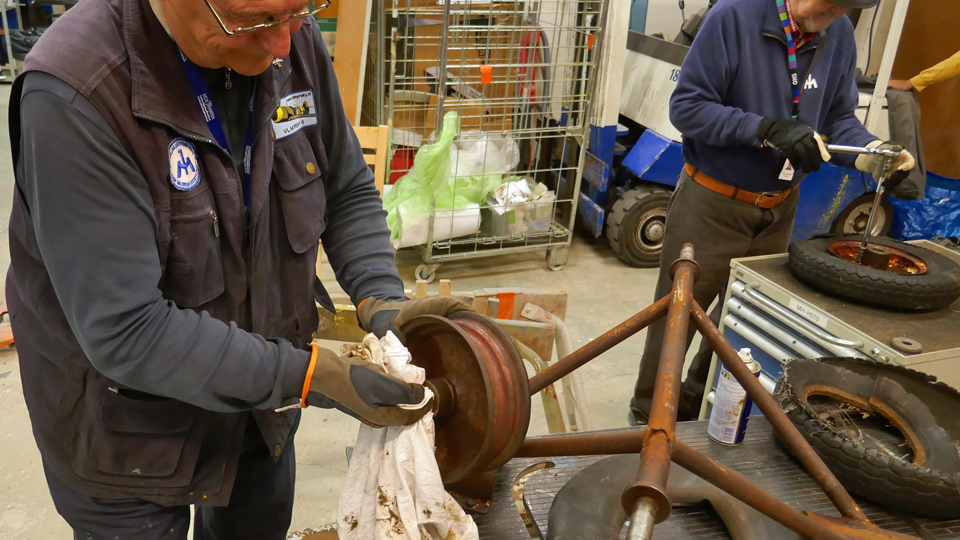
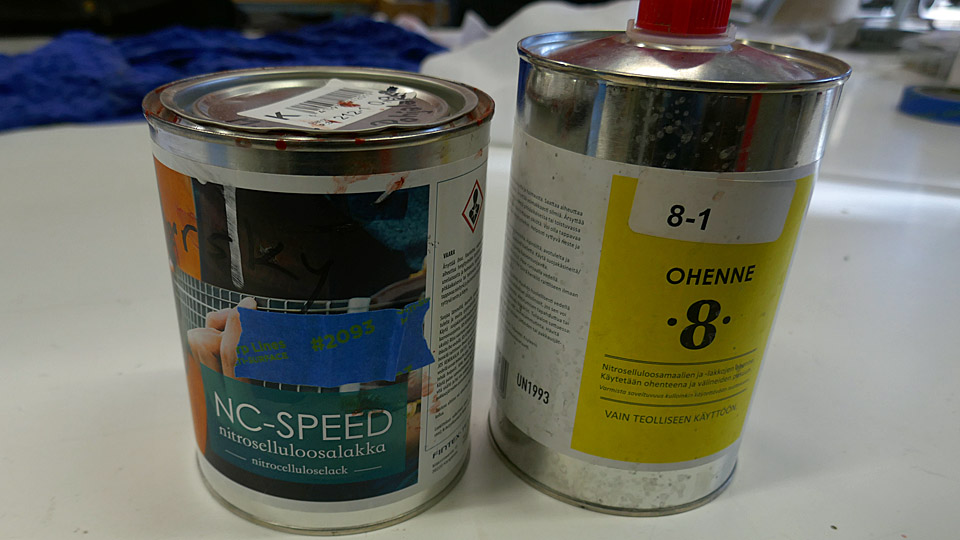
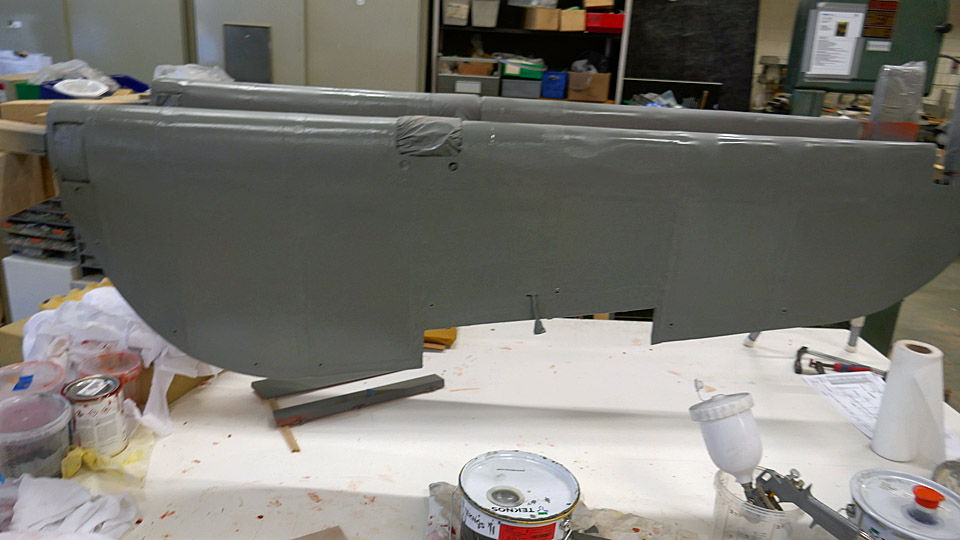
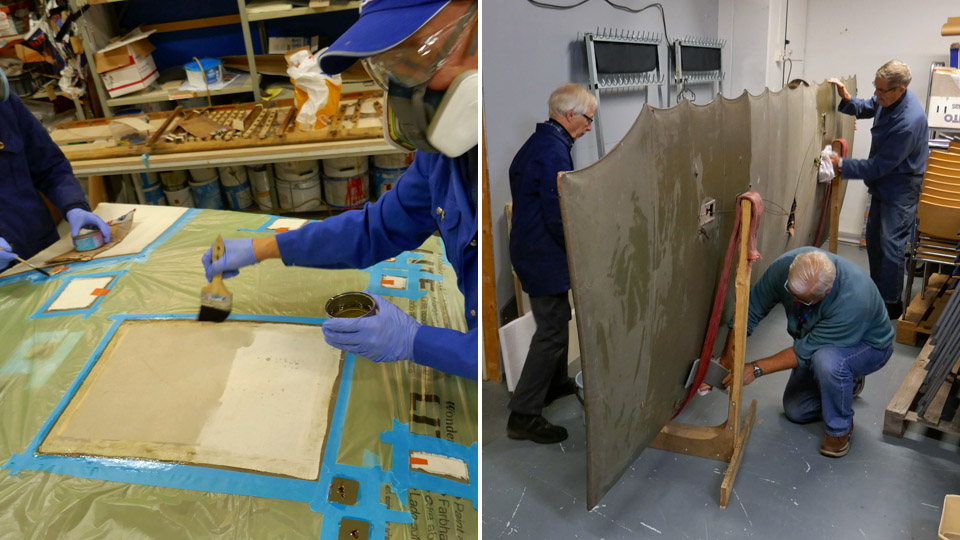
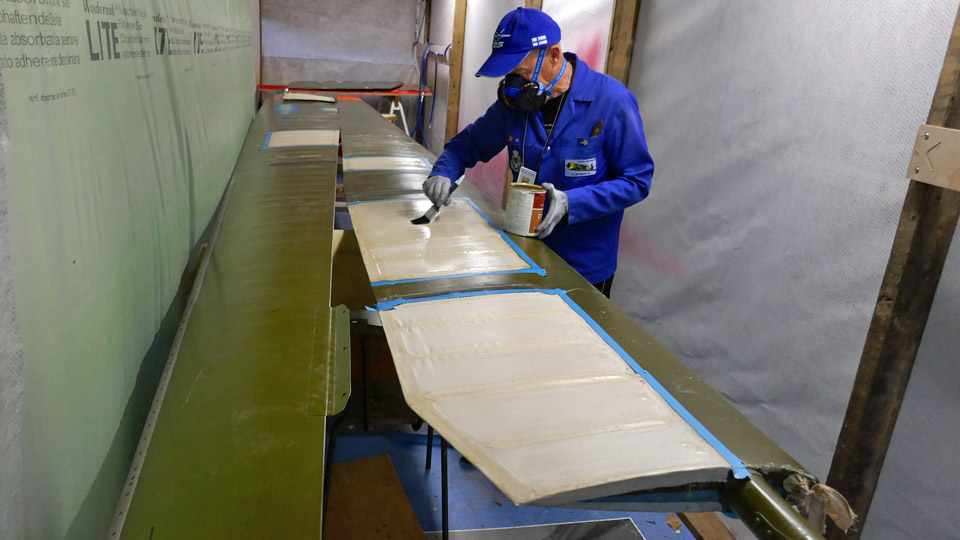
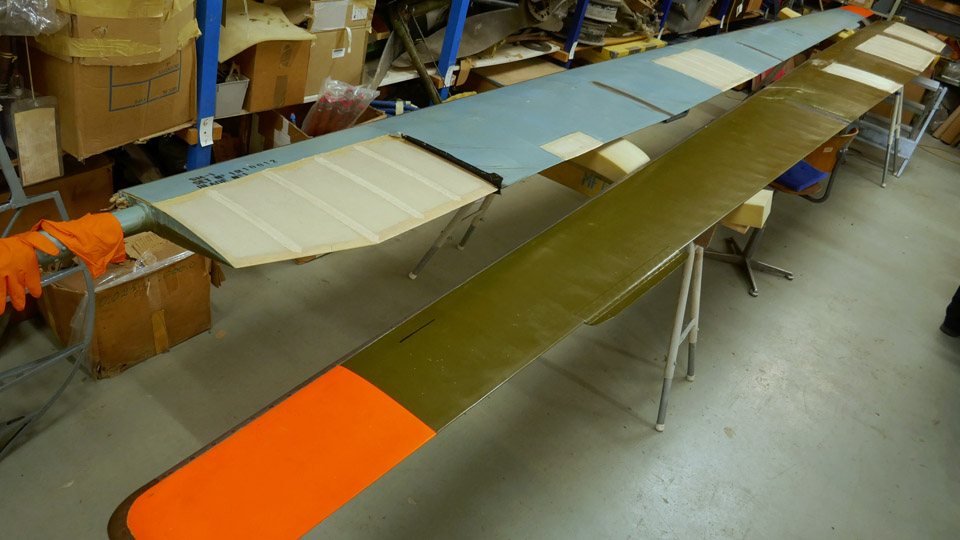
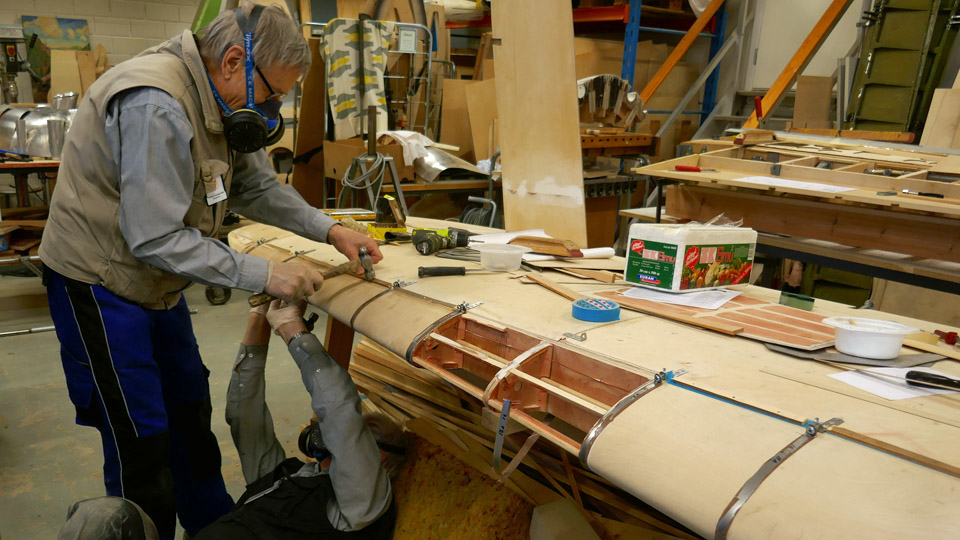
Changing the patches on lower wings of the Caudron to a modern patching materialMaanantai 26.12.2022 - Tuesday Club member The patching of the holes on the lower wings of the Caudron C.59 CA-50), the advanced trainer from the 1920’s, was finished in 2021. More than a hundred holes of various sizes could be found on both wings. To patch the holes on the lower wings we had used first cotton and then linen fabric. We had sewn together the tattered edges of big holes before gluing the patches on them. The patches had been fringed on their edges in the manner of the 1920’s, and they were glued on the holes using nitrocellulose lacquer, i.e. the tightening lacquer for the covering fabric.
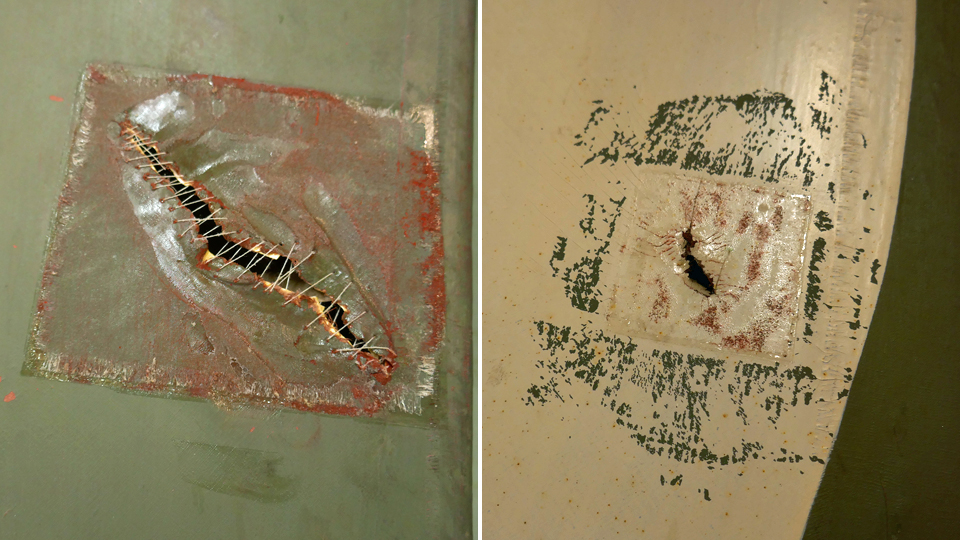
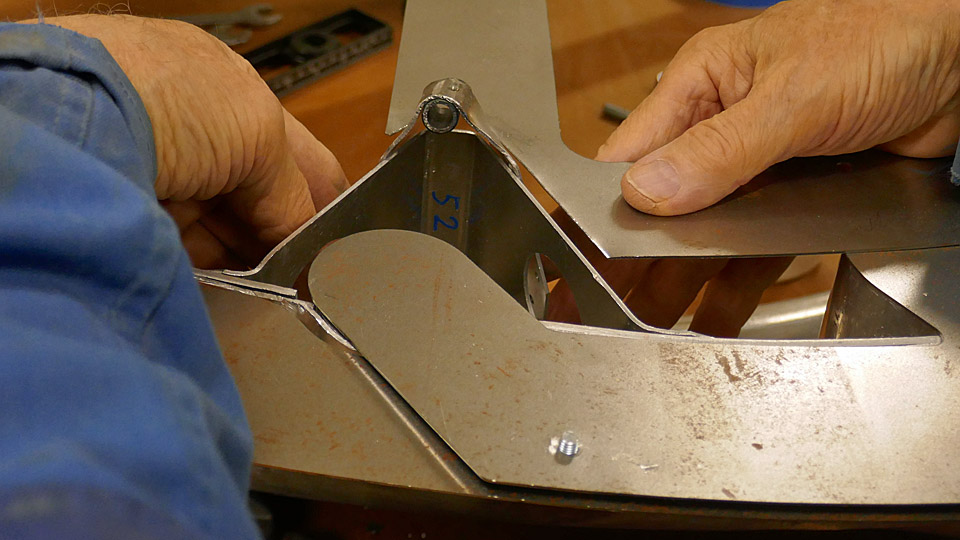
In the autumn of 2022 we started the changing of the fabric patches on the lower wings with the Finnish Aviation Museum’s staff supervising the work. The reason for this was that the larger patches of fabric, and especially the linen patches, hadn’t properly tightened. There were also problems with those patches, where the edges of the holes had been sewn together. In these places the stitches had remained lumpy under the patches in a disturbing manner, probably because the fabric hadn’t tightened enough on the stitches. Patches on the wings have to be smooth at least for aerodynamic reasons.
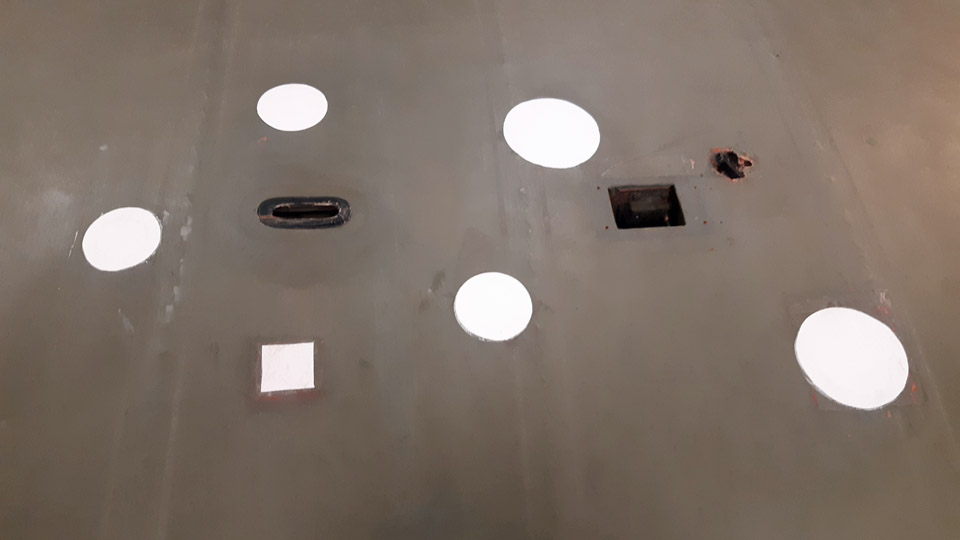
The Museum decided to have the inadequately tightened linen patches and the fabric patches containing stitches to be changed to a new material. As the new material the modern heat-tightening Oratex- material, resembling the 1920s style, was chosen. Patches made of thin Oratex-material, painted in the patinated greyish green hue, produced inconspicuous and at the same time aerodynamically extremely smooth patches, compared with the fabric ones made with tightening lacquer.
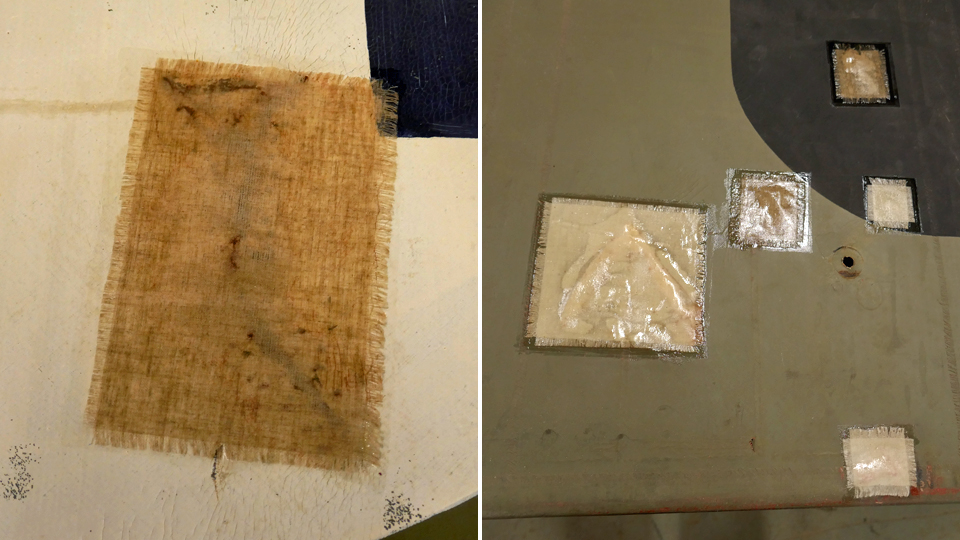
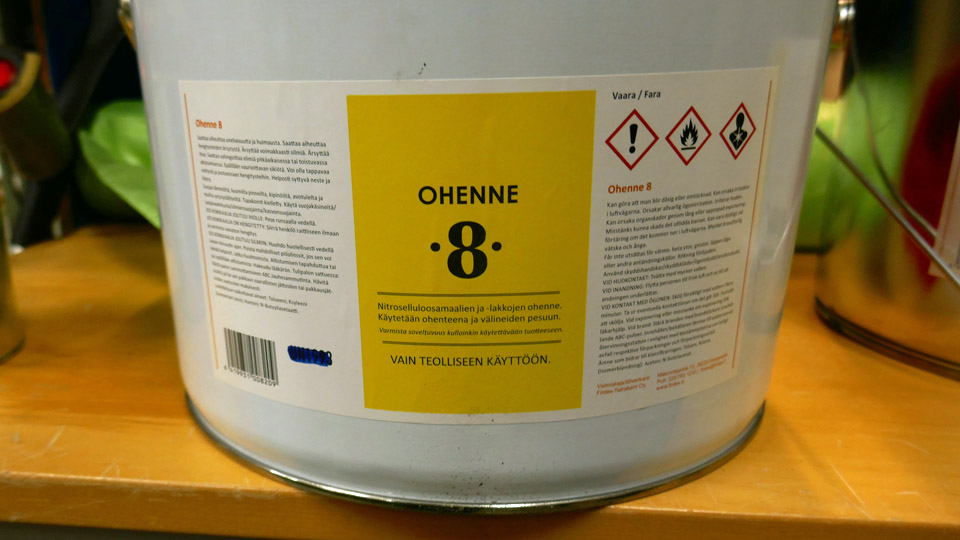
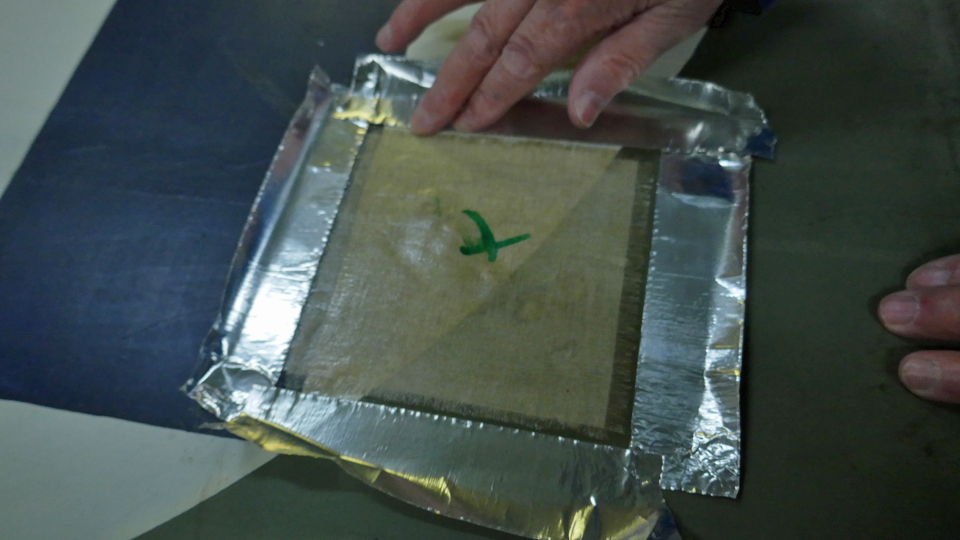
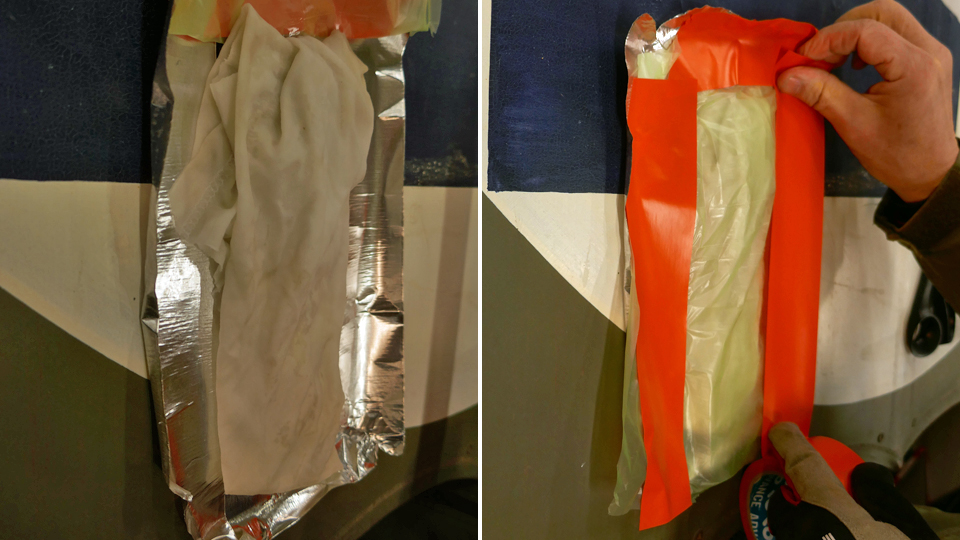
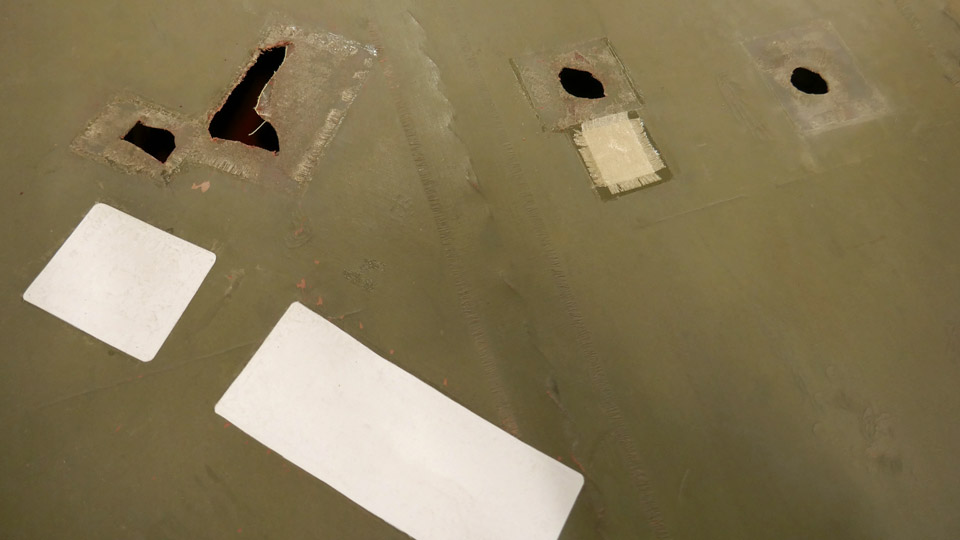
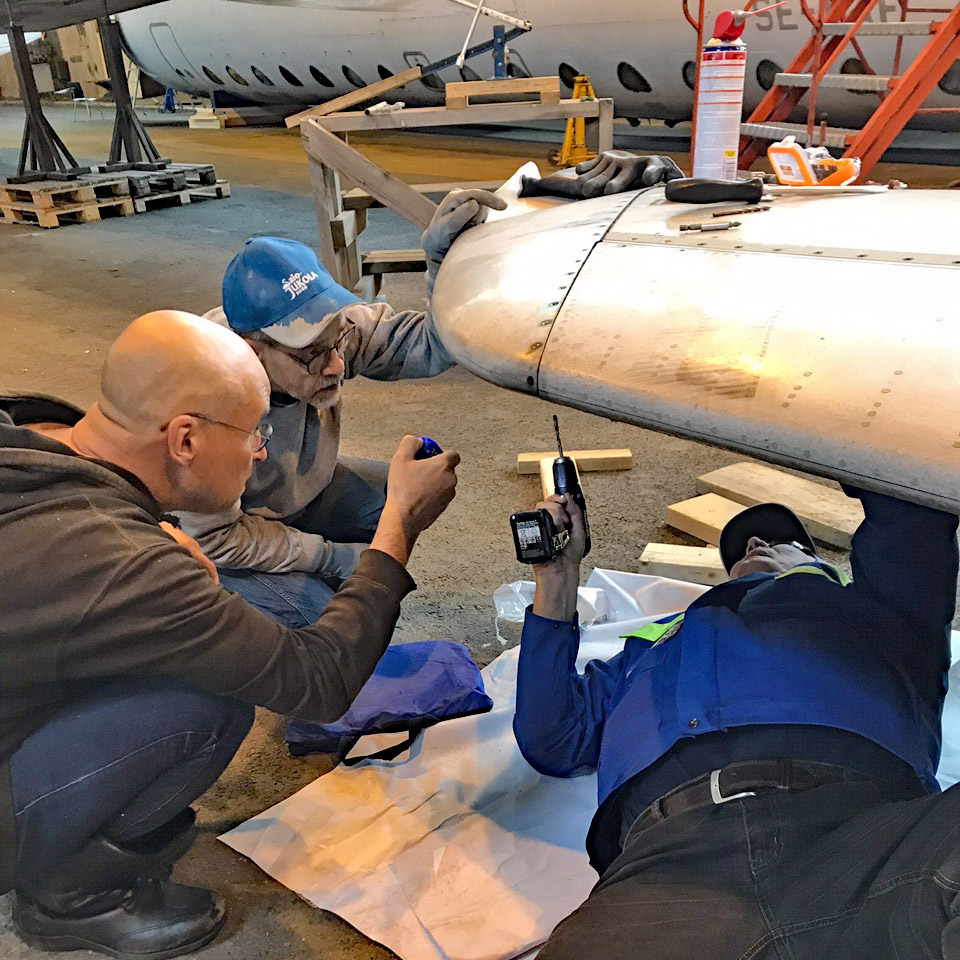
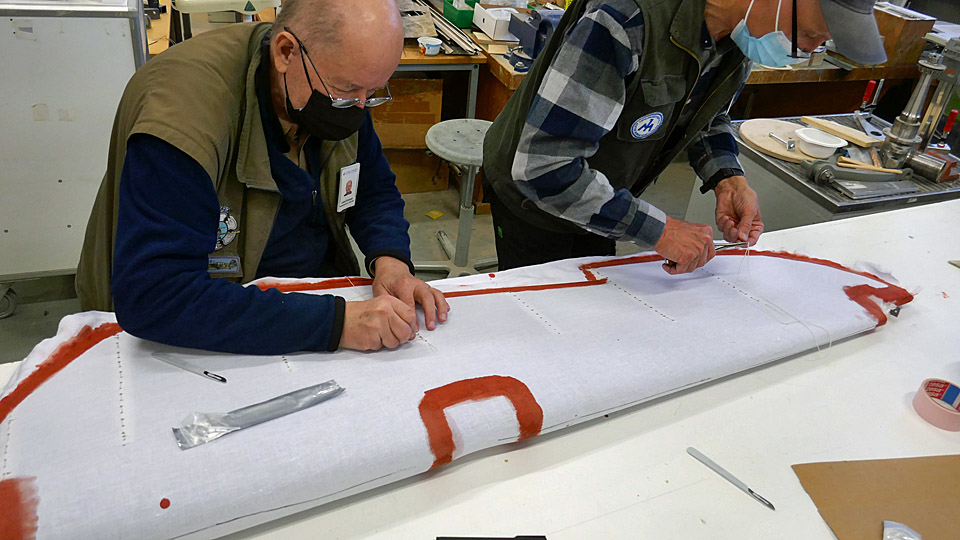
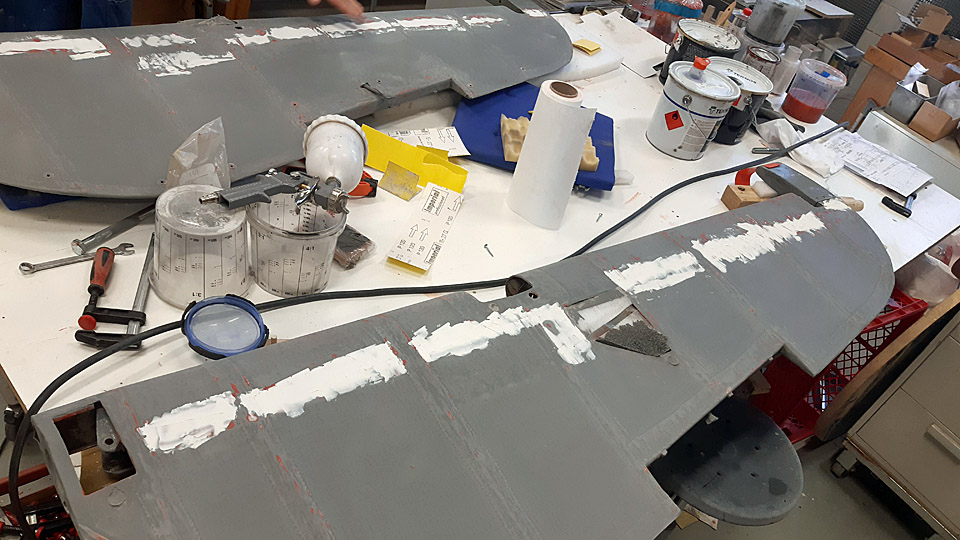
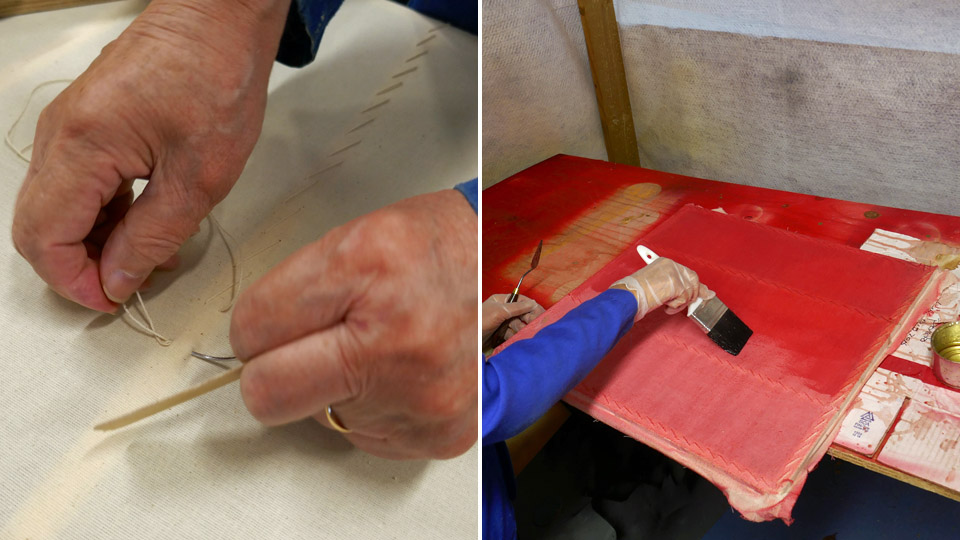
To replace the patching material the fabric patches were loosened using thinner for nitro cellulose lacquer (Thinner 8). The patch was surrounded with aluminium tape, so that the thinner wouldn’t damage the 1920s covering fabric. After this a thoroughly Thinner 8 soaked fabric, which was covered with a sheet of plastic foil, was placed on the patch. The foil was taped tightly on the edges to keep the fabric wet and to prevent the thinner from evaporating. After a few hours “the package” was opened and the cotton or linen patch, glued with nitro cellulose lacquer, could be neatly detached. After this the edges of the holes without a patch were cut clean. Patches, with tattered edges sewn together, were cut completely open. Holes with tattered edges will not be sewn anew.
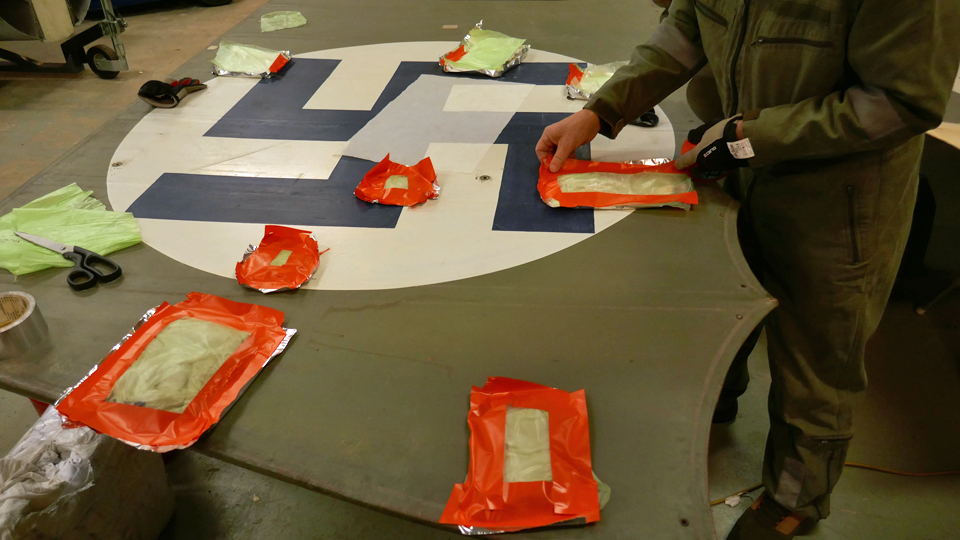
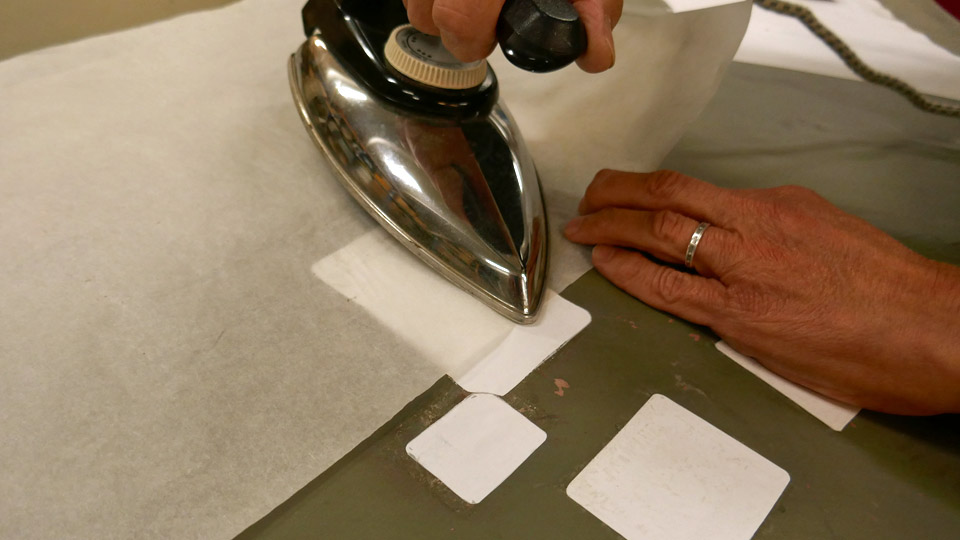
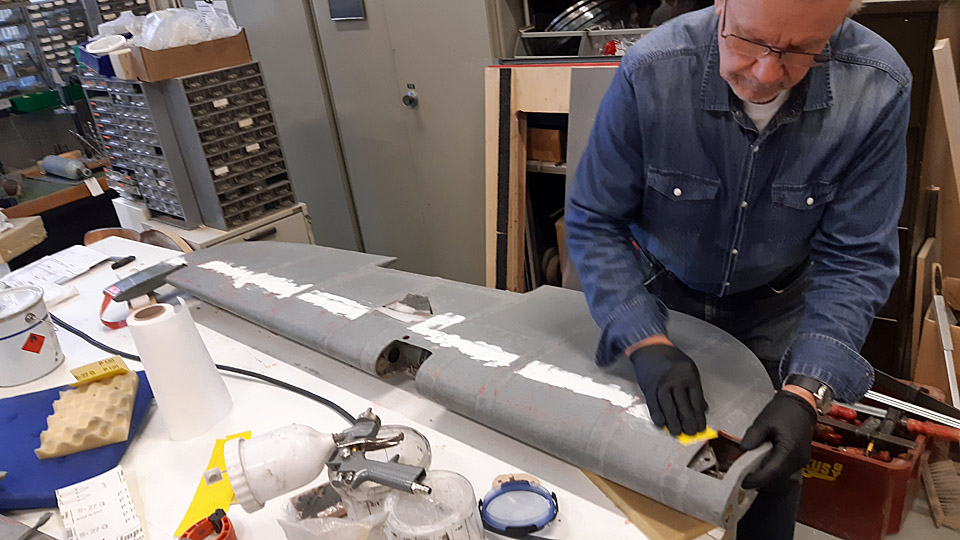
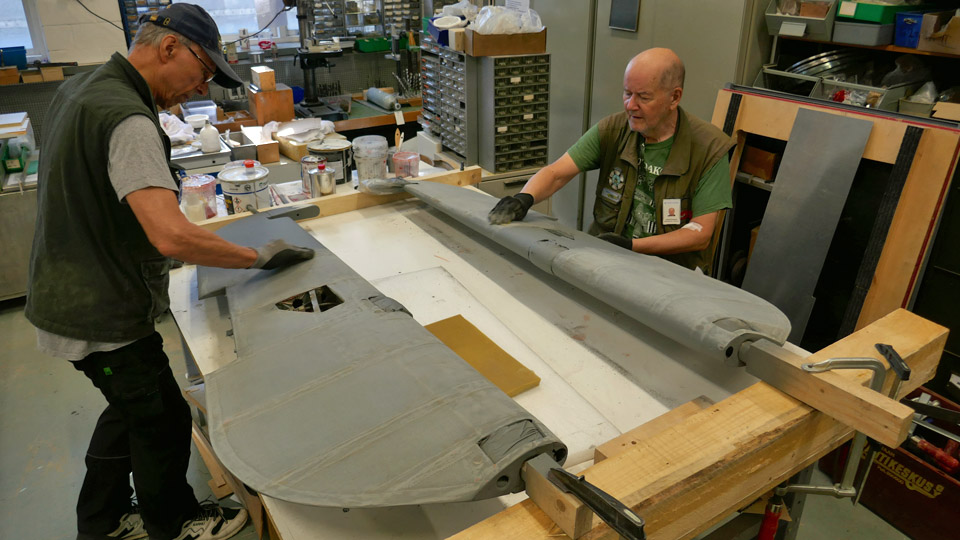
Now the patching of the cleaned holes could be started with Oratex-material. For each hole a larger round or rectangular piece was now cut out of the Oratex-material. After that the patch was glued and tightened on the hole by heating the patch with an iron, which was pre-heated to a suitable temperature, using a protective paper. The heating melts the glue from the underside of the patching material, fastening the patch to its place and tightening the fabric smooth.
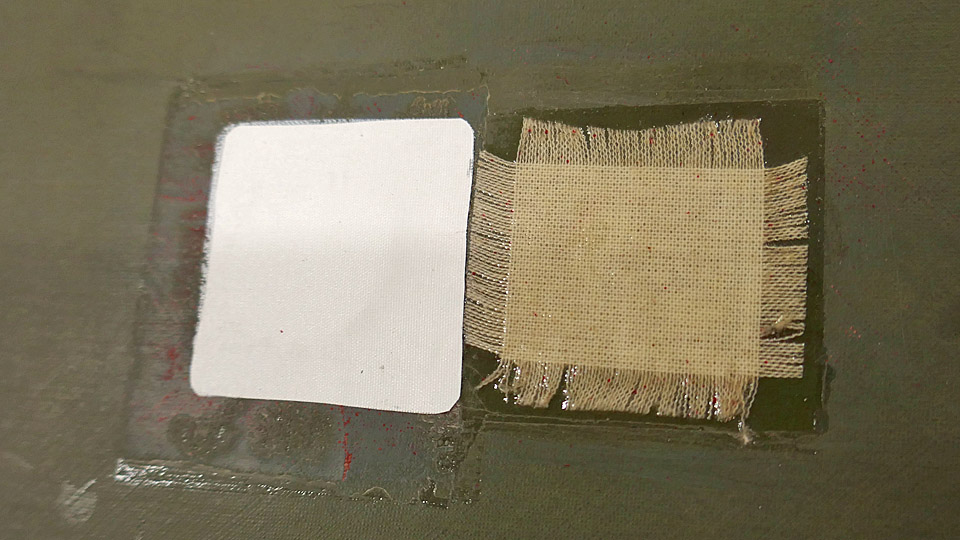
This modern material is really handy to use and the patches turned out to be very smooth and tidy. There’s also the extra bonus of not having to protect oneself against the toxic fumes of the nitrocellulose lacquer. The appearance of Ortex- patches differs, however, from the traditional fabric patches with fringed edges from the 1920s. The work will continue in the spring season of 2023. Photos by Lassi Karivalo. Translation by Matti Liuskallio. |
|
Avainsanat: aviation history, restoration, Tuesday Club, Caudron C.59;CA-50 |
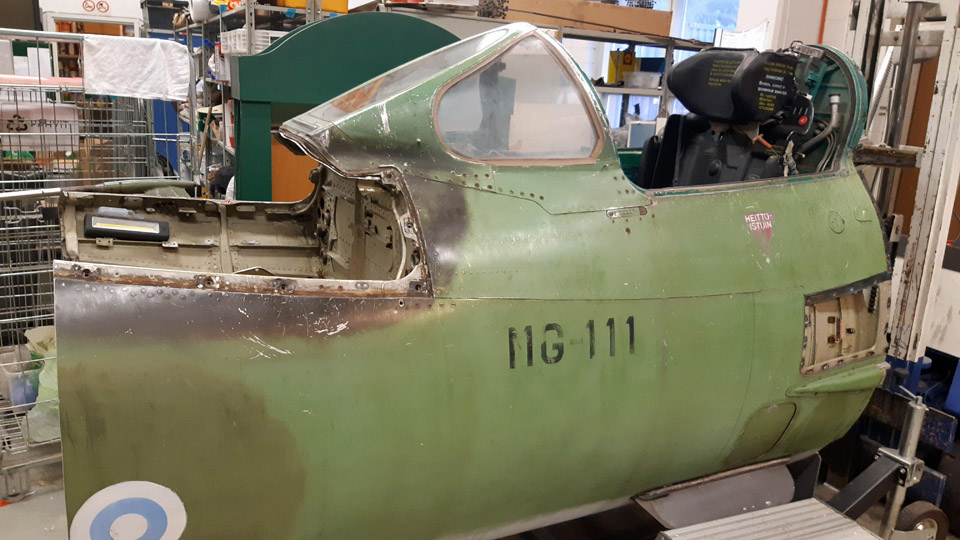
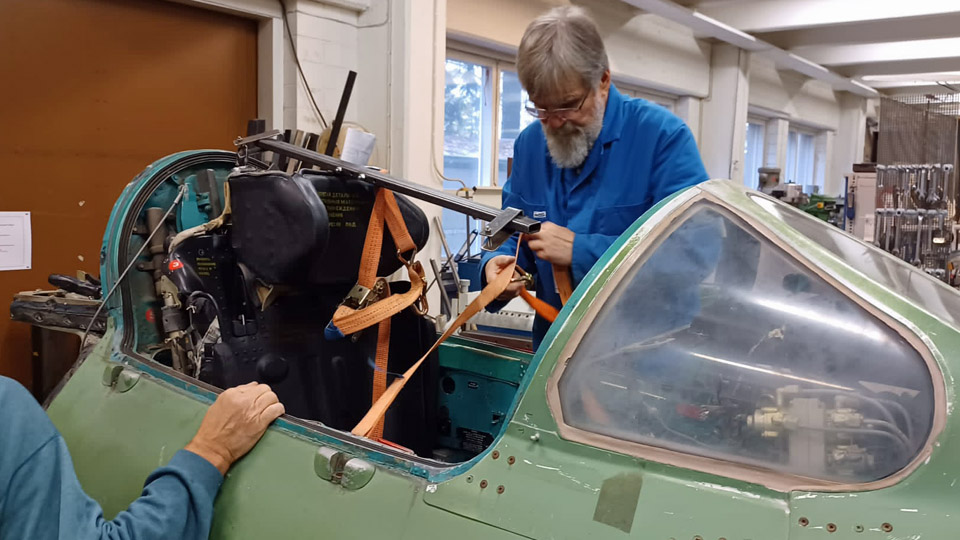
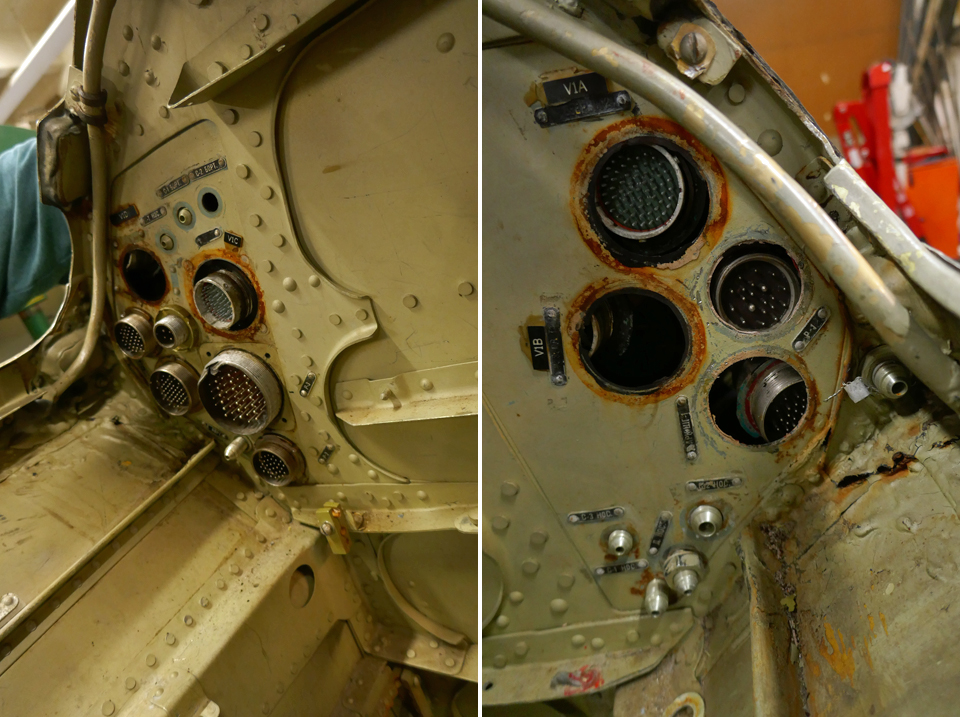
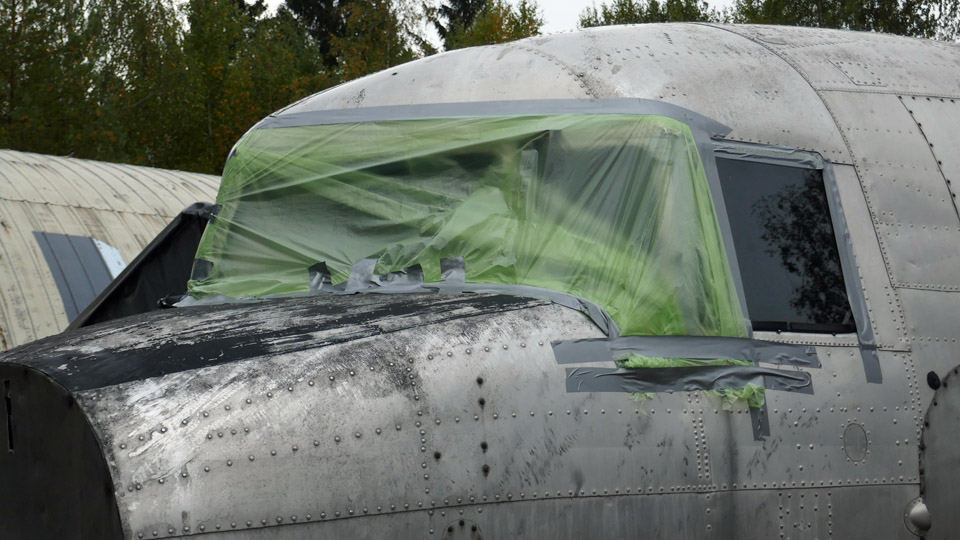
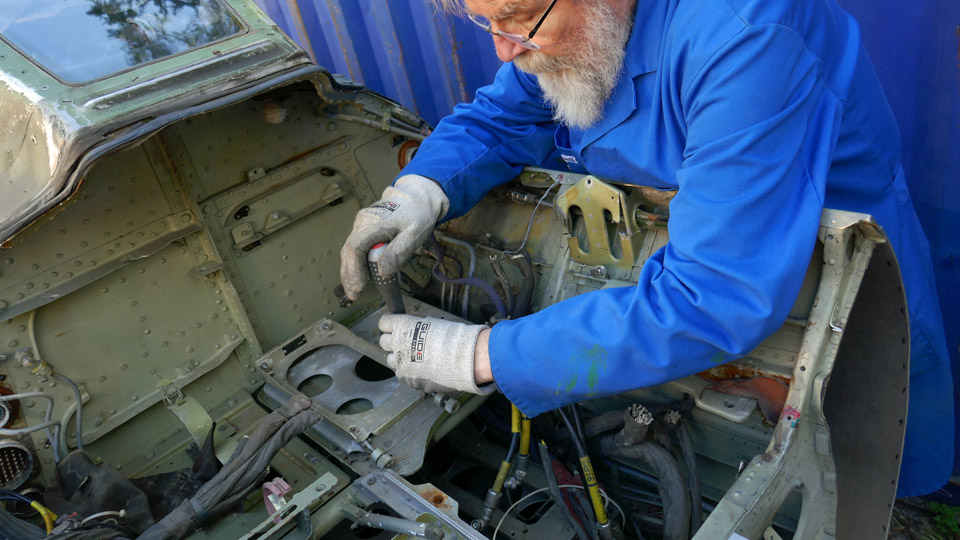
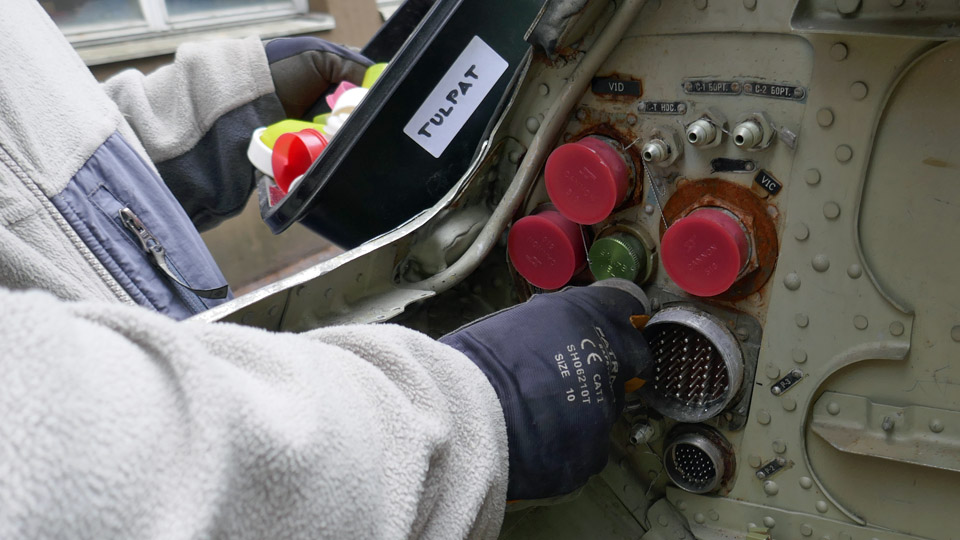
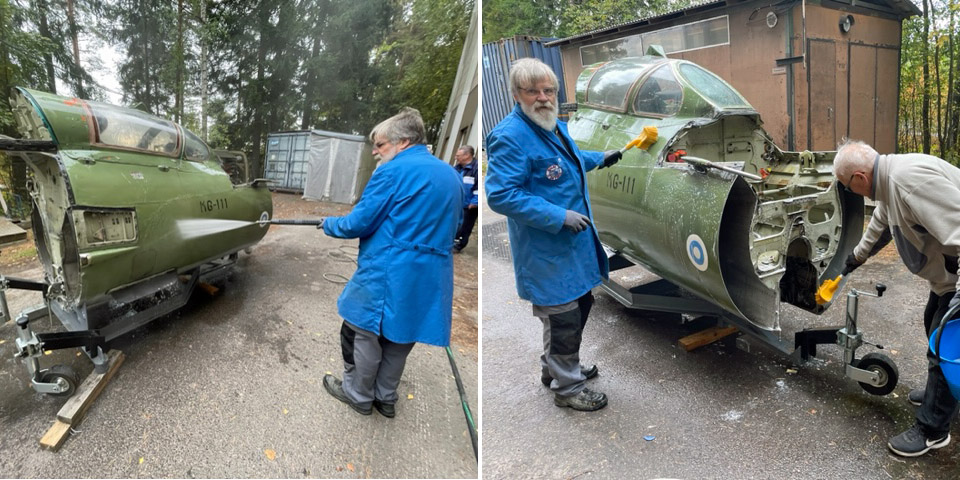
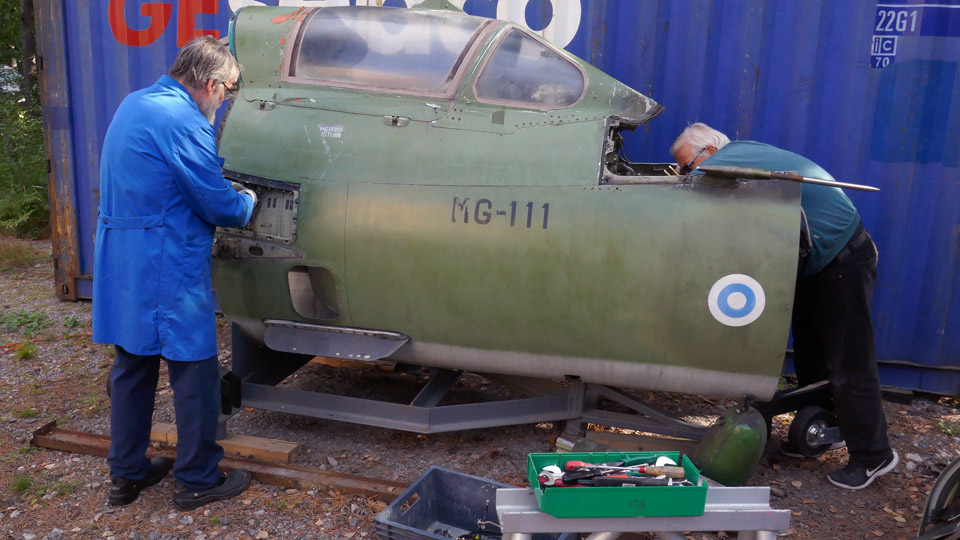
Washing the MiG-21BIS cockpit entity rear bulkhead and covering of the air ductsTorstai 22.12.2022 - Tuesday Club member Suomeksi Preparations to transform the cockpit entity of the MiG-21BIS (MG-111), owned by Aviation Museum Society Finland, into an experience simulator have been going on at the Tuesday Club during the whole autumn season. Clearing the cockpit interior of instruments and wires to make way for the simulator equipment is still going on. Along with that we have concentrated on the work with the external surfaces of the cockpit entity. Later the term simulator will be used instead of cockpit entity in this blog.
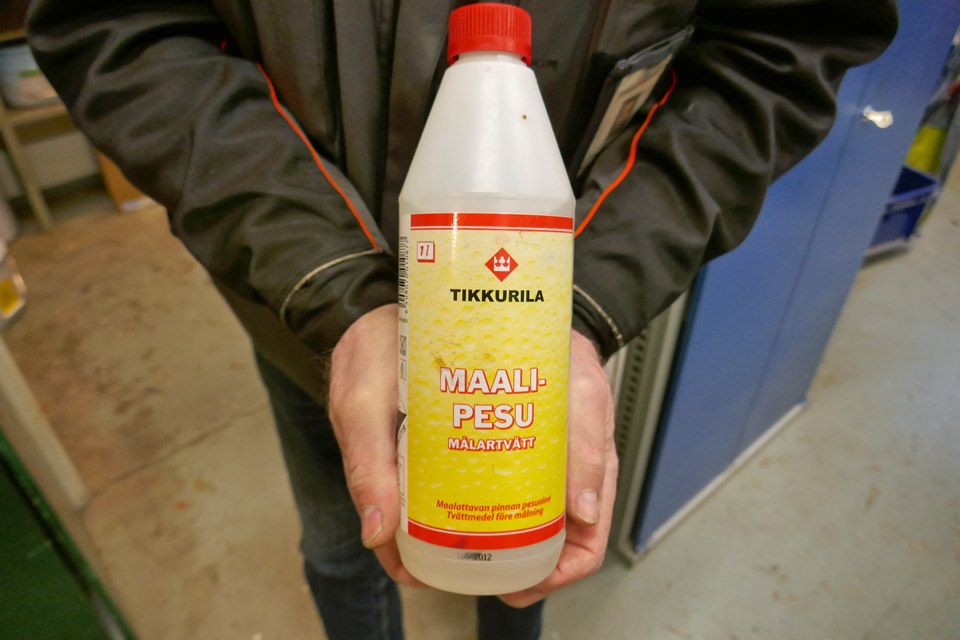
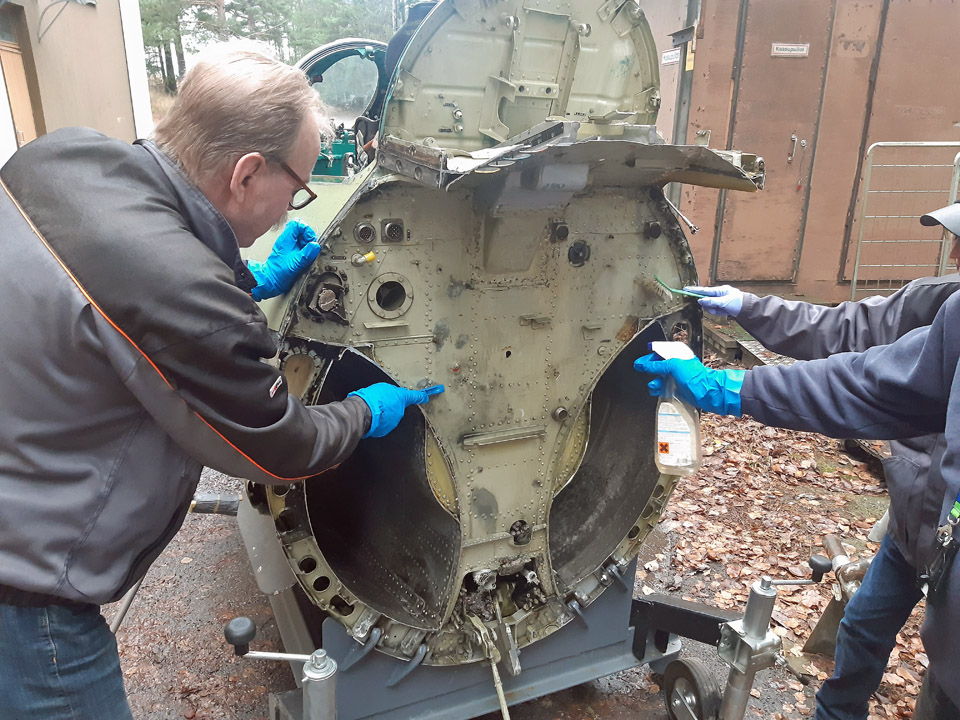
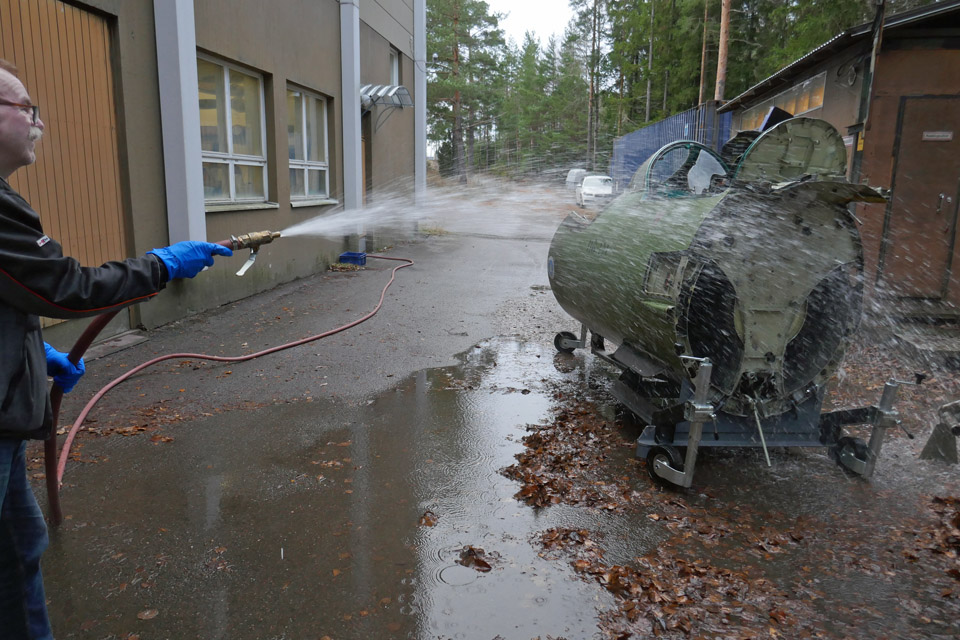
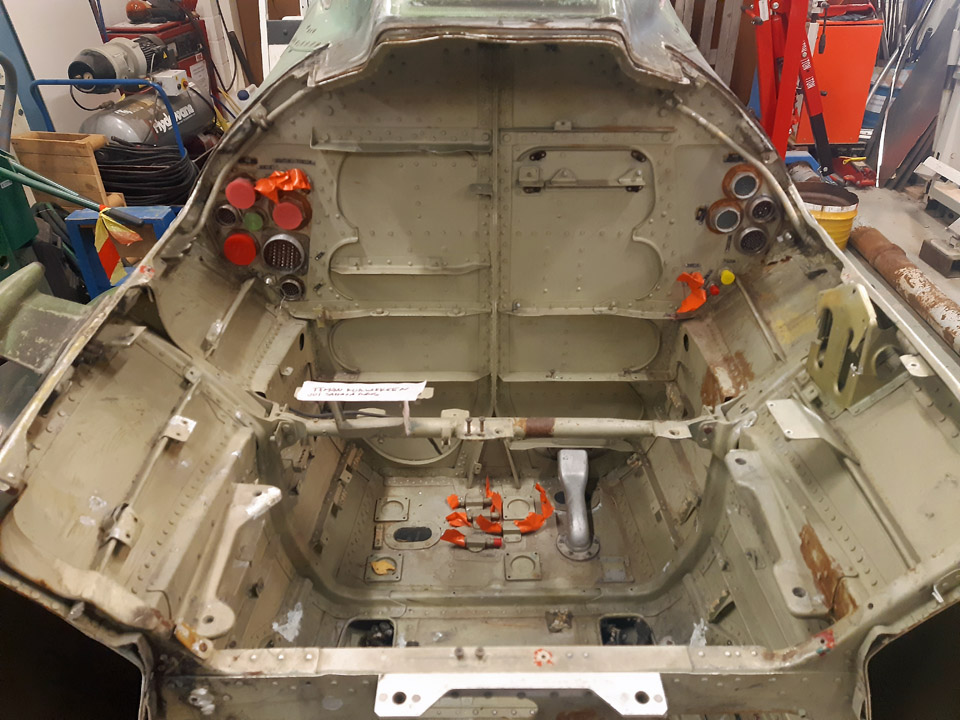
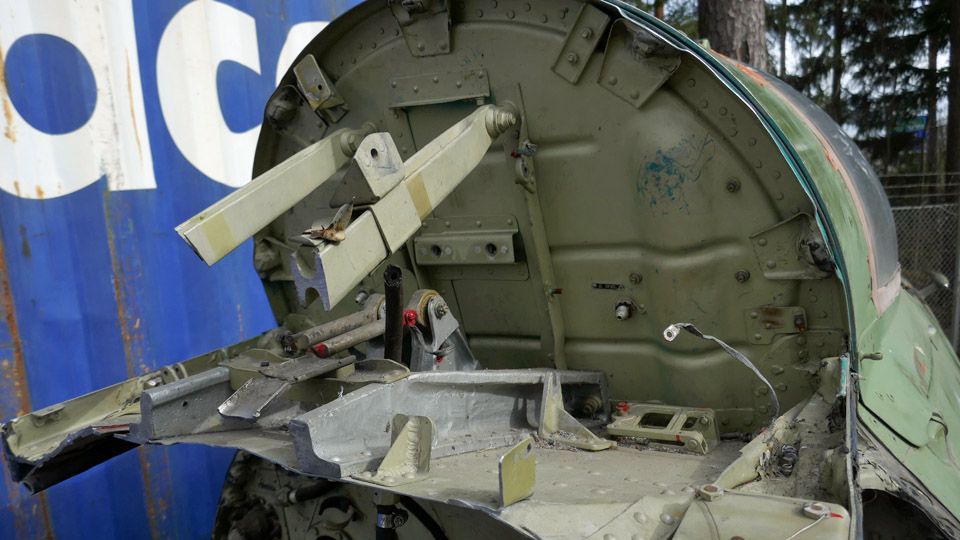
The simulator rear bulkhead has been cleared of all the wires and gadgets. After that the bulkhead was cleaned with Tikkurila Oy paint cleansing liquid, prior to the actual painting of the bulkhead. For the cleansing the simulator was pushed out of the Finnish Aviation Museum’s restoration workshop into the yard. Paint cleansing liquid was sprayed with spraying bottles onto the bulkhead and the surface was brushed clean. After that the cleansed surfaces were rinsed thoroughly with water using the museum restoration workshop’s fire hose.
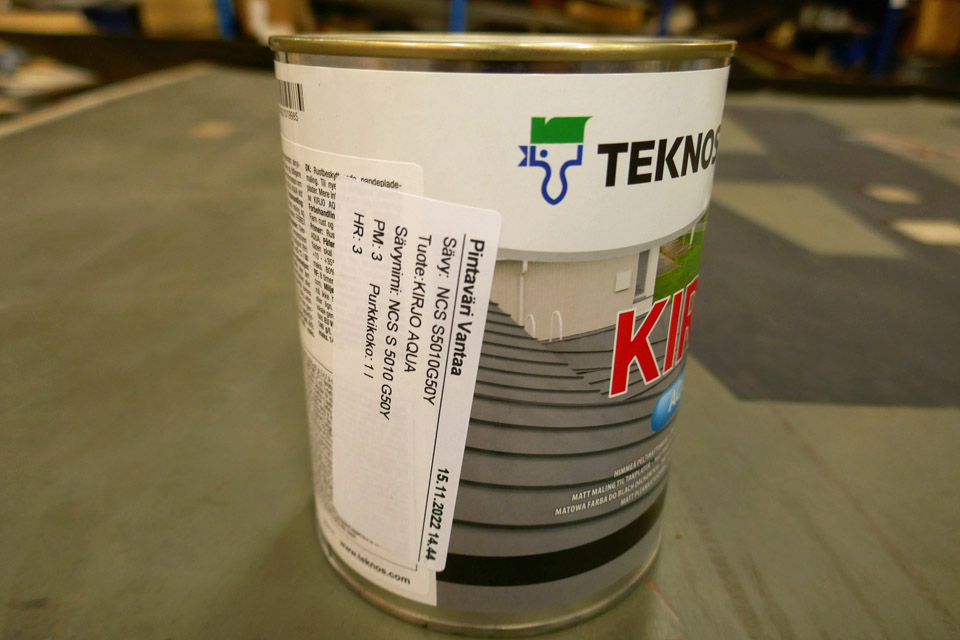
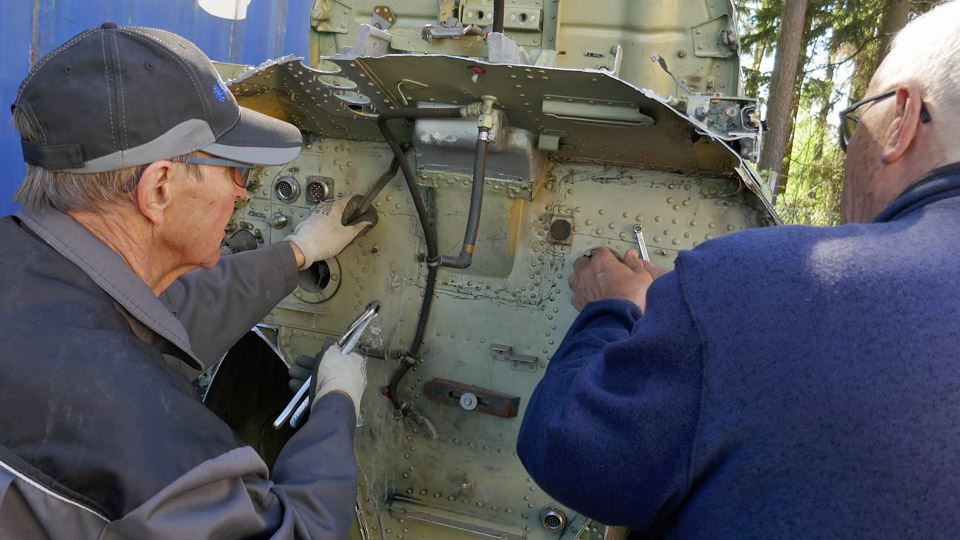
The MiG-21BIS simulator rear bulkhead will be painted to the shade of the faded green exterior surface. This way it will visually match the simulator’s original faded green colour. The front bulkhead will be painted with the same colour. To obtain the colour we went to the Vantaa branch of Pintaväri, carrying one fairing with a faded surface. The shade of green was defined from the fairing (NCS S5010G5OY) and accordingly Teknos Ltd KIRJO paint was mixed for painting the rear and front bulkheads.
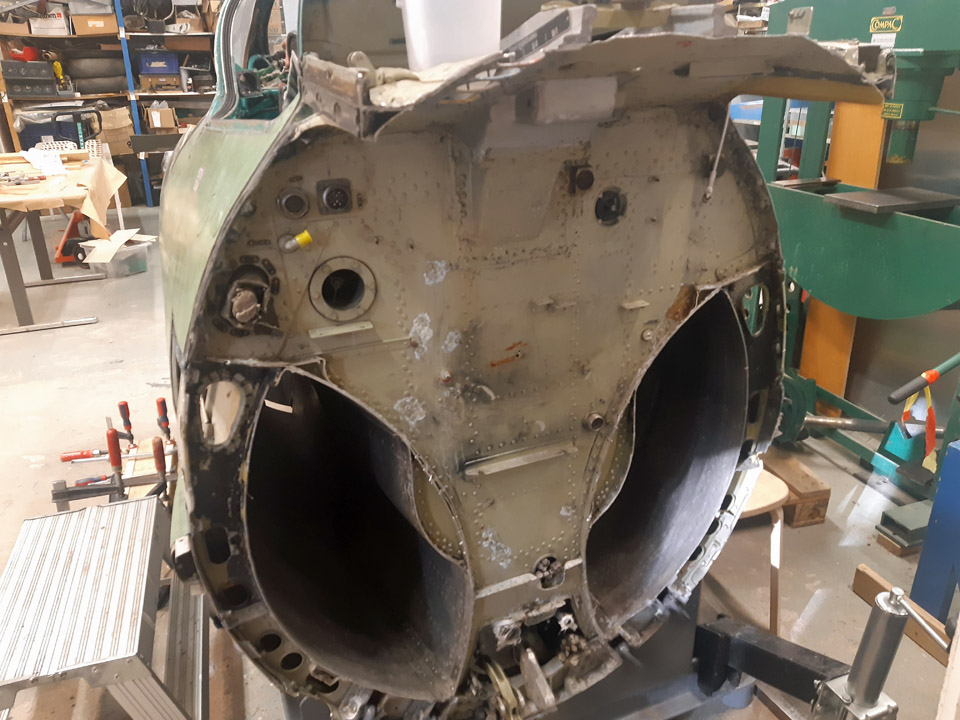
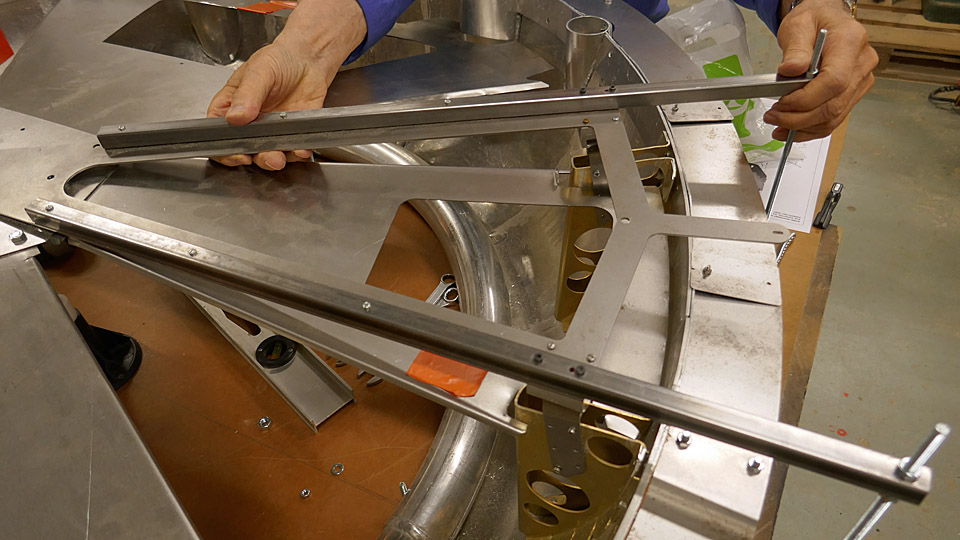
However, we decided to postpone the painting of the cleansed rear bulkhead until the air duct openings in the rear bulkhead had been covered. Closing the rear and front bulkhead air ducts is primarily a safety issue. The ducts are large enough for a museum visiting small child and also a bigger one to crawl inside the duct. In the simulator’s front bulkhead there’s also the opening of the nose wheel well.
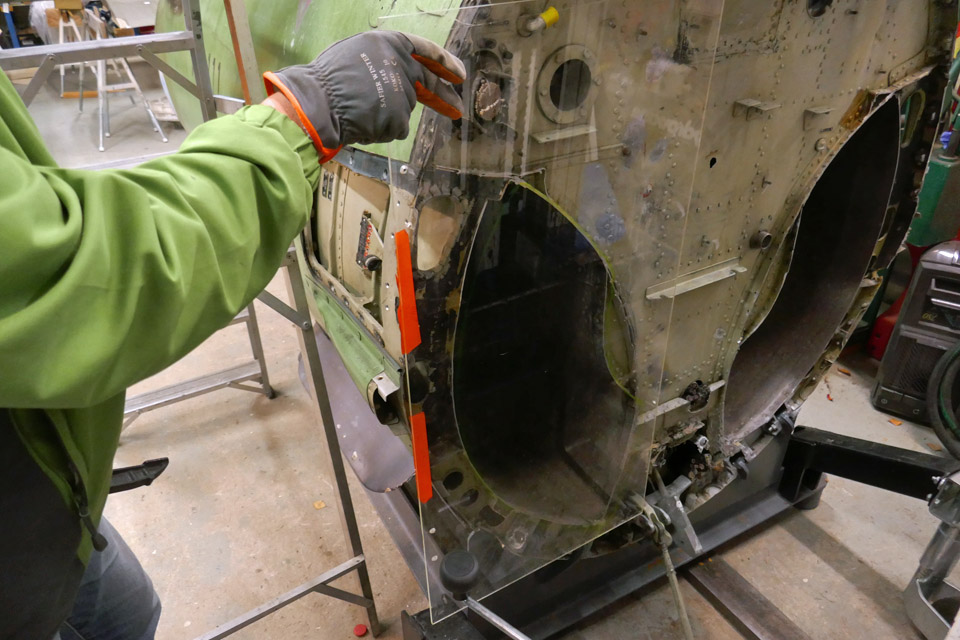
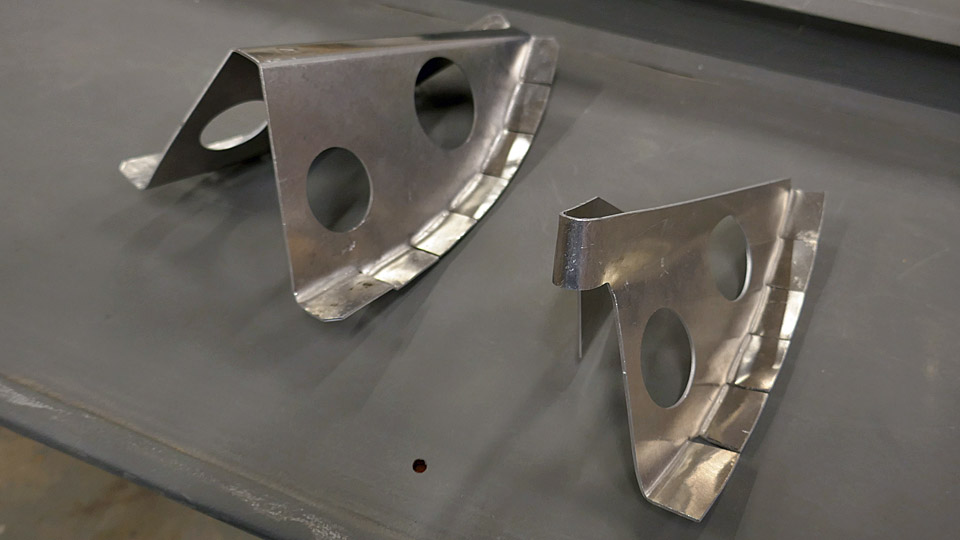
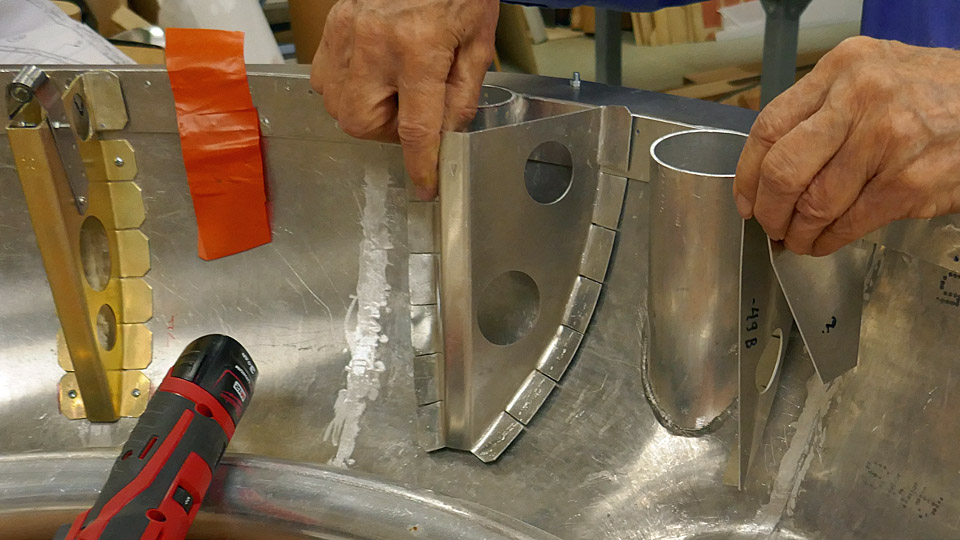
We decided to cover the air ducts with sturdy transparent plexi glass plates. This way one can see inside the duct. The assembly of the plexi glass covers will be done so that the pieces aren’t easily detachable, so that the museum visitors wouldn’t be tempted to take them off, but in such a way that they could be easily removed if necessary. We started to make the plexi glass covers with the left air duct opening in the rear bulkhead. With this opening it can be tested how to cut, shape, and implant the plexiglass cover into the duct opening. Only after this plexiglass cover has been fitted into the air duct opening, will we start making the right air duct plexiglass lid.
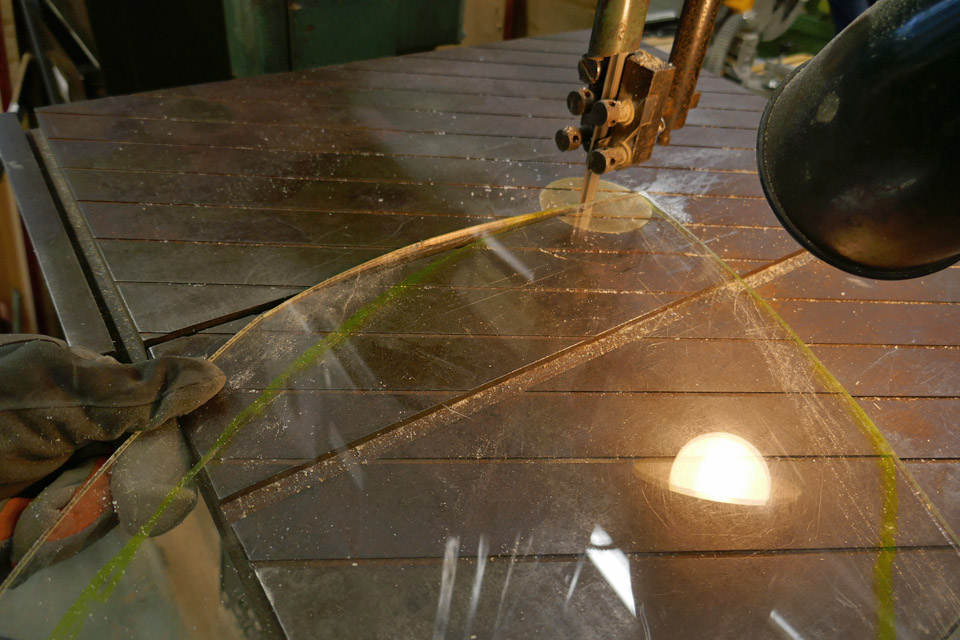
In the Finnish Aviation Museum’s material container we found suitable 5 mm thick polycarbonate plexiglass. It can be easily sawed and shaped and is not prone to crack when worked on.
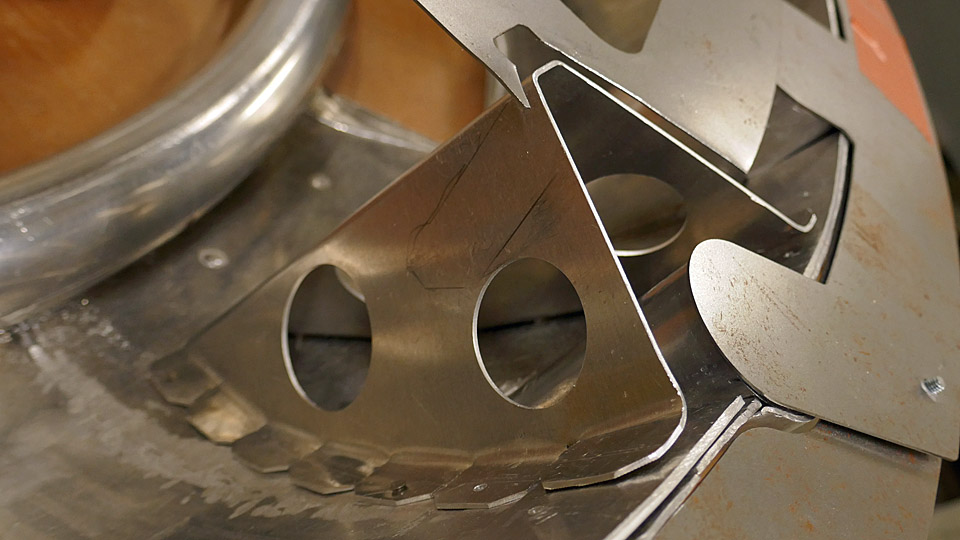
A piece of plexiglass was placed on the opening of the air duct and the shape of the duct was drawn on it. After that the plexiglass was sawed with a band saw along the drawing line to its preliminary shape. By fitting the piece of plexiglass on the opening it was moulded phase by phase to the shape of the air duct rim. The aim was to achieve a shape where the plexiglass sits suitably tightly inside the rim of the duct. Eventually the plexiglass was shaped so that it fitted into the duct opening.
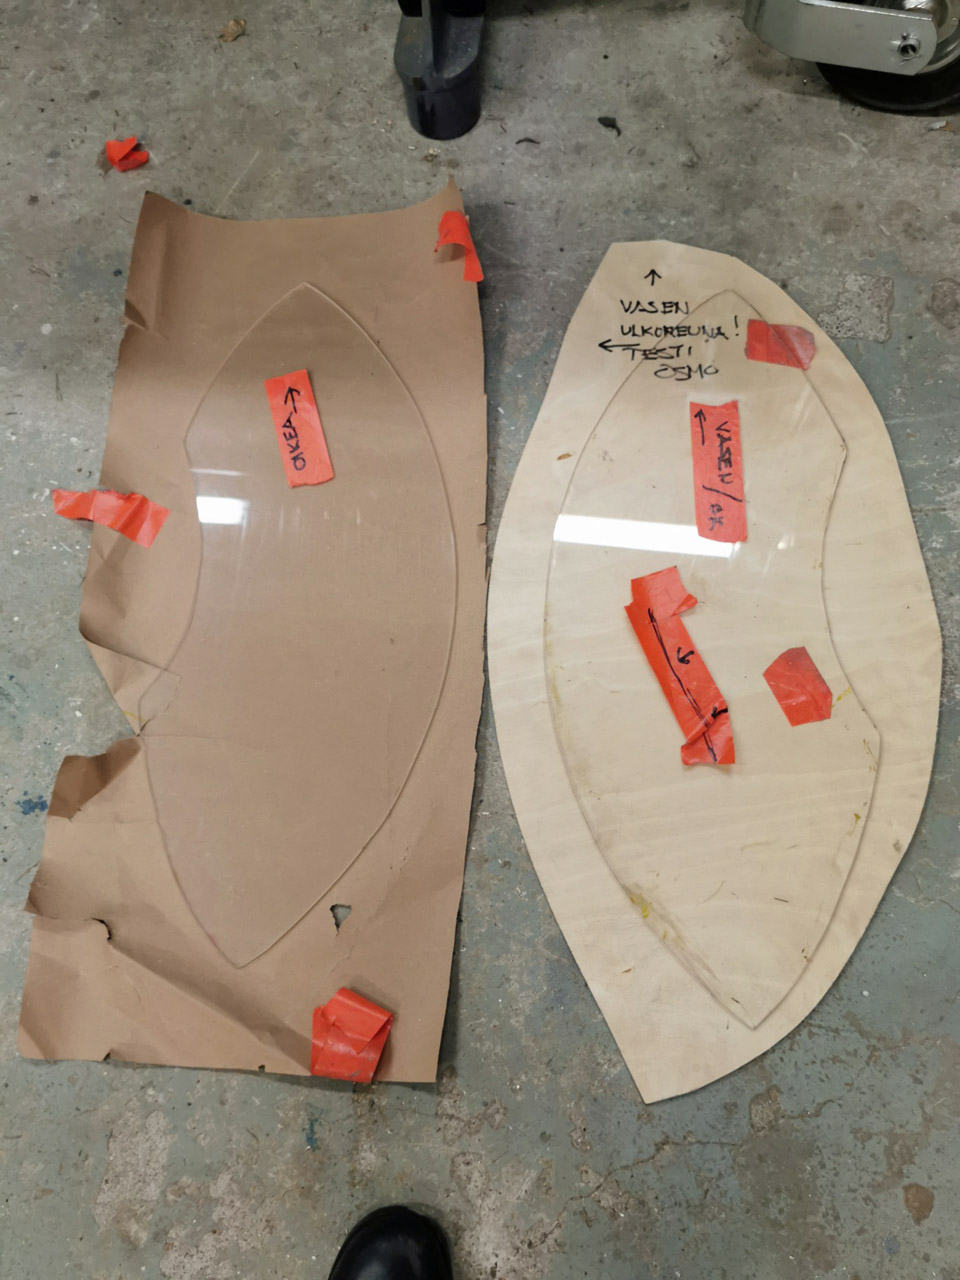
We used the left lid as a template for the right air duct, albeit as a mirror image. We assumed that the ducts would be identical. After having cut the plexiglass for the right air duct and tried it on the opening, we found out that the ducts weren’t fully identical – oh well, “big country, big tolerances”. After some additional shaping the plexiglass it fitted snugly to the inside rim of the duct. Now both the lids of the simulator rear bulkhead were ready to be fastened.
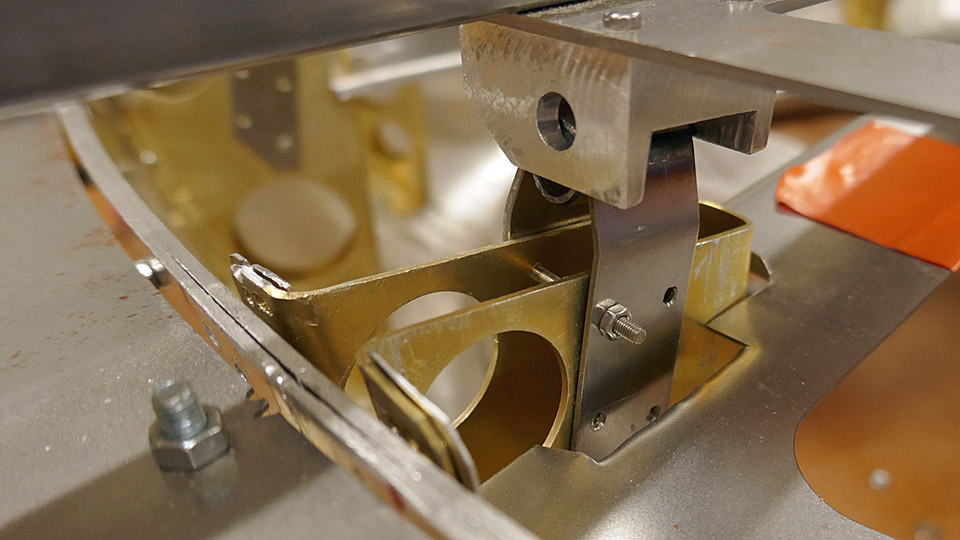
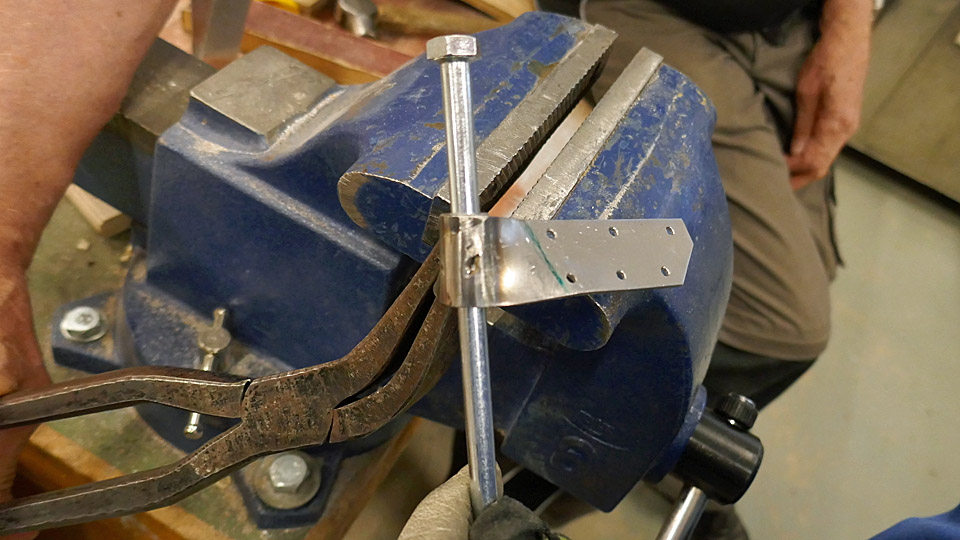
To fasten the plexiglass lids we decided to use L-shape holders. One end of the holder would be fastened to the plexiglass cover, the other to the rim of the air duct. For making the holders, strips of aluminium were cut off to suitable pieces and bent into L-shape. Fastening the plexiglass covers will take place after the Tuesday Club’s Christmas break.
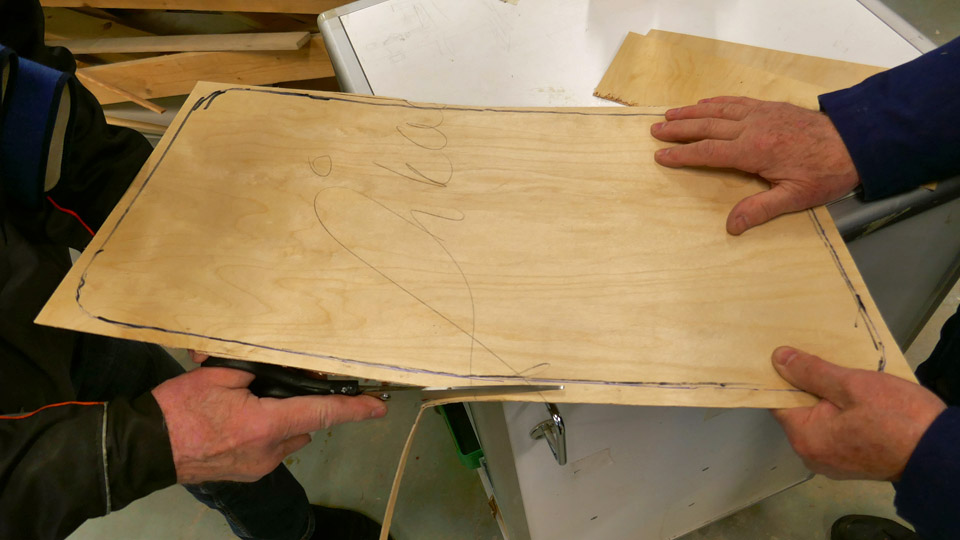
Along with the rear bulkhead plexiglass covers, work went on with covering the front bulkhead landing gear well. Unlike the engine air intake ducts, the cover to the landing gear opening will be made out of laminated wood. First we made a template the shape of the landing gear opening out of easily workable insulation board. According the insulation board template, the cover of the landing gear opening was sawed out of 15 mm thick laminated wood. The shaping of the cover to its final form and fastening it into place is postponed to the Tuesday Club’s spring season. |
|
Avainsanat: aviation history, restoration, Tuesday Club, MiG-21BIS, MG-111 |
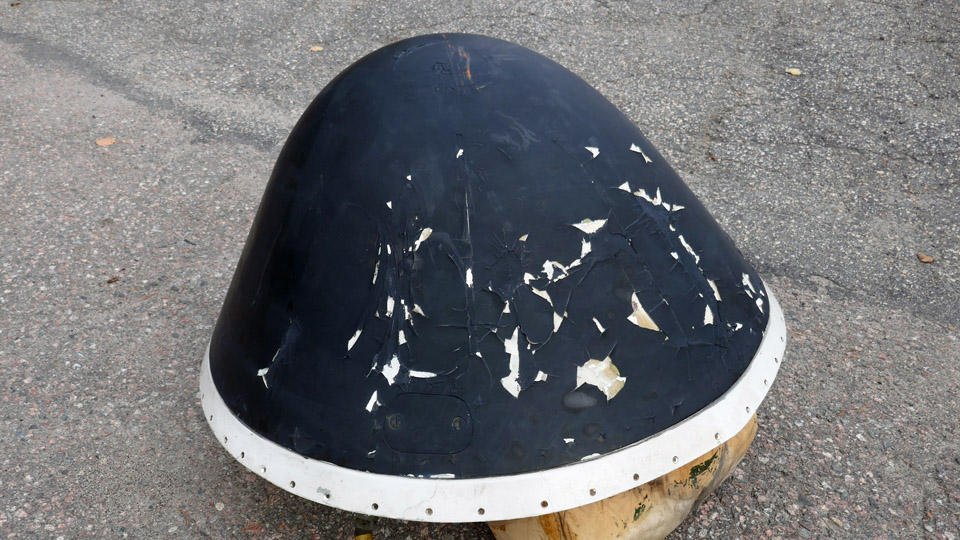
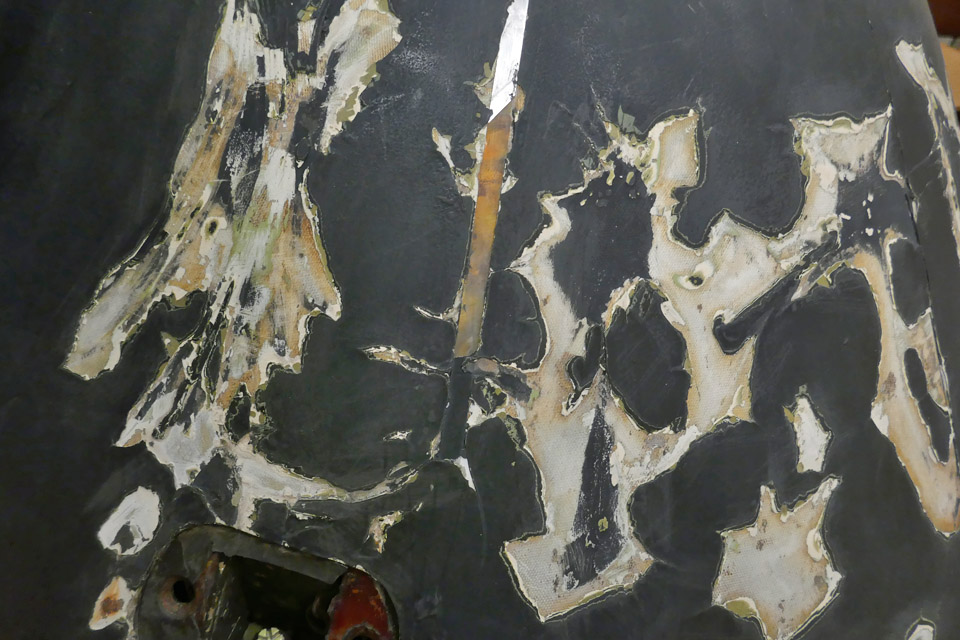
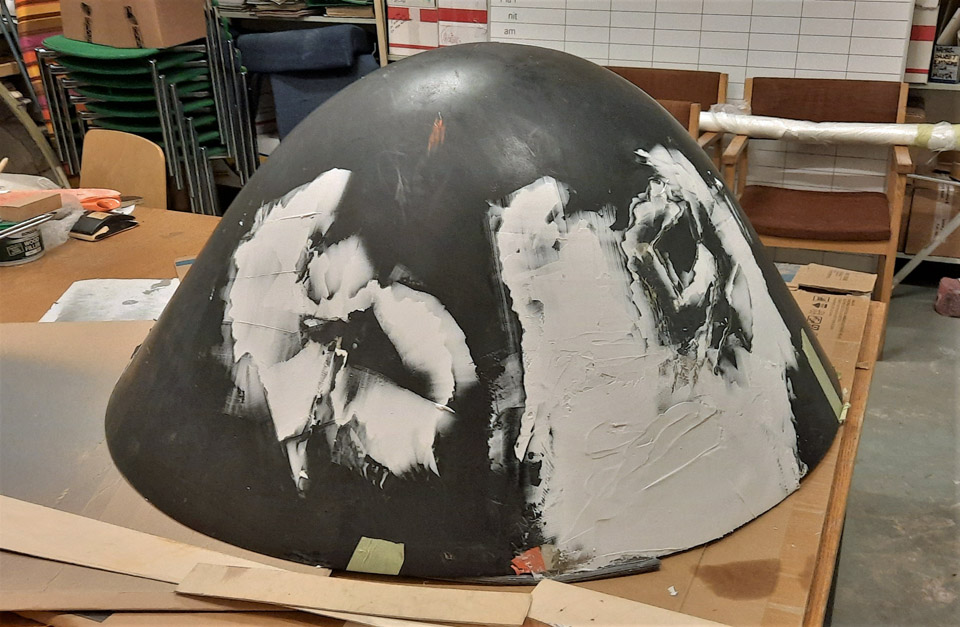
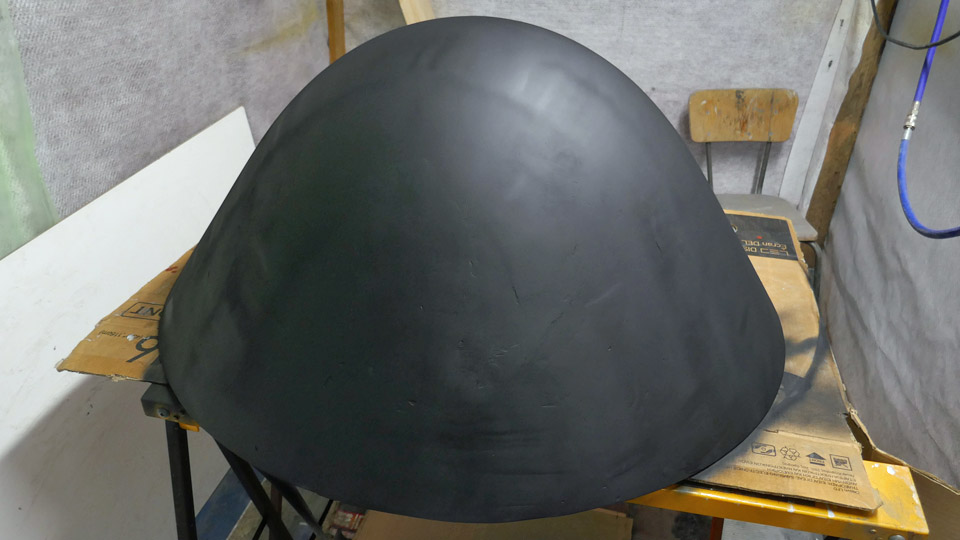
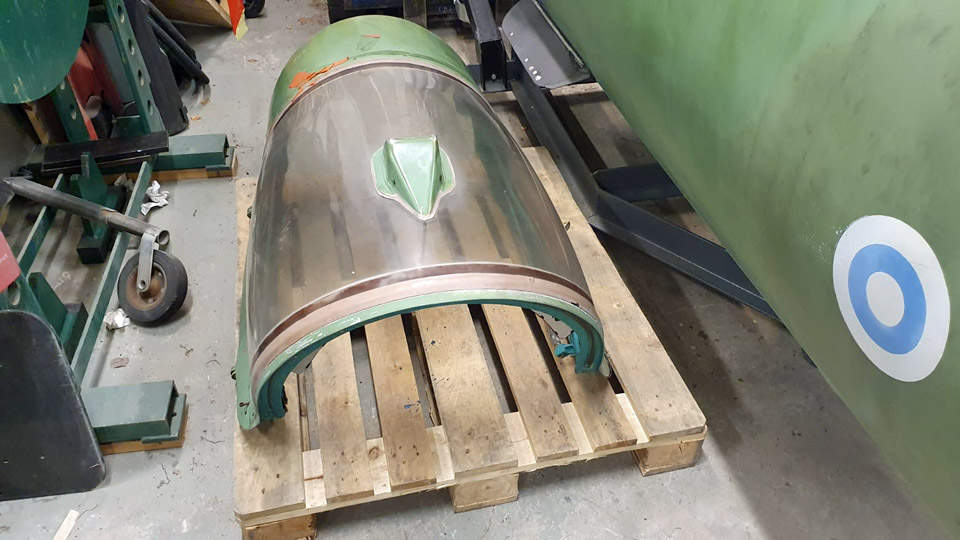
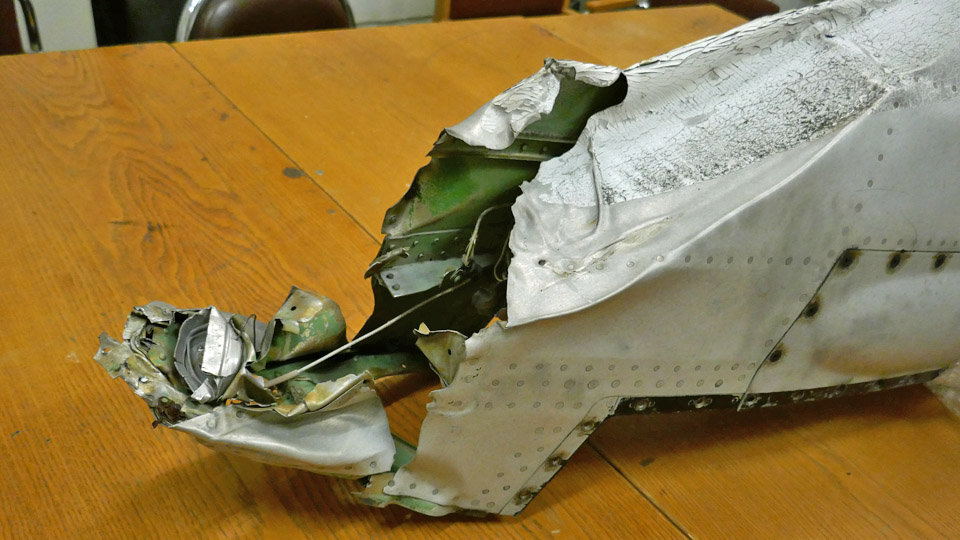
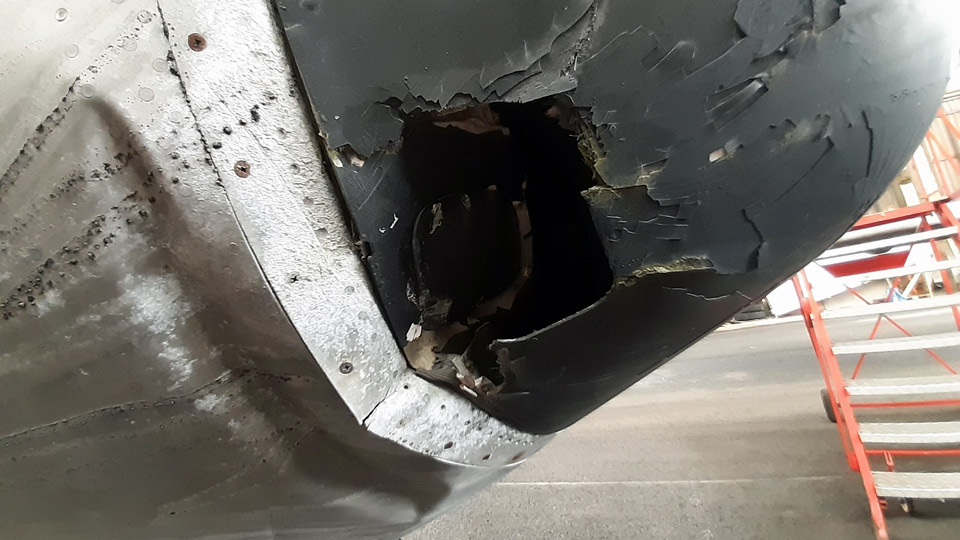
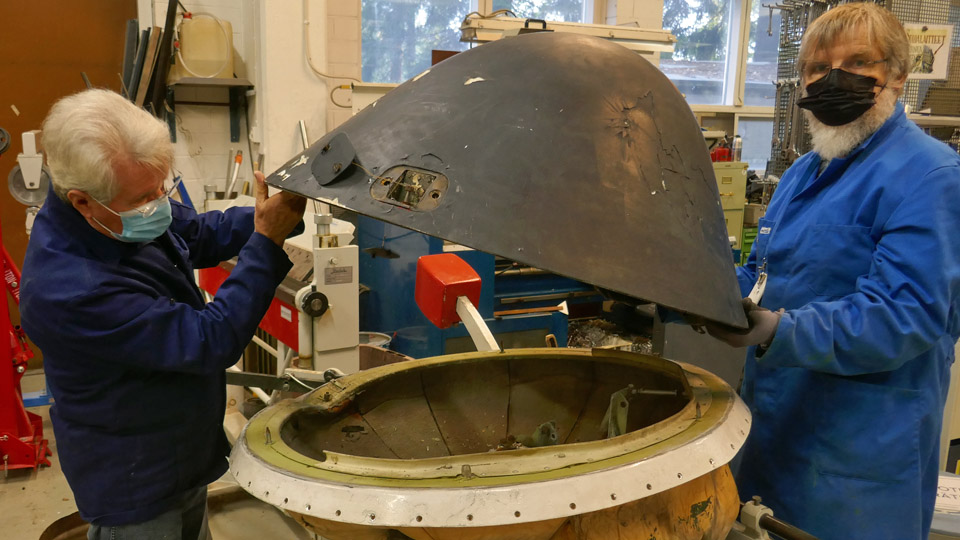
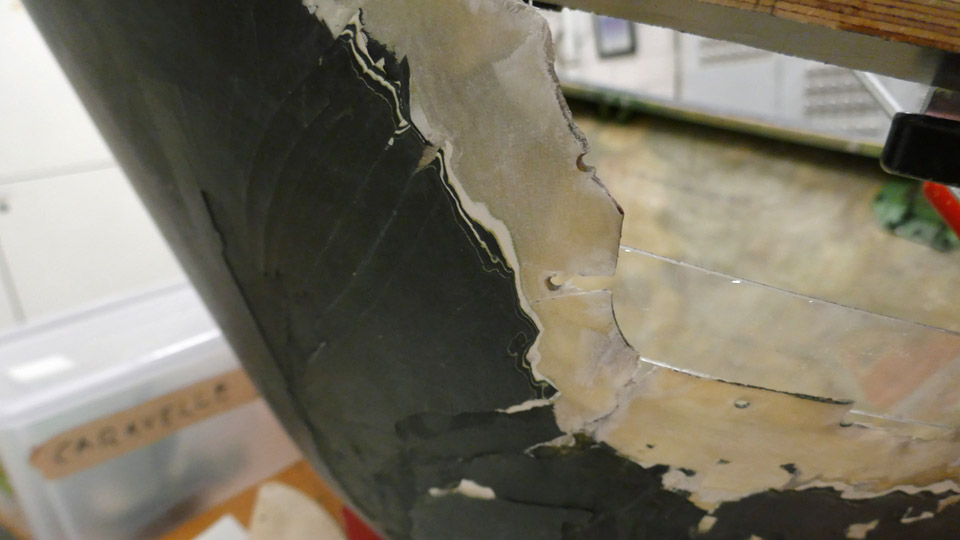
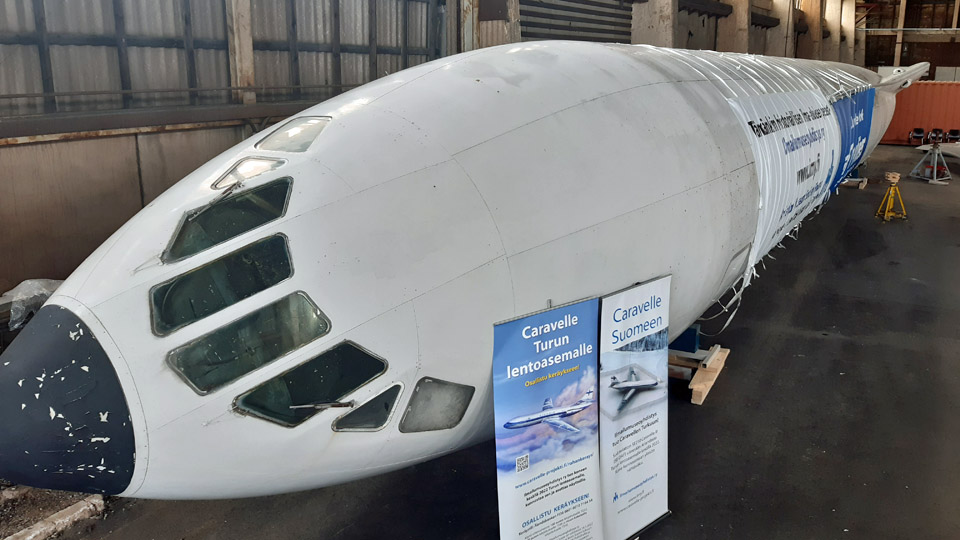
Caravelle's radome is repaired and repaintedKeskiviikko 7.12.2022 - Tuesday Club member The radome, disassembled from the nose of the Caravelle III (SE-DAF) which is now owned by Aviation Museum Society Finland, is being repaired at the Tuesday Club. Its painted surface has cracked, and it has been also badly damaged in a collision.
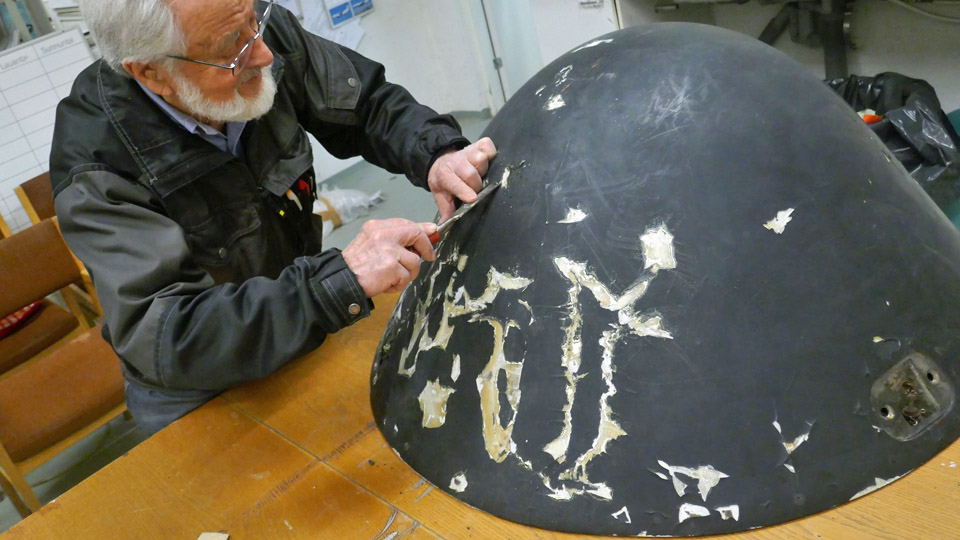
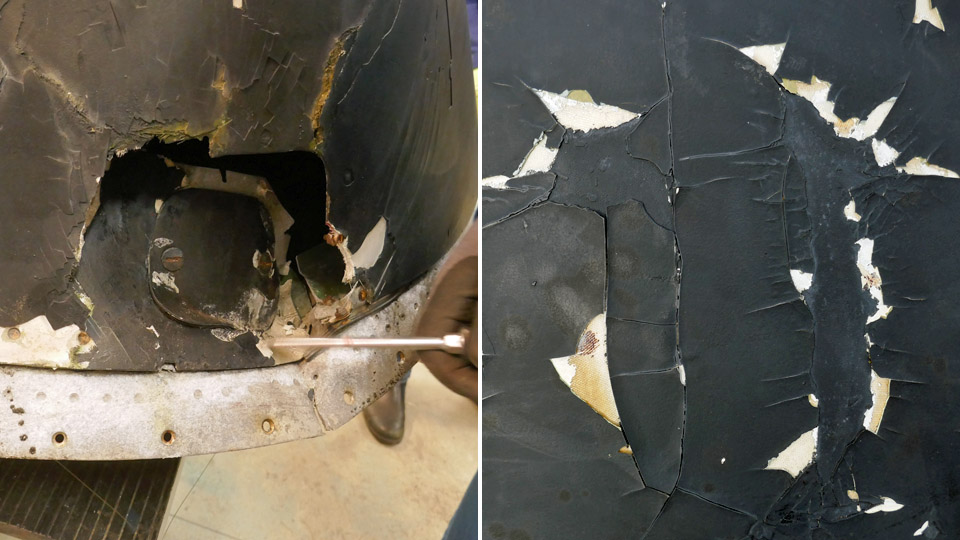
The radome is made of Kevlar and its surface has originally been puttied and painted with matt black paint. The black paint surface has cracked and peeled off in several places. The white putty and the Kevlar surface under it are visible in the damaged areas.
The cracked paint and the white putty on the radome surface were chiseled off down to the Kevlar surface. This caused grooves and holes on the radome’s surface. The Tuesday Club team decided to fill the grooves and holes with epoxy filler. This material was also a good choice for smoothing and levelling the radome’s damaged area which had been patched with glass fibre fabric.
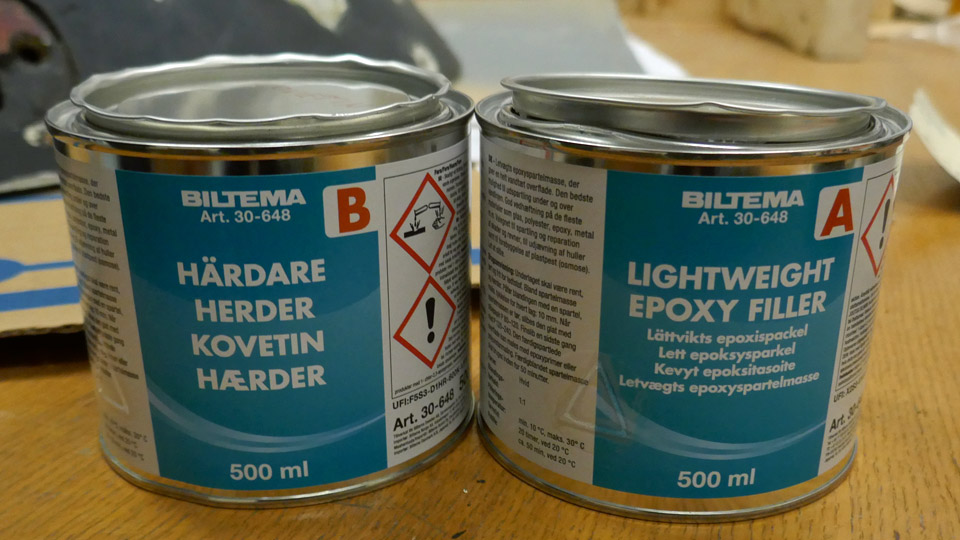
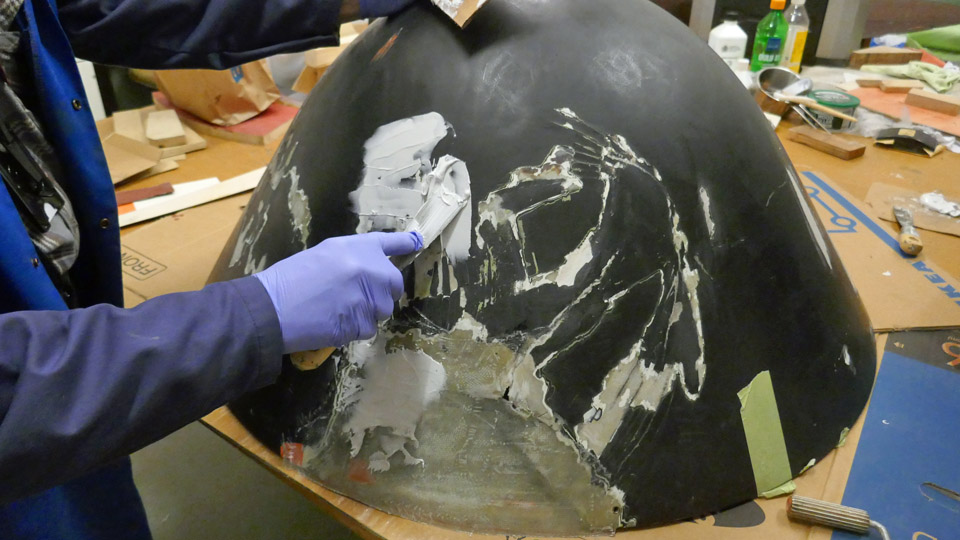
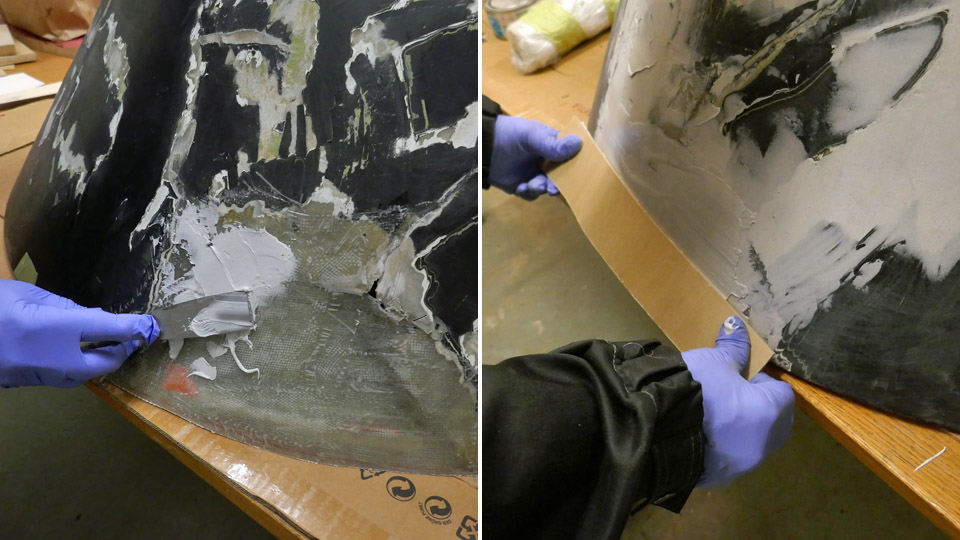
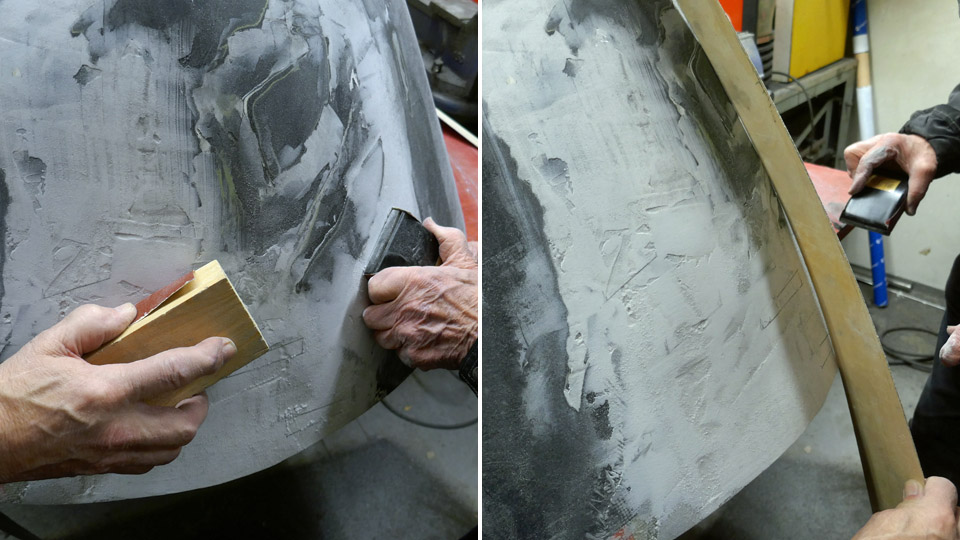
Light epoxy filler (Lightweight Epoxy Filler) and hardening agent were purchased from Biltema. Following the product instructions, a portion of filler was mixed. The filler was spread with metal spatulas on the holes on the radome’s surface and on the damaged area, which had been laminated with glass fibre fabric. A thin flexible plywood veneer was also used when spreading the filler, pulling it on the radome’s surface, following its curved shape. The filler followed well the curved shape of the radome. Several portions of filler had to be mixed before all the grooves had been filled and smoothed.
When the filler had dried, it was sanded, mainly manually. Sanding by hand gives a better touch on the radome’s curved surface than working with a grinder. After sanding the filler treatment was repeated and sanded again to get a smooth surface, matching the radome’s curved shape as accurately as possible.
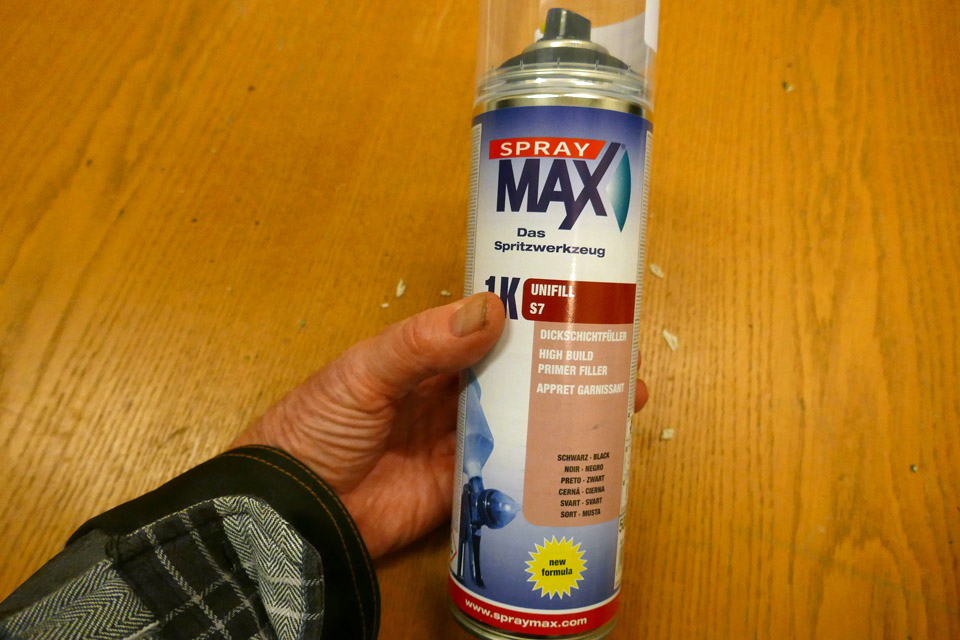
After two rounds of filling and sanding, the team decided to paint the surface with a primer. Spray MAX Primer filler was chosen, and it was purchased from the Pintaväri store. This primer fills well the small roughness on the sanded surface and it can be re-sanded and re-painted.
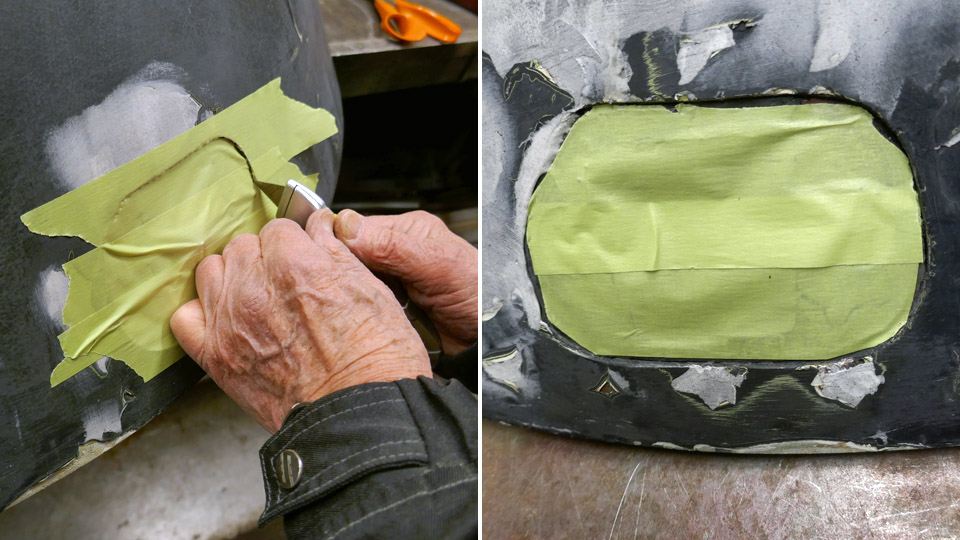
Two layers of Sprey primer were spread on the sanded radome surface. Before applying the paint, the cover holes of the radome’s fastening bolts were protected. Although the result after the primer paint looked quite good, the smooth mat black paint surface revealed some uneven areas, and we will still have to fill and sand the radome’s surface in some areas before it is completely smooth and ready for the finishing paint. Photos by Lassi Karivalo. Translation by Erja Reinikainen. |
|
Avainsanat: aviation history, restoration, Caravelle, Tuesday Club, SE-DAF |
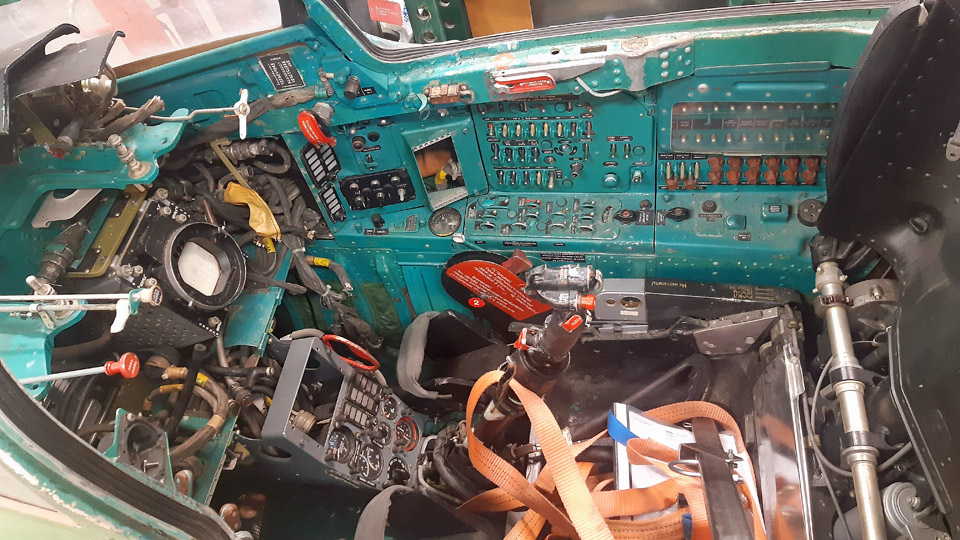
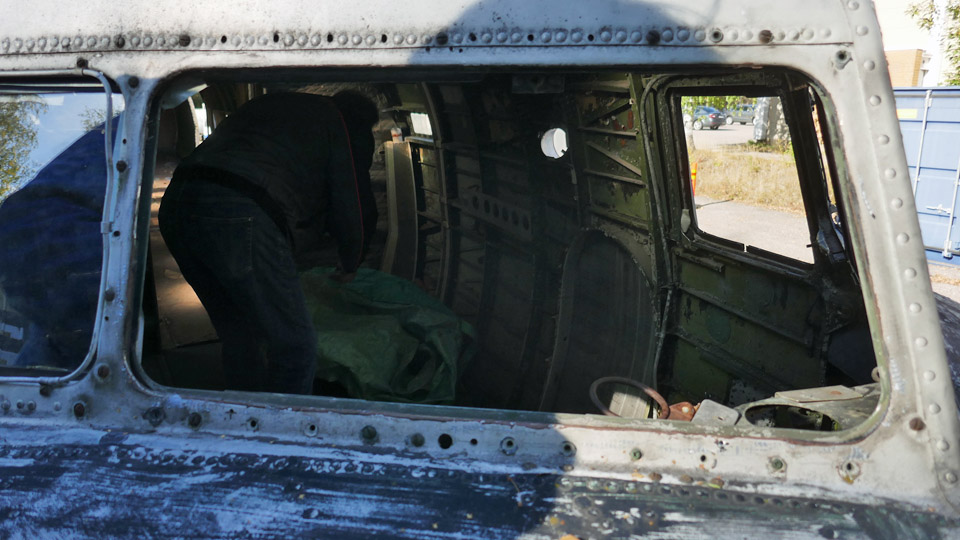
Dismantling the MG-111 cockpit interior for the simulatorMaanantai 5.12.2022 - Tuesday Club member Work on the MiG-21BIS MG-111 cockpit to transform it into an experience simulator continues at the Tuesday Club. When the MG-111 was scrapped, Aviation Museum Society Finland received a part of the fuselage, containing the cockpit, to be modified to an experience simulator. To achieve that, most of the equipment of the cockpit entity will be dismantled. In their place the simulator equipment will be installed, but part of the original equipment and parts will also be reinstalled.
Most of the wiring and equipment from the space in front of the cockpit, as well as the wiring from the bulkhead behind the cockpit, were already dismantled at the yard of the Aviation Museum. After this the cockpit part was taken to the restoration workshop of the Aviation Museum, to dismantle the equipment and wiring within the cockpit.
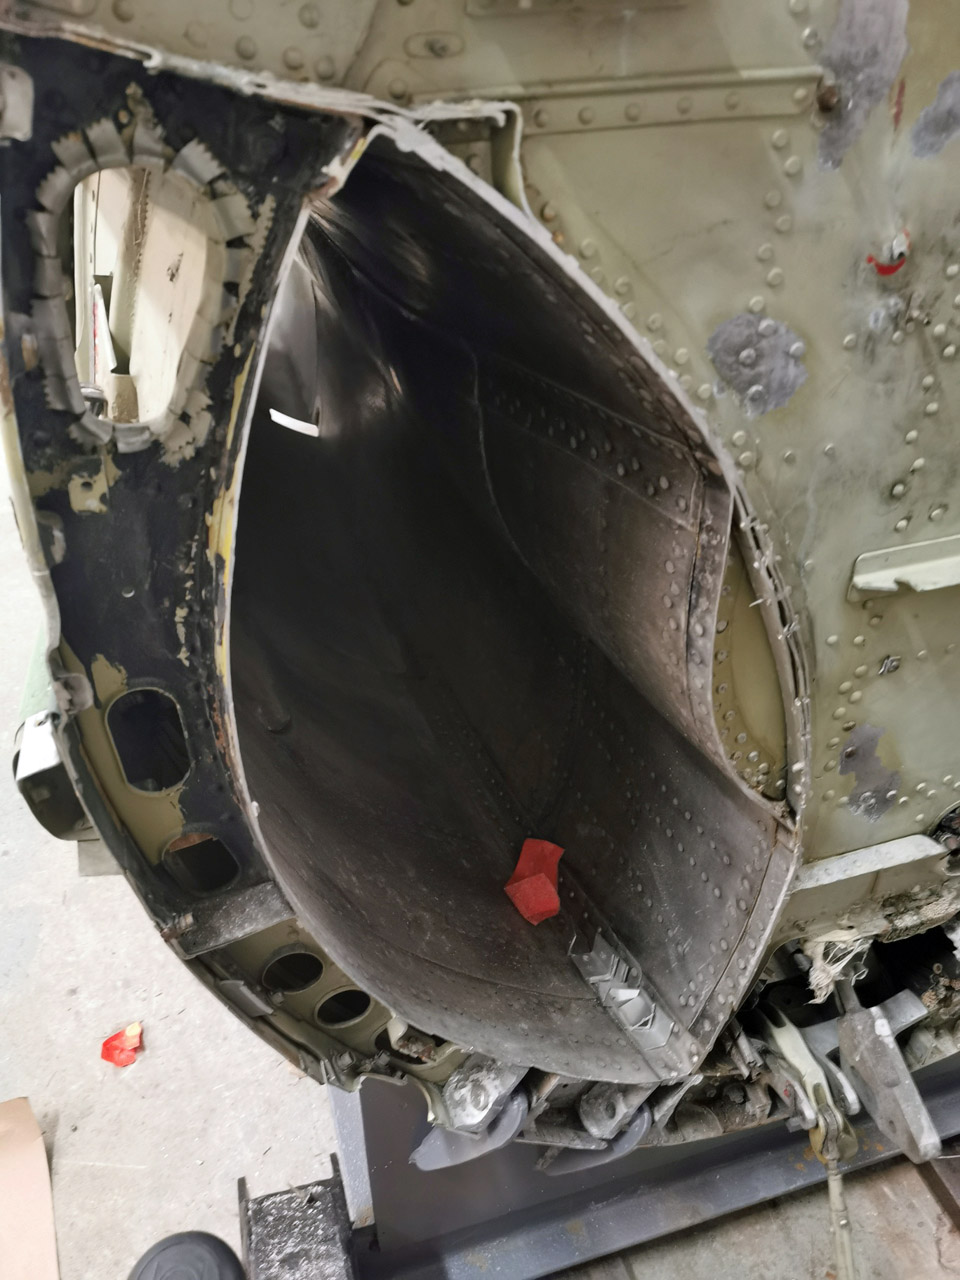
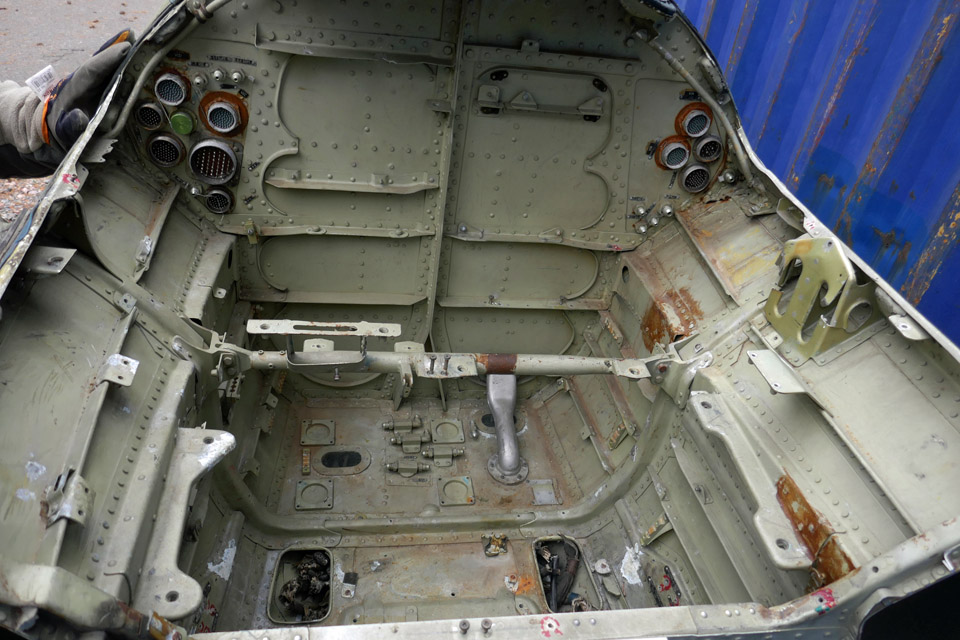
First the space in front of the cockpit and the rear bulkhead were stripped off the last wires and equipment racks and holders there. So both spaces are now empty. The empty front space will at its time house the simulator equipment of the MiG-21BIS cockpit simulator. The rear bulkhead will be tidied and painted and the large openings of the engine air intake channels that are visible there will be covered with plexiglass.
Photo: Juha Veijalainen. For emptying the cockpit of its equipment, we wanted to detach the pilot’s seat because removing the seat would provide space for working in the cockpit, both during the removing the equipment and installing the simulator equipment. Before we set to removing the seat, we detached the cockpit canopy.
Photo: Ari Aho. To remove the seat, we received expert guidance and the necessary lifting lever from the former MiG-21BIS mechanics at Rissala. Detaching the seat didn’t, however, succeed because we couldn’t find the release catch under the MG-111 seat, where it normally is. It is possible that the release catch wasn’t reinstalled when the seat was removed when the MG-111 was struck off charge and reinstalled after the detonation charges belonging to the ejection seat had been removed. Well, we’ll try again to remove the seat in December, when we’ll hopefully get a mechanic from Rissala to come and visit and ponder about the thing with us.
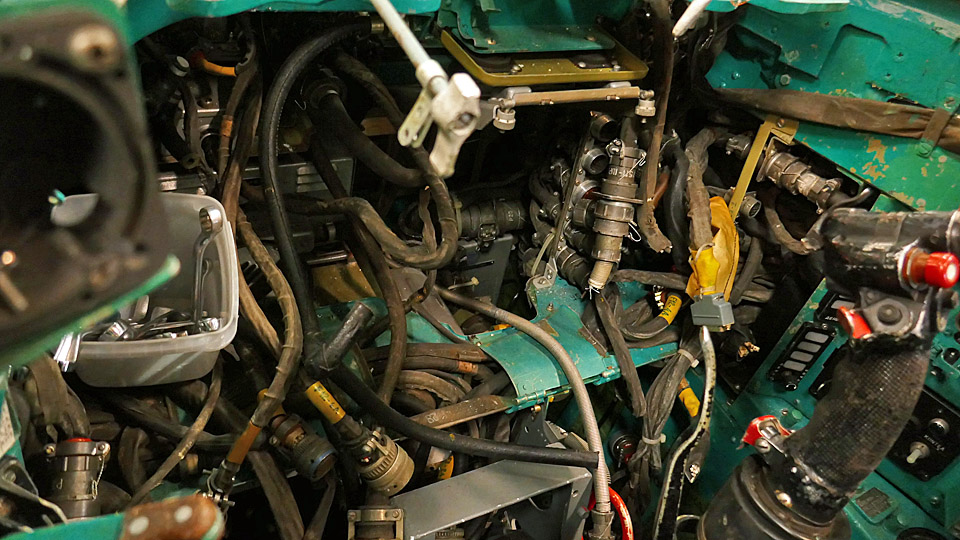
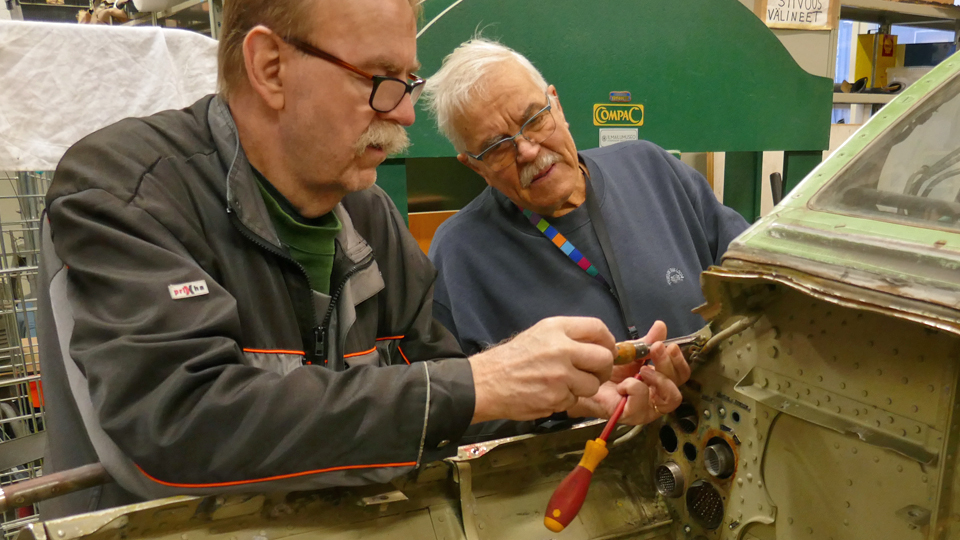
Photo: Juha Klemettinen. Although we couldn’t detach the pilot’s seat, we started to dismantle the interior of the cockpit according to Juha Klemettinen’s advice to transform the cockpit of MiG-21BIS MG-111 into a simulator. Juha removed the instrument panels and other switchboards himself. Our task was to dismantle, as advised by Juha, the space behind the instrument panel of the radar screen and the numerous wires criss-crossing there. How on earth could there be so much wiring!!
We started the work on the cockpit first by removing the radar and then turning our attention to the wires. It wasn’t so much about single wires, but bunches of wires inside a skin. Some of them could be disconnected from their connectors and removed. Disconnecting the wires from their connectors was awkward, because the connectors were either hidden on unobtainable. It came to mind that our Russian colleagues hadn’t paid a thought to easing the work of mechanics when positioning the wires.
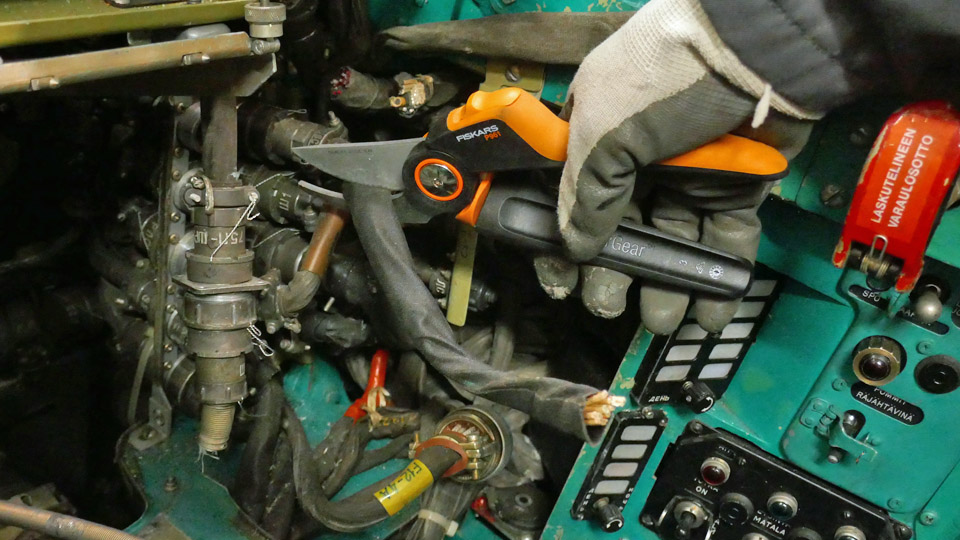
At the end there was no other option left but to cut the wires. Juha gave us permission to do that. Cutting the thick wires was no mean feat, because the thick bundles containing many wires were very tough nuts to cut.
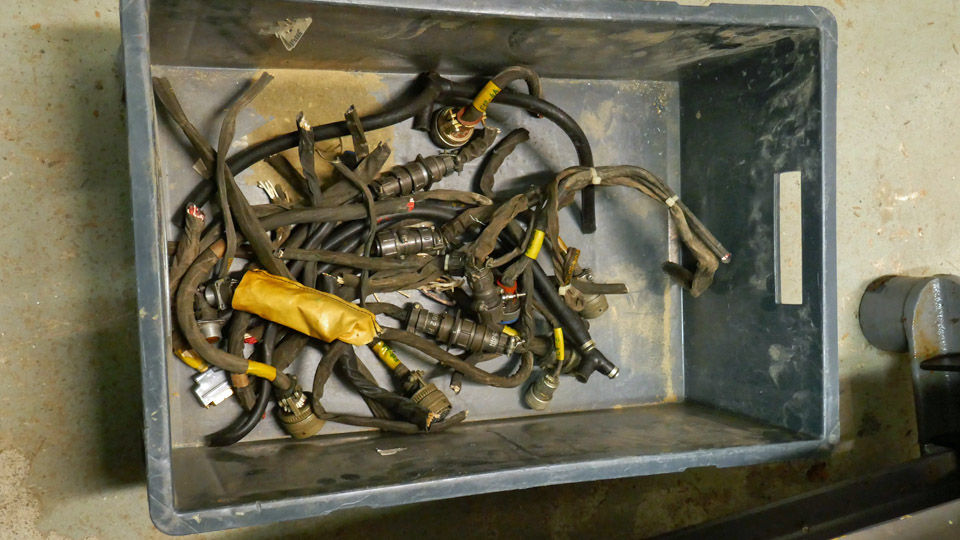
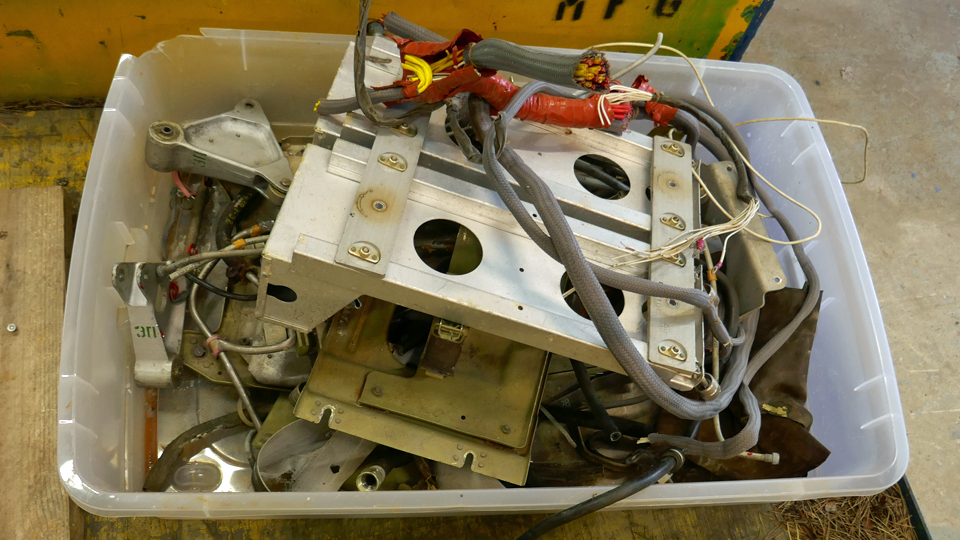
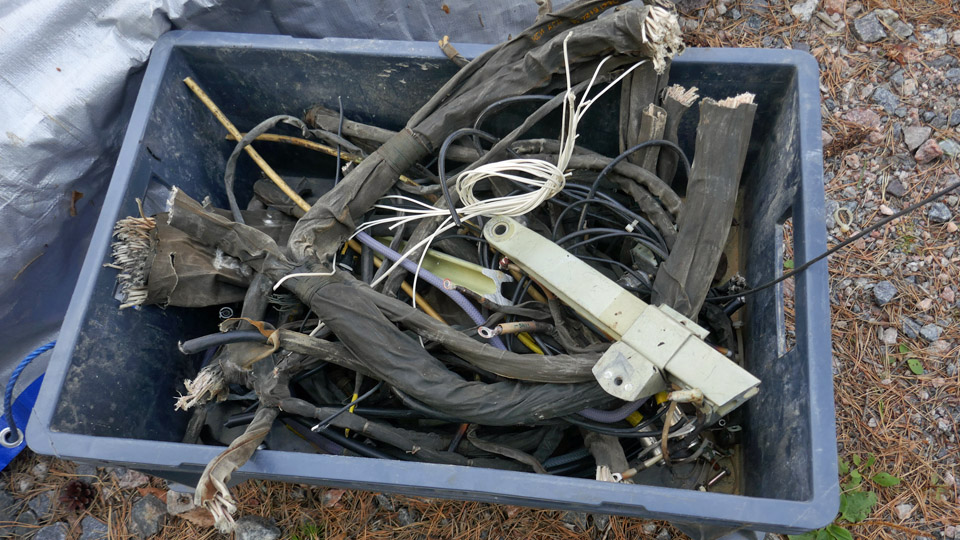
Someone had the bright idea to acquire a pair of Fiskars garden secateurs (branch cutters) to cut the thick bundles of wire. If the Fiskars secateurs cut 20-30 mm thick branches easily, they should cut through the Russian wires. So we bought a pair of Fiskars branch cutters and they worked very well in cutting the wire bundles. The box containing cut off wires began to fill with wires of various length removed from the cockpit. We still have our work cut out for us before the space behind the instrument panel has been completely emptied.
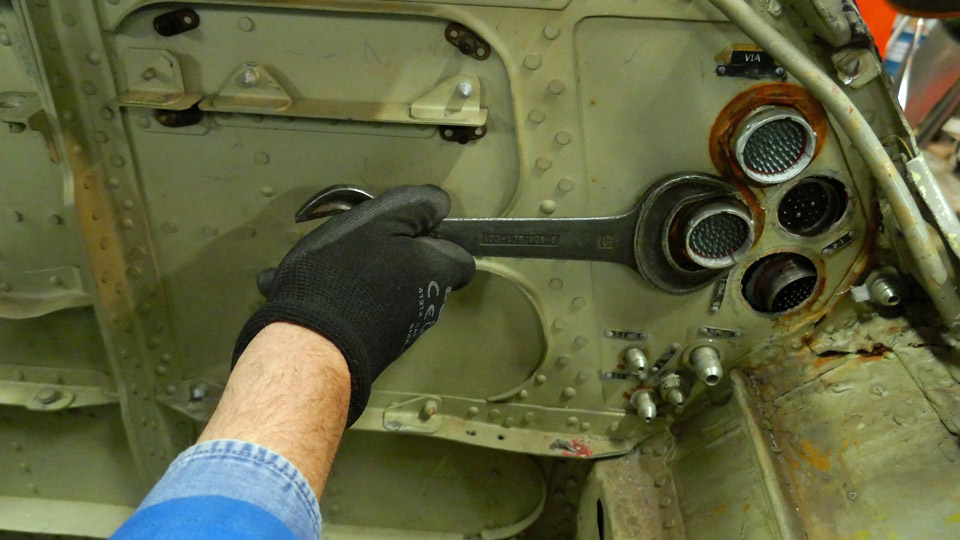
Simultaneously, as we worked inside the cockpit, we dismantled the multi-pin connecting plugs that ran through the bulkhead between the cockpit and the space in front of it. The shackles that fastened the plugs to the bulkhead could be turned open. After that the plugs were pushed through the bulkhead, to the cockpit, to be drawn out from there. It wasn’t possible to push them into the cockpit very much, because the thick wires didn’t yield. It will probably be possible to remove the plugs with their wires, after a sufficient amount of wires have been removed from the cockpit. In good time the wires from the simulator mechanism will be drawn through the openings in the bulkhead between the cockpit and the space in front of it, where the simulator equipment will be installed. Photos: Lassi Karivalo except if otherwise separately mentioned. Translation by Matti Liuskallio. |
|
Avainsanat: aviation history, restoration, Tuesday Club, MiG-21BIS, MG-111 |
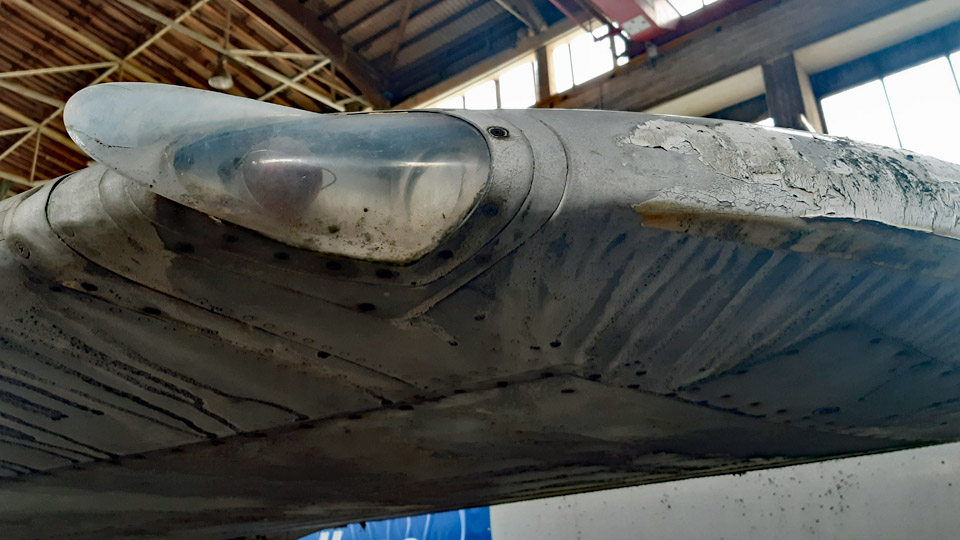
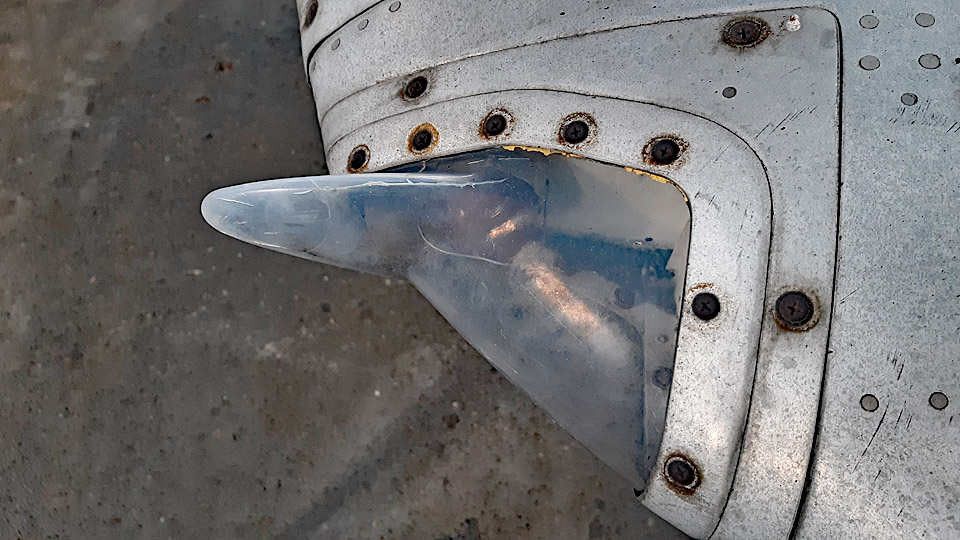
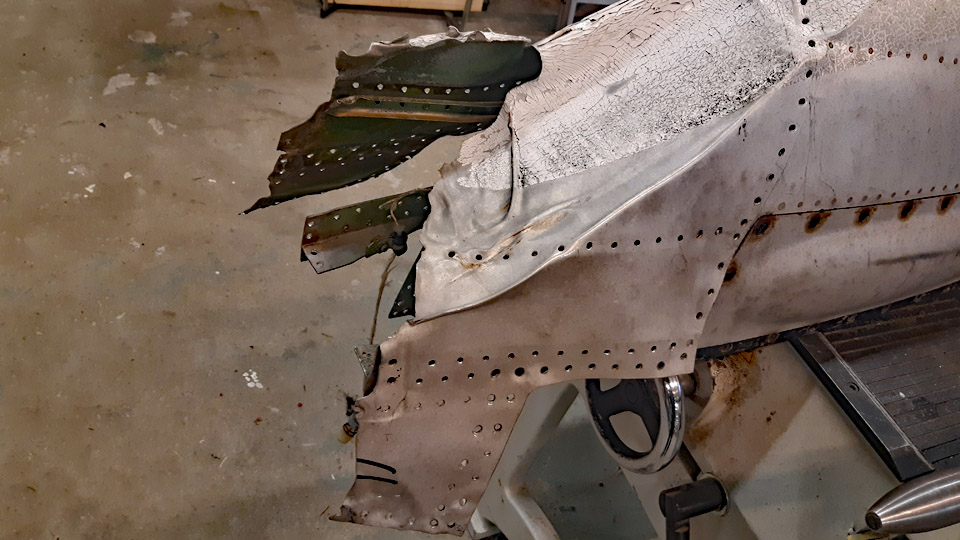
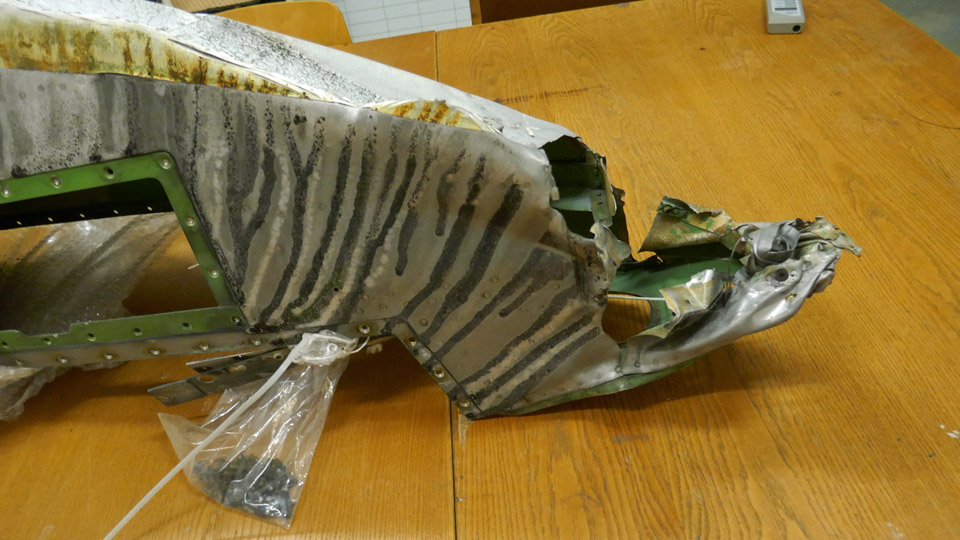
The repairing of the Caravelle's right wingtipMaanantai 21.11.2022 - Tuesday Club member The right wingtip of the Caravelle III (SE-DAF), which was acquired from Sweden by Aviation Museum Society Finland and is now in a hall in the Pansio port area in Turku, has been badly damaged at its leading edge. The damage has been caused by some airport vehicle which has hit the Caravelle’s wingtip during the decades when the aircraft stood on the side of the airfield. There is a dent also in the middle of the tip of the left wing. Furthermore, the trailing edge of the horizontal stabilizer tip and the radome at the nose of the aircraft have been damaged in collisions. The wings, the horizontal stabilizer and the radome will be repaired at the Tuesday Club.
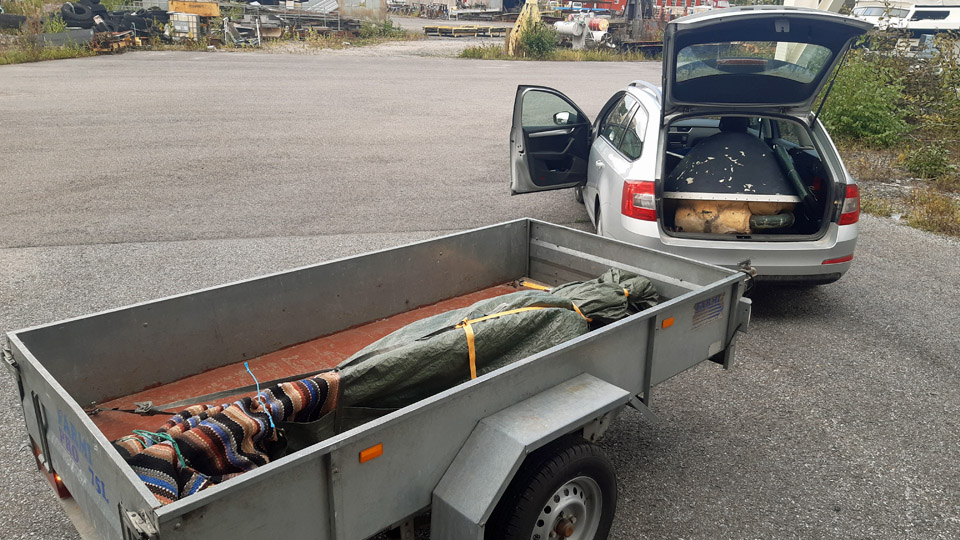
Fortunately, the tips of the Caravelle’s wings and the horizontal stabilizer can be detached. The Aviation Museum Society’s volunteer team in Turku detached the wing tips, the damaged tip of the horizontal stabilizer and the radome to be taken to Vantaa. These parts were brought from Pansio in the boot of a car and on a trailer to Vantaa, to be repaired at the Tuesday Club.
The leading edge of the right wingtip is broken along a distance of 40 cm. The navigation light and its uniquely shaped lamp shade are broken too. The navigation light shade on the left wing is unbroken. When repairing the right wingtip, the left wing will be used as a model.
The navigation light is badly broken. It may be possible to make a new lamp socket for the light bulb, but it will probably be impossible to make the navigation light shade which has a complicated shape. It can hardly be found as a spare part, either. Well, we can surely ask Le Caravelle Club in Sweden, they have restored a former SAS Caravelle.
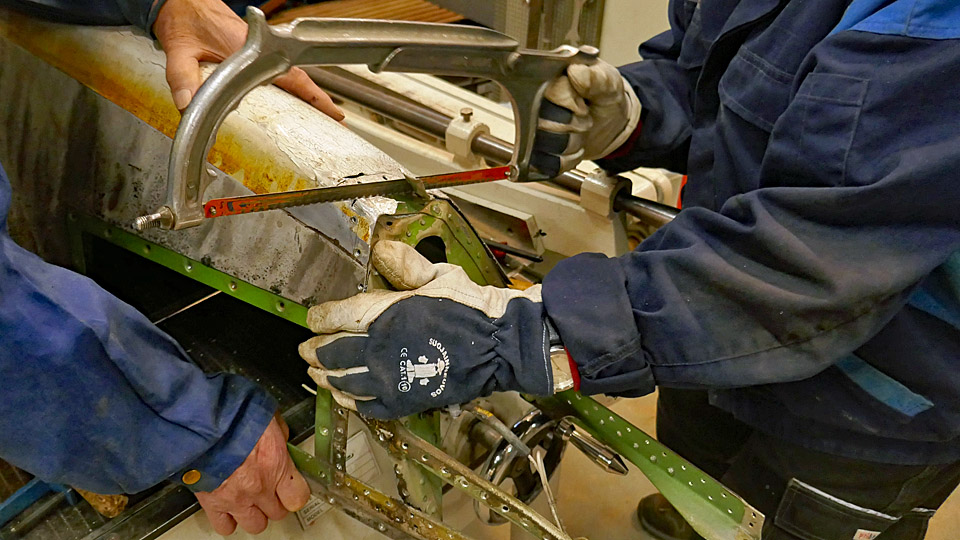
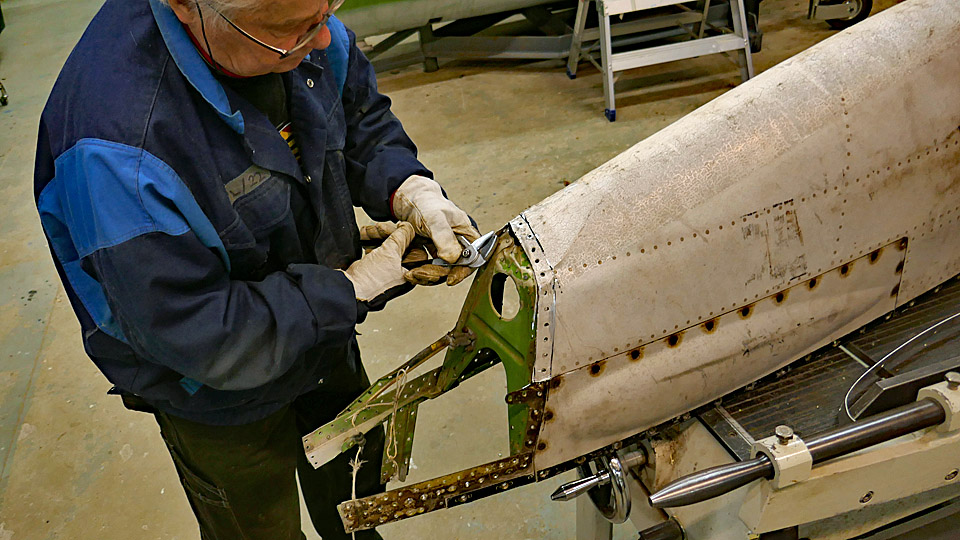
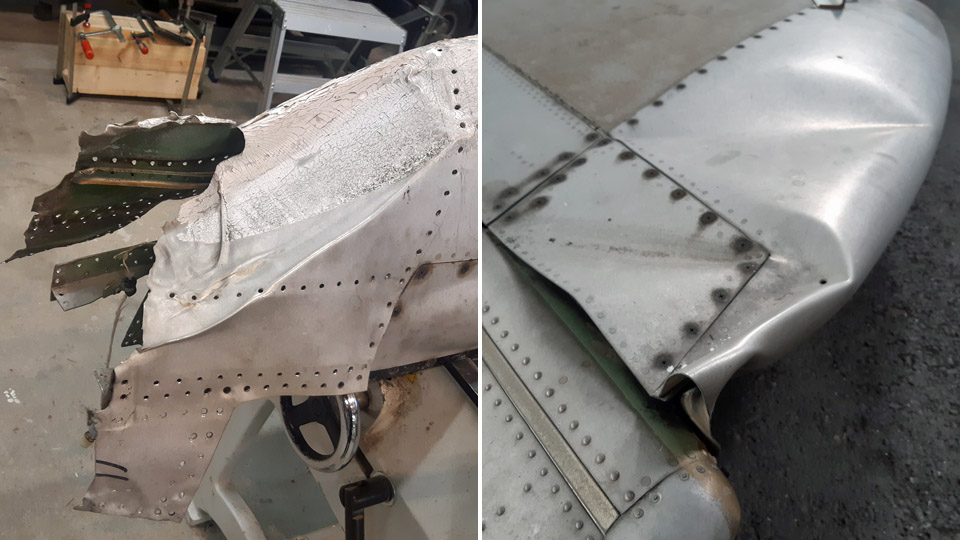
The repair of the right wingtip was started by drilling out the rivets which fastened the crumpled aluminium sheets on the wingtip. After this the sheets could be bent open, and we could get a better view of the damaged tip’s structure.
We tried to mould the damaged aluminium sheets and see if they could be bent into their original shape. However, the duralumin sheets on the wingtip are made of such hard aluminium that they broke when they were bent back into their original shape. We had to admit that the damaged wingtip can’t be repaired by using the original sheets. The wingtip and its supporting structures will have to be rebuilt from new aluminium sheets. Fortunately, we have the unbroken tip of the left wing to use as a model. We dismantled the whole damaged area of the right wingtip.
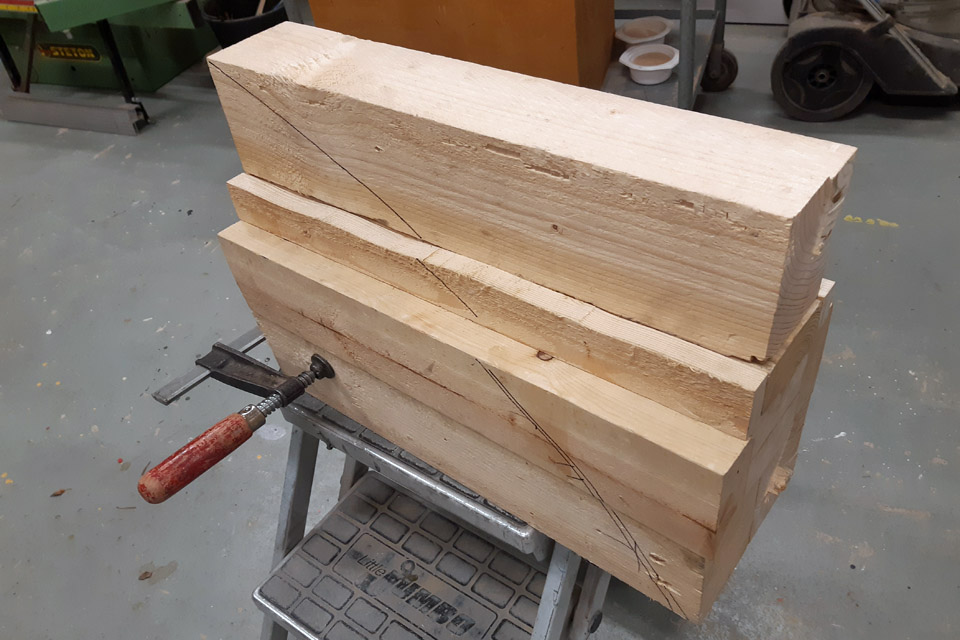
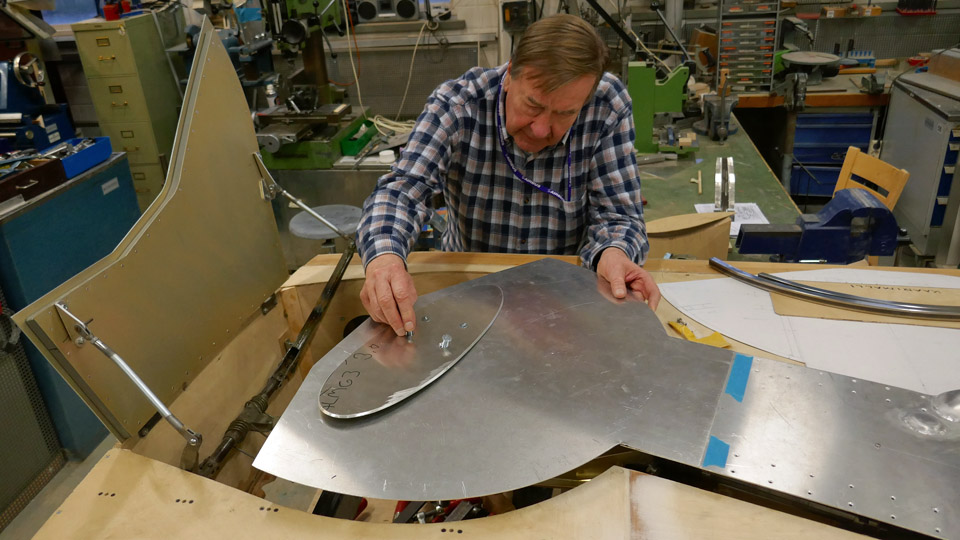
We analysed different alternatives for building the right wingtip and concluded that the broken part will be rebuilt from several sheets of aluminium, which are moulded into the shape of the wingtip and riveted together. For this purpose, a wooden last will be made, shaped as the unbroken left wingtip, but its mirror image. Each sheet of aluminium will be bent into shape against this last and then riveted to each other to form the new wingtip. Before riveting, a new supporting structure for the wingtip will have to be built.
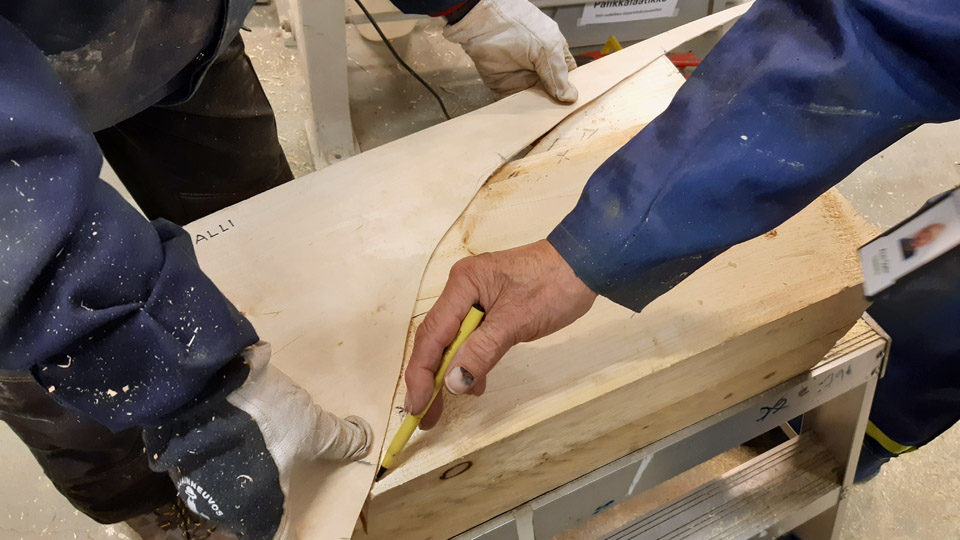
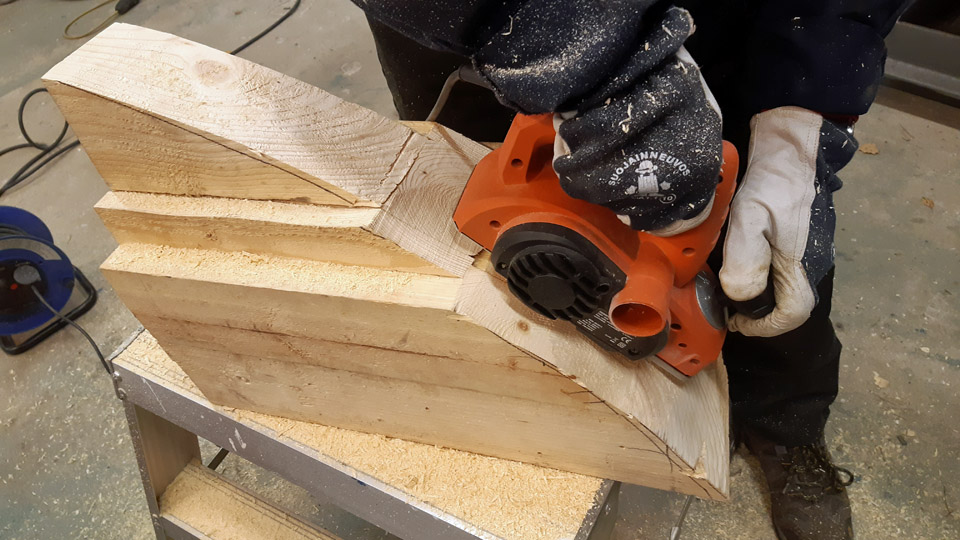
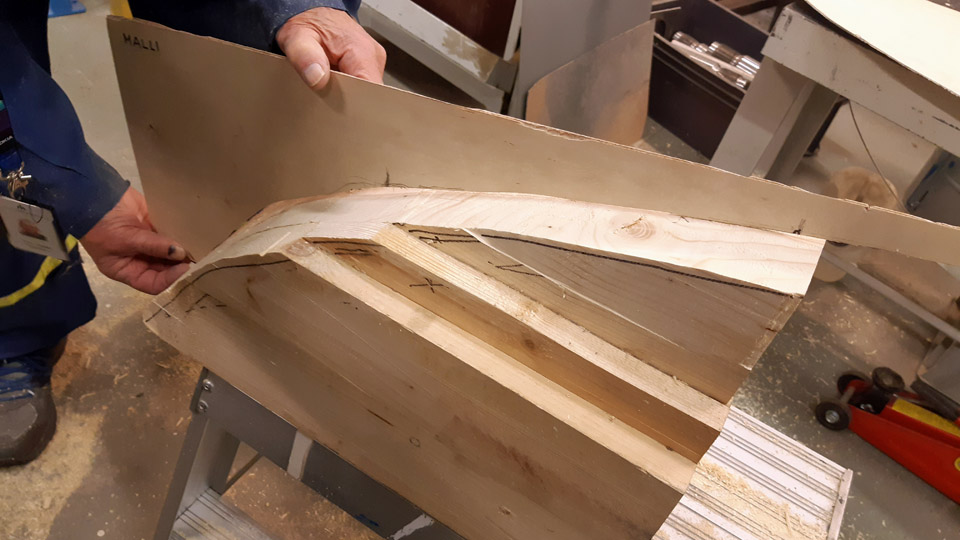
We started to build the wooden last by gluing together some pieces of plank to make a piece of wood, larger than the wingtip. This piece of wood will be gradually shaped by sawing, carving, planing, and grinding to match the shape of the wingtip’s leading edge. To make the piece of wood exactly match the shape of the wingtip, profile jigs, made of plywood and shaped as the unbroken wingtip, will be used. When the shaping progresses, the profile jigs will be used for testing where the wooden last still needs to be shaped.
When the glue had dried, we could start shaping the chunk of wood into the wooden last. First the curved side profile of the wingtip was drawn on the piece of wood. A band saw was used for sawing along the drawn line and almost one half of the piece of wood was cut off. Then the shaping continued with a hand milling machine and a plane. When the shaping work is continued, the shape of the last will be checked with the profile jigs. There is still a lot of work ahead before the wooden blank matches the shape of the wingtip’s leading edge and can be used as a last for moulding the aluminium sheets for the broken wing. Photos by Lassi Karivalo Translation by Erja Reinikainen. |
|
Avainsanat: aviation history, restoration, Caravelle, Tuesday Club, SE-DAF |
The repair of the Caravelle III (SE-DAF) radome has been startedLauantai 12.11.2022 - Tuesday Club member The Caravelle III, owned and brought from Sweden by Aviation Museum Society Finland, is stored in a hall in Pansio port area near Turku. There it is being restored before placing it on display at Turku airport. In Turku the local volunteer team is working on the restoration, which started with cleaning the aircraft’s surfaces before painting. The Tuesday Club has been given the task to repair the damages which have been caused on the aircraft during its long storage period. There is damage on e.g. the right wing-tip, the left tip of the horizontal stabilizer and the radome on the aircraft’s nose. We just can’t help wondering which airport vehicle at Arlanda has managed to bump into the Caravelle so many times.
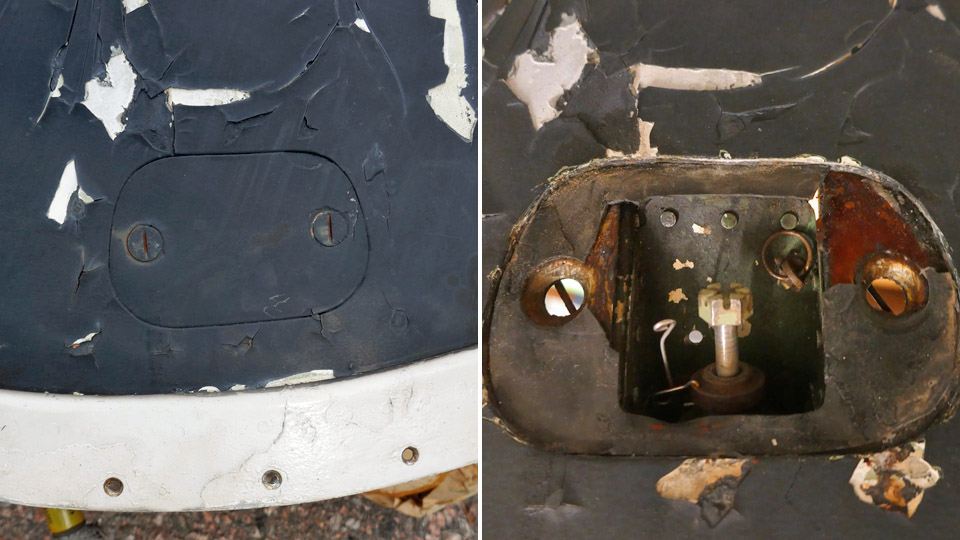
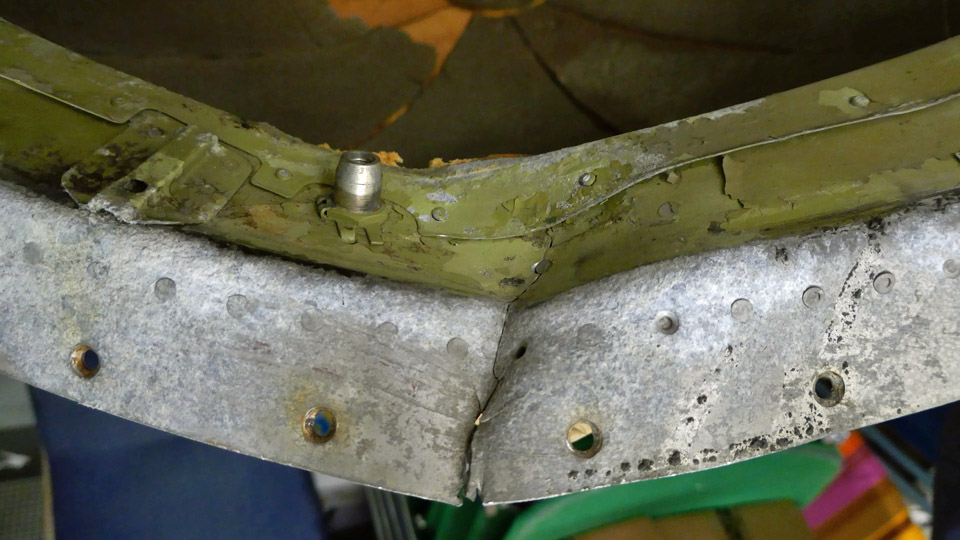
Annoyingly, the damage caused by the collision on the radome happens to be right on one of the hatches which cover the fastening bolts of the radome. The radome, made of glass fibre, has bent inwards at an area of about 20x15 cm. The collision has also broken the edge ring of the radome and damaged the rim of the bulkhead on the aircraft’s nose, under the radome. There is also damage on the aircraft’s nose under the bulkhead edge, the metal edge of the nose is bent, and the aluminium covering is creased. The painted surface of the glass fibre radome is also badly flaking.
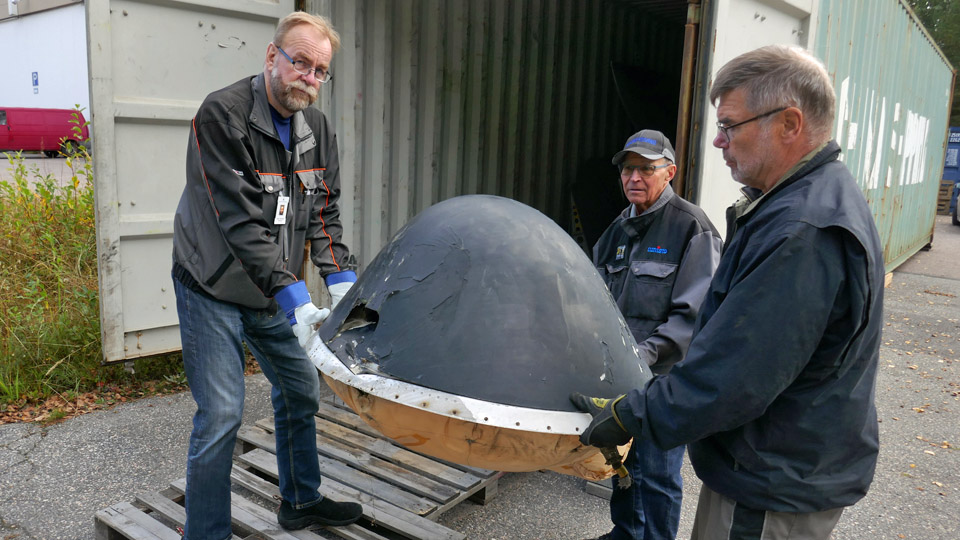
The Turku team disassembled the damaged tips of the right wing and the left horizontal stabilizer and the nose bulkhead, with its radar and radome. We fetched the bulkhead and the tips of the wing and horizontal stabilizer from Pansio to be repaired at the Finnish Aviation Museum in Vantaa. The repair of the radome and the wing tip are well under way, the tip of the stabilizer will be repaired later.
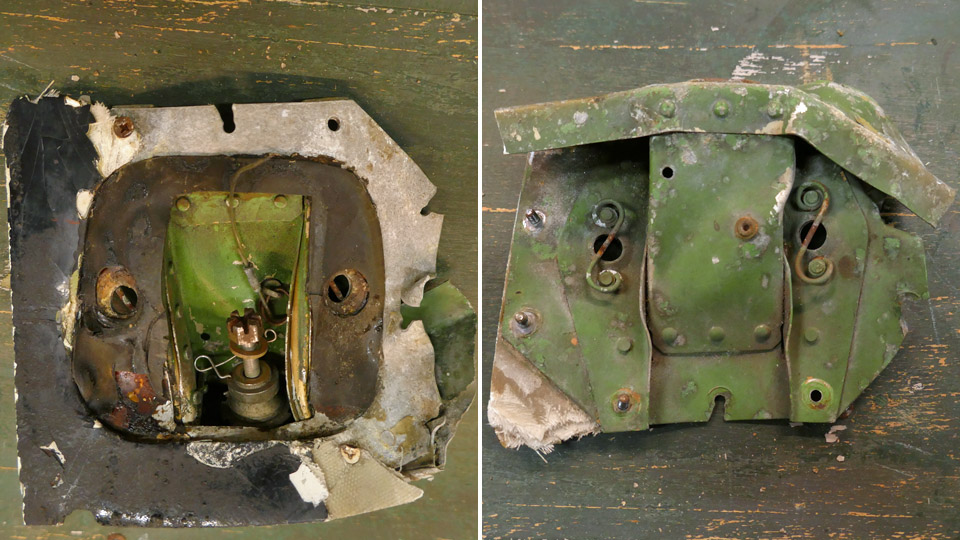
Before repairing the radome, it had to be disassembled from the nose bulkhead. The radome is fastened on the bulkhead rim with three fastening bolts and three guide pins. The bolts can be seen when the hatches on the radome, one above each bolt, are opened. First the hatches above the two unbroken fastening bolts were opened. Under each hatch a supporting frame could be seen, it is fastened on the radome glass fibre and on the radome’s metal edge. There is a crown-headed fastening bolt in the middle of the frame. The two bolts on the edge could be easily opened and unfastened from the threaded sleeve on the metal rim of the bulkhead. Fortunately also the bolt under the damaged hatch could be opened and after this the radome could be lifted from the bulkhead. We could now see that the radar space under the radome was empty. The radar had been disassembled at some point during the Caravelle’s storing period, but obviously before the radome was damaged.
When the radome had been disassembled, we could see the damage on the bulkhead’s metal rim, under the radome’s edge. The bulkhead rim is badly bent inwards and broken. It must be repaired before the radome can be assembled back into its place after repair.
Photo: Reijo Siirtola
As a preparatory task before repairing the glass fibre radome, the damaged metal frame of the fastening bolt was disassembled. The metal frame has been tightly riveted on the damaged edge of the radome, we didn’t even try to unfasten it in other ways than just by cutting through the radome’s metal edge on either side of the bolt’s frame. The broken area of the radome could now be removed together with the bolt frame.
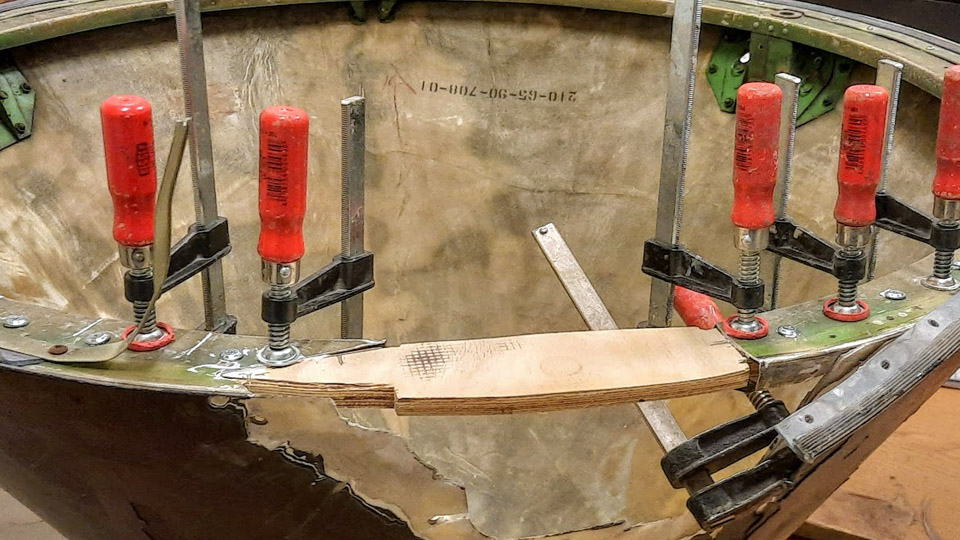
Photo: Reijo Siirtola. The repair plan is to first build a replacing piece for the removed section of the radome’s metal edge. The broken metal frame for the bolt can’t be used any more, so we came up with a solution where a bridge between the radome’s cut edges will be made from strong plywood. The third radome bolt can be fastened on the threaded sleeve on the bulkhead’s rim through the plywood bridge. A metal collar for the bolt will be inserted on the hole on the plywood. This repaired joint of the third bolt will not be as strong as the original, but it will be quite ok for the radome of a non-flying display aircraft. From outside the difference won’t be seen.
Photo: Reijo Siirtola. When the radome’s cut edge has been repaired in the way described above, a sufficient number of glass fibre fabric layers will be laminated with epoxy resin on the collision hole on the radome. The laminated area will be ground to match the level of the dome’s original surface. A hole for the bolt hatch will be made into the laminated surface.
We started to build the piece missing from the radome’s metal edge. A piece of strong plywood was cut, imitating the shape of the missing edge piece. The piece of plywood was glued with epoxy glue as a bridge between the ends of the metal edge. There is still some work needed before the bridge is ready. After that we will laminate the hole in the radome. The edges of the damaged area in the glass fibre dome have already been ground thin for the laminating work. Photos by Lassi Karivalo except if otherwise mentioned. Translation by Erja Reinikainen. |
|
Avainsanat: aviation history, restoration, Caravelle, Tuesday Club, SE-DAF |
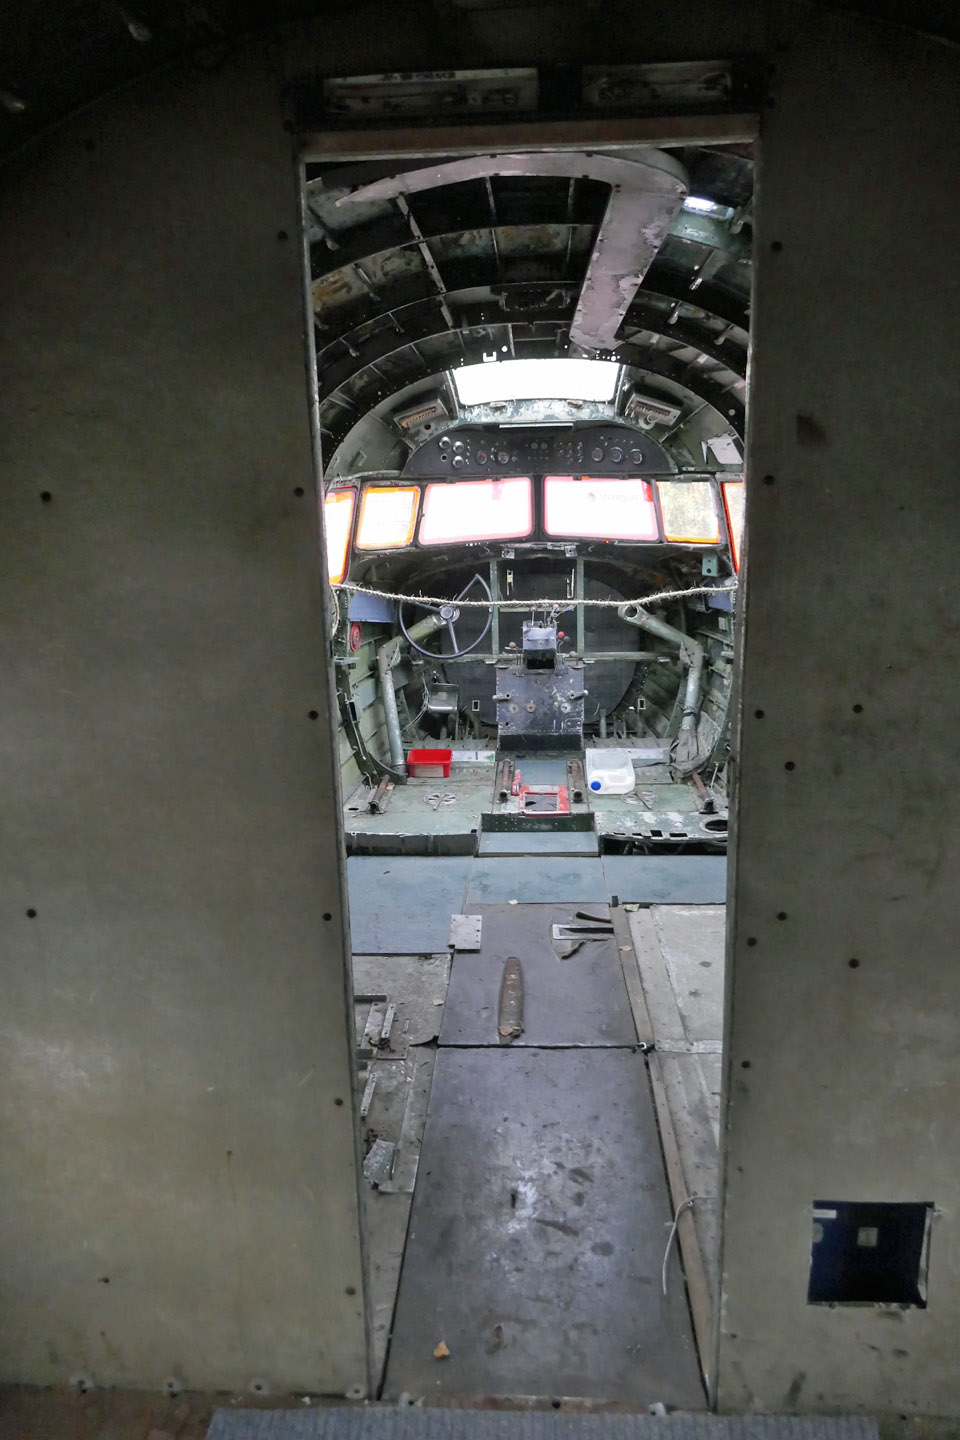
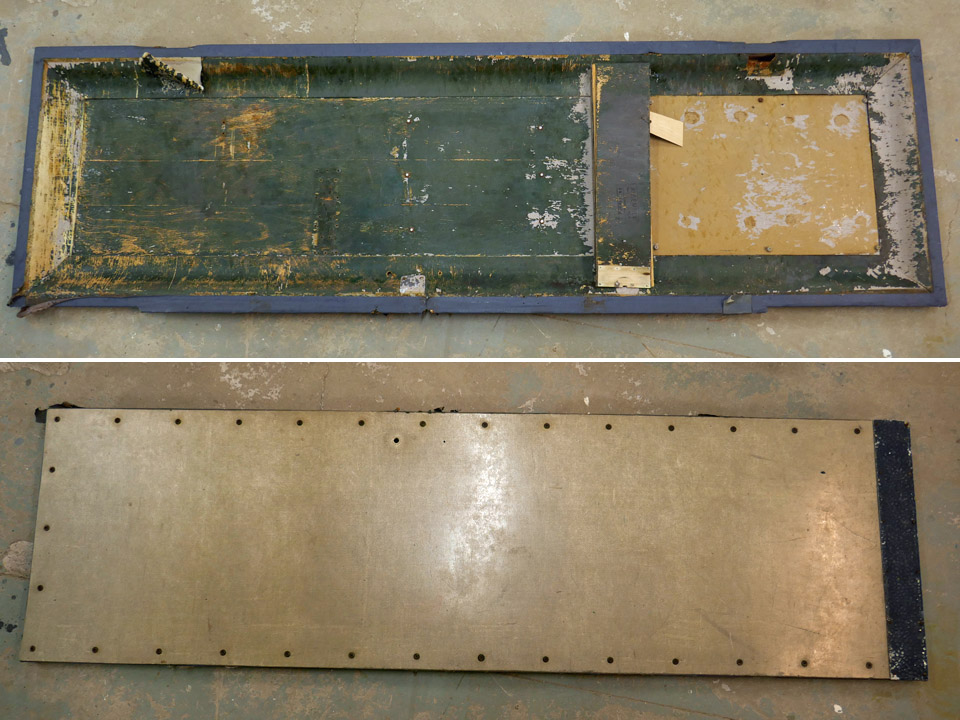
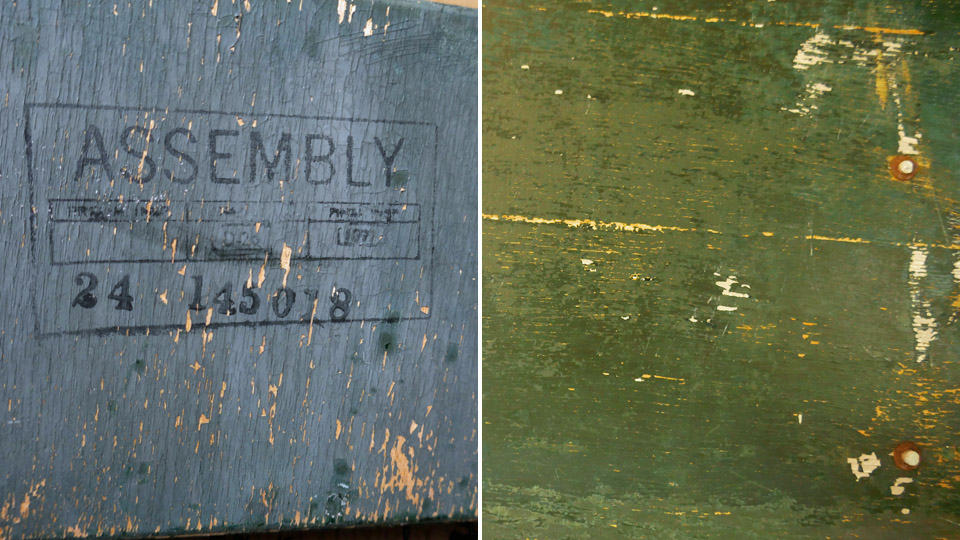
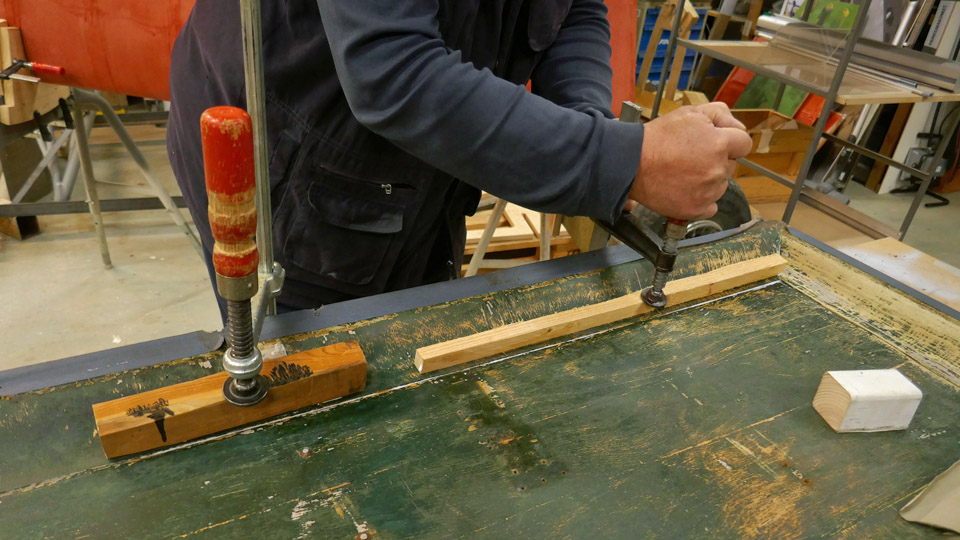
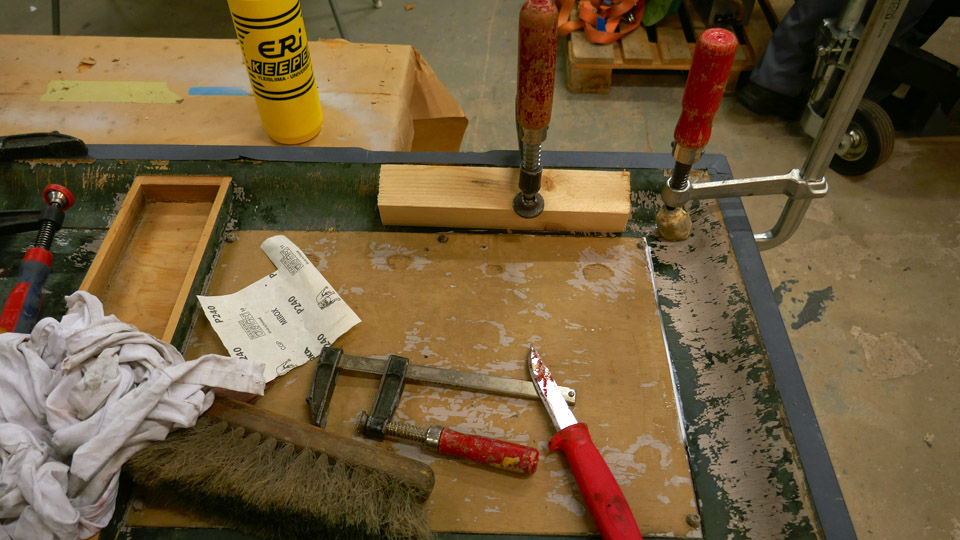
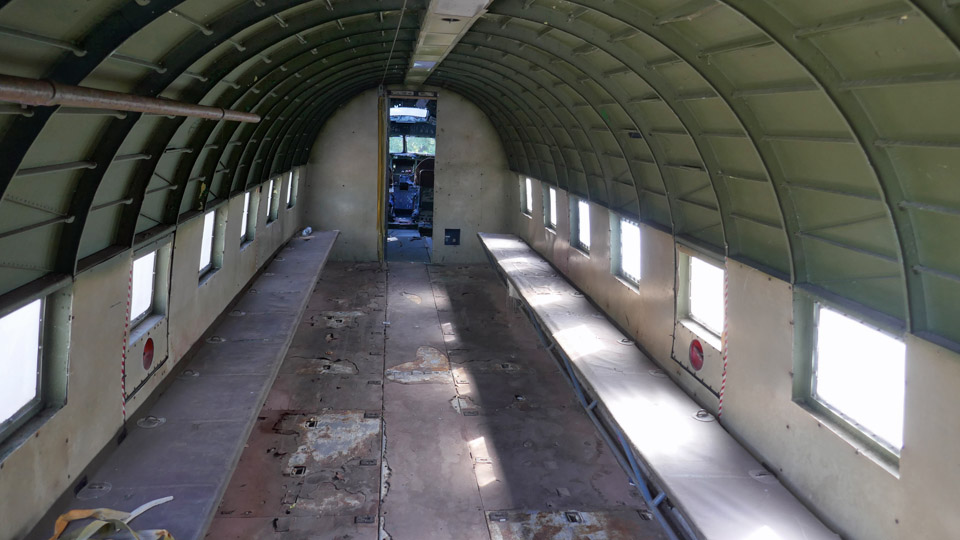
DO-5's door from the cabin to the cockpit is under restorationSunnuntai 6.11.2022 - Tuesday Club member The restoration work of the DO-5 (DC-3/C-47) fuselage, owned by Aviation Museum Society Finland, is now concentrating on the wooden door which separates the cockpit from the cabin. Structurally it is a so-called panel door. The painted surface on the cockpit side is badly worn and flaked, and it will be restored to its original condition. On the cabin side the original surface of the door has been hidden under a modern and pale hard-surfaced board. The same board has been used for covering the cabin side of the wall separating the cockpit and the cabin, and the cabin walls up to the upper level of the cabin windows. We are wondering whether the door and walls have been re-covered during the aircraft’s Lufthansa period or when it came to the use of the Finnish Air Force. We decided to leave the cabin side of the door as it is, with its new covering, to match the cabin walls. Judging from the cockpit side of the door, the door seems to be an original C-47 type door. An indication of this is a large stamp found on the plywood surface of the door. The word ASSEMBLY and serial number 24 145018 can still be read on it. There are also other numbers on the stamp, but they are not clearly distinguishable.
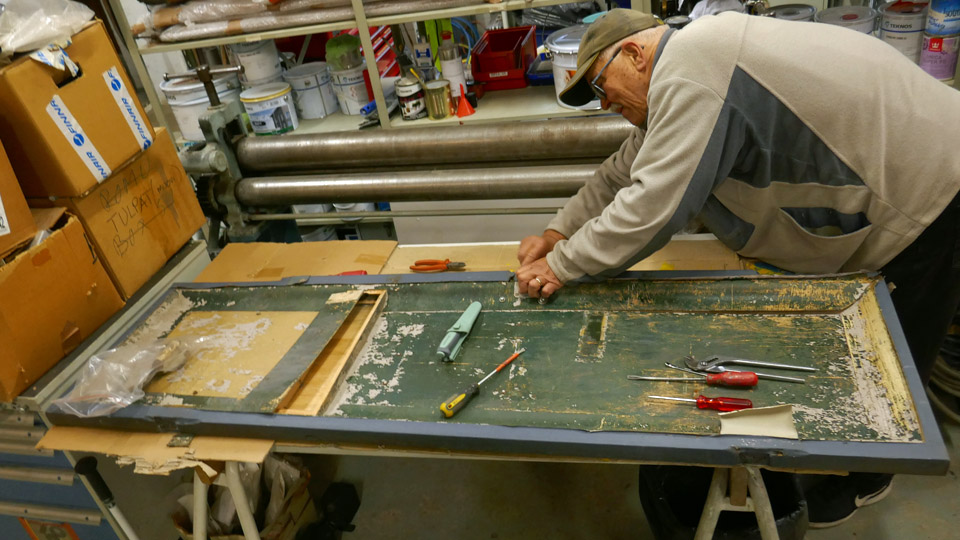
For restoring the door, it was disassembled from its frame and brought to the restoration workshop at the Finnish Aviation Museum. The painted surface on the cockpit side will be sanded and the plywood veneers, which have delaminated, will be glued back together. Finally the door will be repainted.
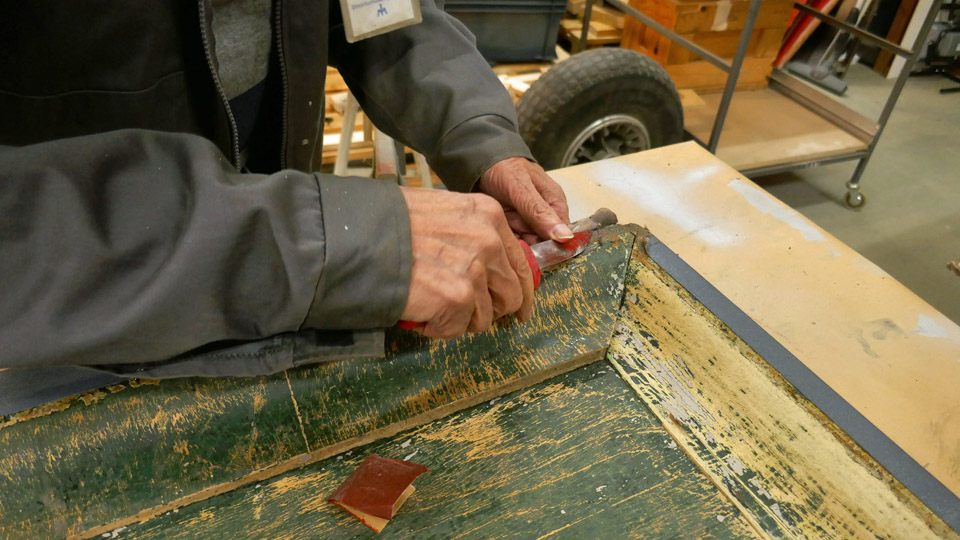
Before painting, the loose flaked paint was scraped off and the greenish grey paint surface was sanded smooth. Our aim is to paint the door and the aluminium wall surfaces in the cockpit using the original shade of green. Before that we will try to find out what the original paint and its shade might have been.
At least two different shades of green can be seen on the door. It looks as if there is a paler shade of green underneath, and it has been covered with a darker green paint. On the aluminium wall surfaces in the cockpit at least three different shades of green can be distinguished. We can only guess which of these could have been the original one – if any. After the invasion of Normandy, the DO-5 has been in civilian use in the Netherlands, French Indochina, and Germany before coming to the service of the Finnish Air Force in 1960.
I asked for advice about the DC-3 colours from the Finnish Air Force Museum. I learned that the cockpit colour, and also the colour of the door, was most likely the American “Bronze Green” or “Dull Dark Green”. In the American aircraft of that era the colour of the inner surfaces was usually dark green. Zink chromate anti-corrosion primer was used on aluminium surfaces and its shade was modified with black pigment, adding some UV-protection on the paint. However, there are still some issues to resolve before we can go and buy the paint.
The surfaces still need some preparatory work before the door is ready to be painted. We haven’t yet decided whether the door will be painted now or in the spring, together with the aluminium wall surfaces in the cockpit.
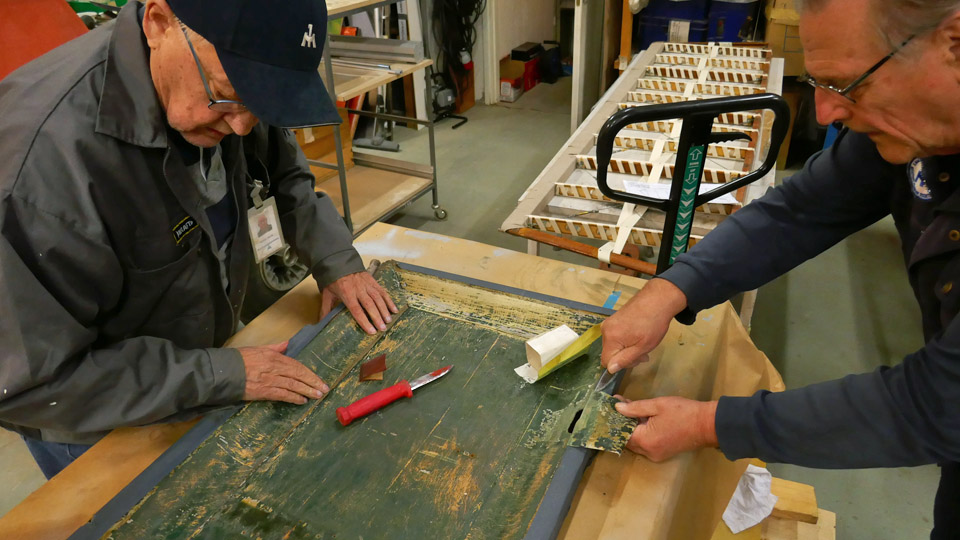
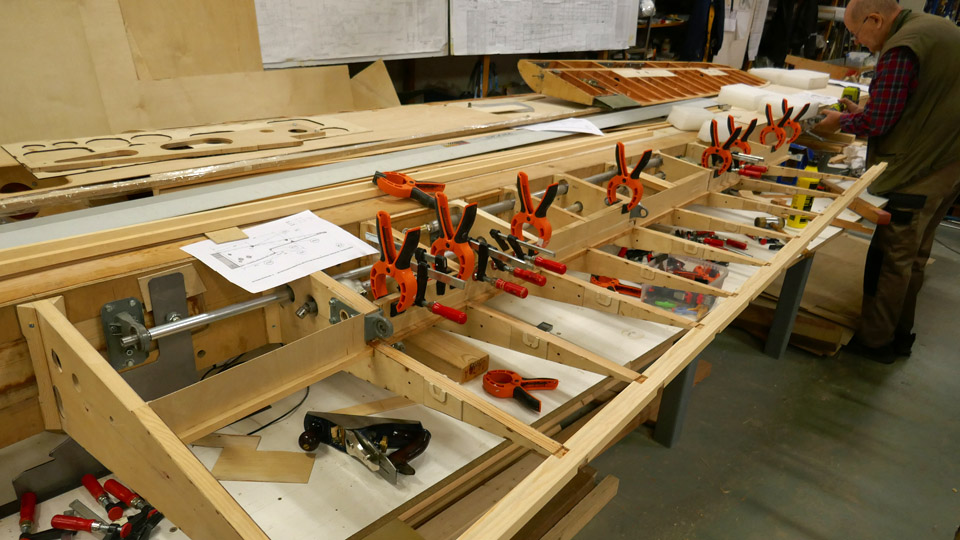
When the door surfaces had been sanded, the delaminated plywood veneers were glued into place. The veneers were pressed tightly against the surface using blocks of wood and clamps. The glue we used was EriKeeper Plus wood glue, meant for outdoor use. Photos by Lassi Karivalo Translation by Erja Reinikainen. |
|
Avainsanat: aviation history, restoration, Tuesday Club, C-47, DC-3, DO-5 |
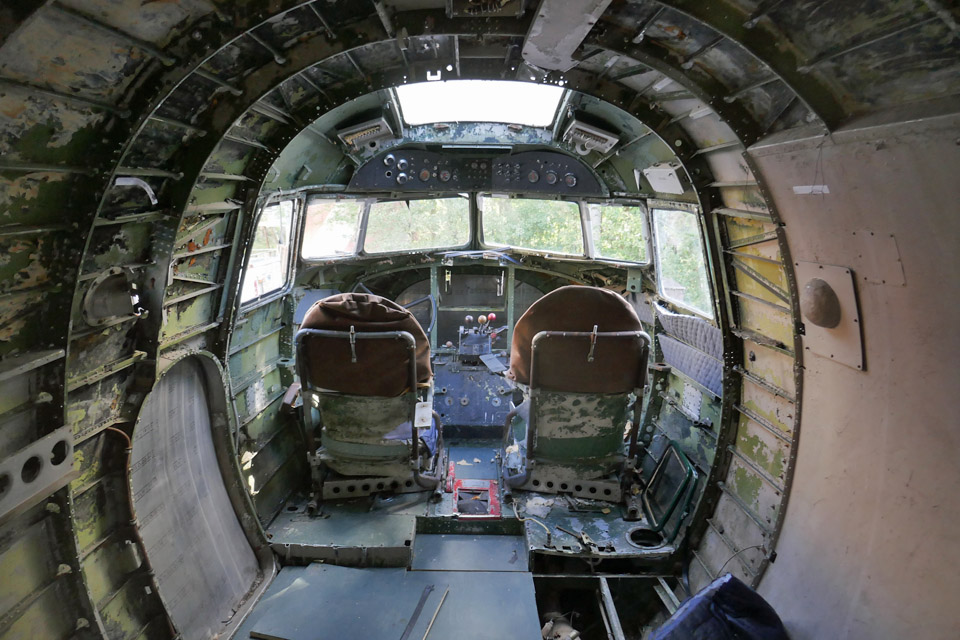
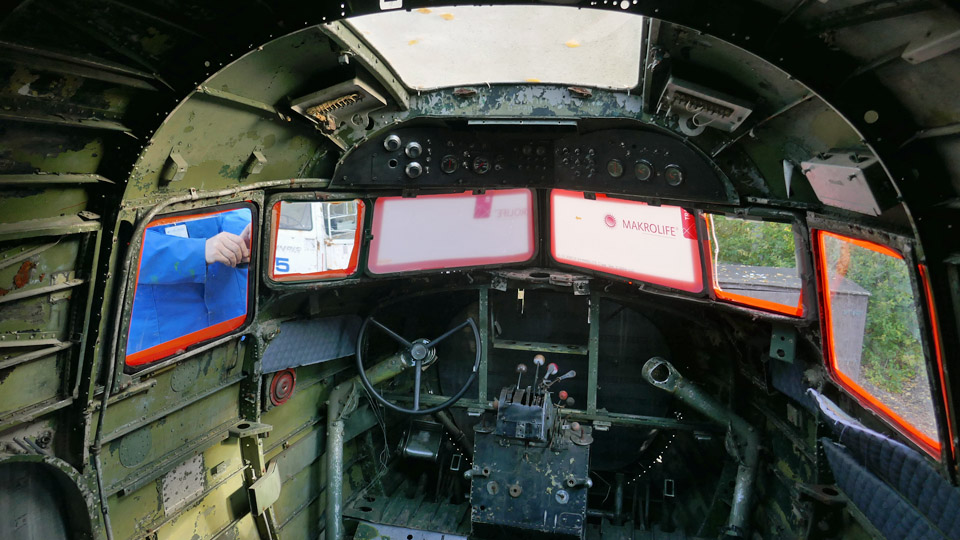
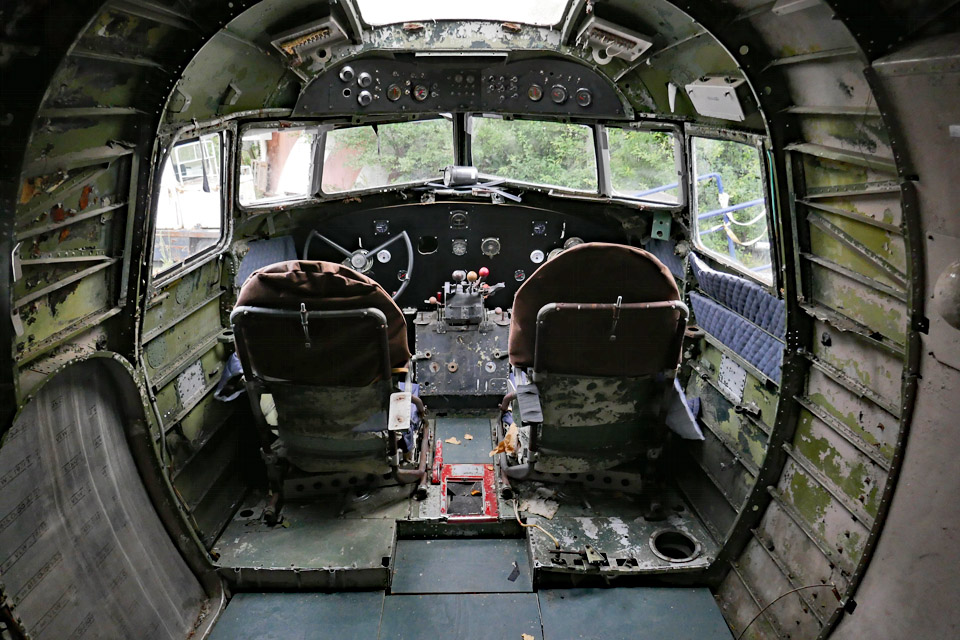
DO-5 cockpit seatsTorstai 20.10.2022 - Tuesday Club member Suomeksi Restoring the fuselage of the DC-3/C-47 (DO-5) into at least tolerable condition before display requires all kinds of work. The main emphasis is on the cockpit area.
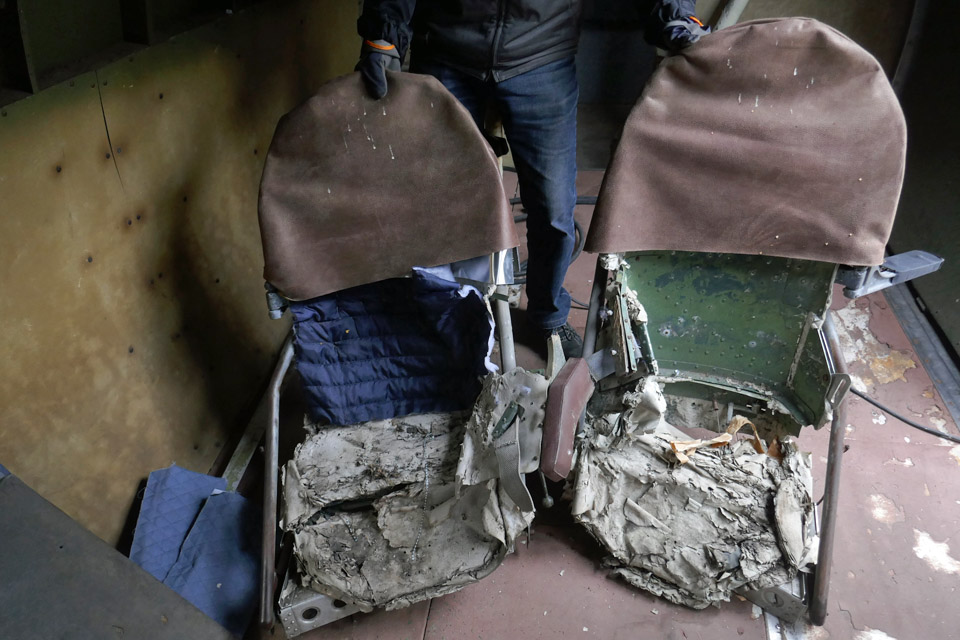
When the tail sections of the DO-5 and other clobber had been moved from the fuselage into the storage container next to the aircraft and when the cockpit windows had been sealed to prevent rainwater from entering the aircraft, we could concentrate on the cockpit. The starting point was a complete disaster area: the instruments and most of the cockpit equipment were missing, the seats were tattered, the walls bare without interior panels, and there was rubbish everywhere.
Our first step was to clear the cockpit of the clobber and rubbish, which had filled it during the years. Eventually we were even able to use a vacuum cleaner for cleaning the surfaces in the cockpit. The first aim is to make the cockpit look tidy. Thinking further, it would be nice to install some of the missing instruments and equipment back into the cockpit, but now this seems to be very far away.
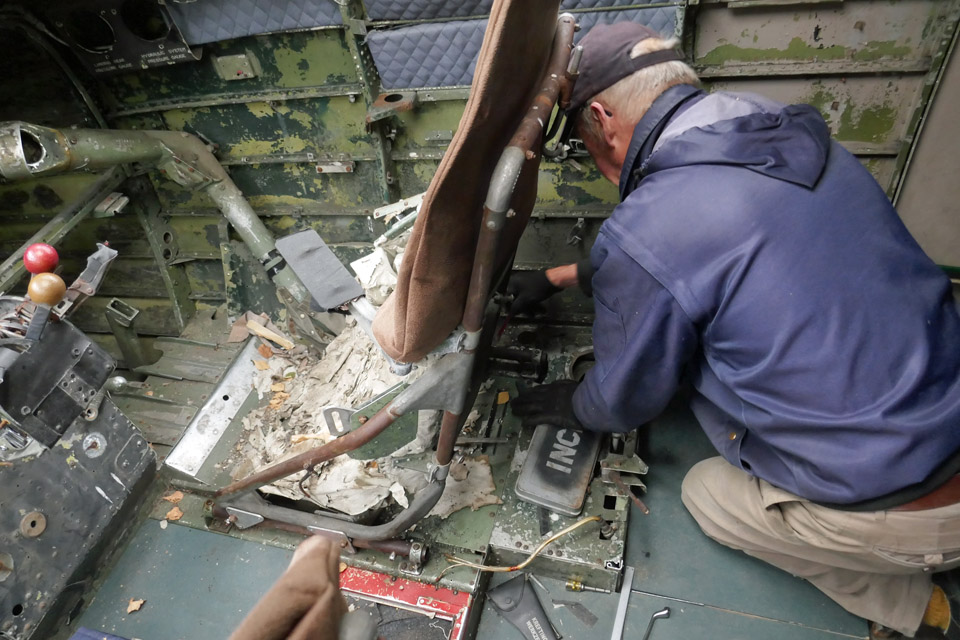
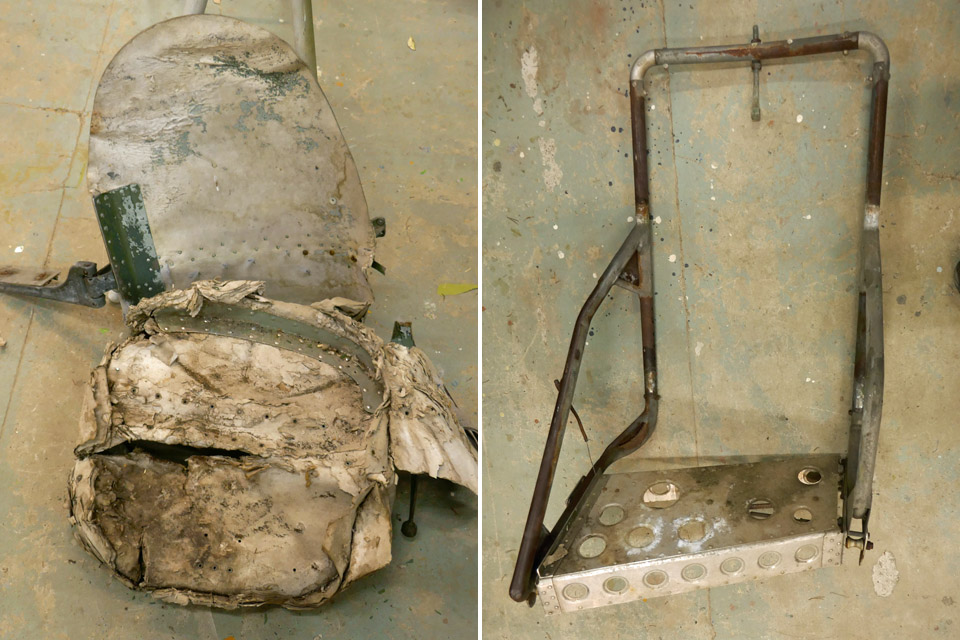
After cleaning our following targets were the pilots’ seats. The seat consists of the actual seat and its tube frame, on which the seat is fastened. Our aim is to restore the seats although the seat parts are badly damaged. The tube frames are still in good condition, although covered with rust.
The reason for the damage is that the whole seat part is made of multi-layer cardboard; pressed and stiffened into the shape of a seat. Due to the rainwater and humidity which has got into the cockpit, the pressed cardboard has become soggy, and the cardboard layers have disintegrated into pulp. However, the seat backs are still in reasonable condition.
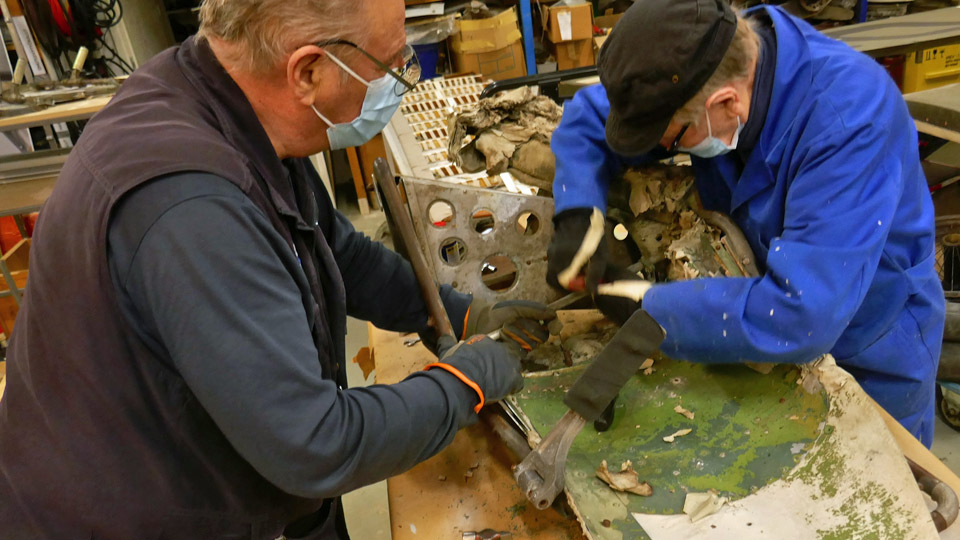
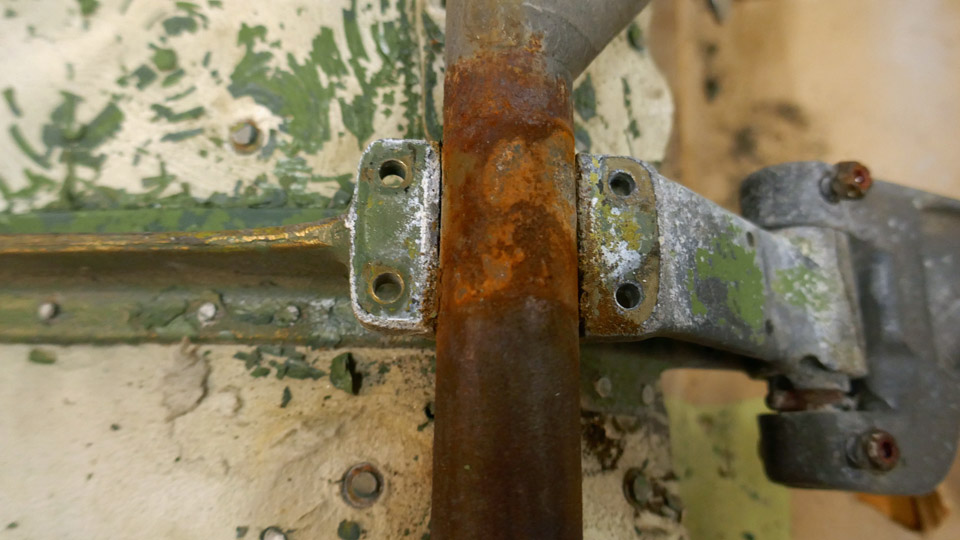
The truth is that it won’t be possible to restore these original tattered seats into good condition. The seat part of both seats will have to be completely replaced, even though the seat back is still useable. We will certainly be stuck between a rock and a hard place, trying to figure out how the seat part could be rebuilt. One option would be to build it from aluminium plate, this is an alternative to be considered. The seat frame must be cleaned of rust and painted.We started the seat work by unfastening both pilot’s seats from the rails on the cockpit floor. Then the seat part of each seat was unfastened from the seat frame. The seat is fastened on the seat frame tube with brackets, which slide on the tube to allow the height of the seat to be adjusted. The seat is locked at the suitable height with lock pins which are pushed into the holes on the frame tubes. The adjusting mechanism is under the seat.
We started the dismantling work of the seat on the left. We unfastened the rusted brackets around the seat frame tube to disassemble the seat from the frame. This wasn’t easy, because the seat height adjustment locking pins were still firmly stuck in their holes on the seat frame. Some effort was needed before the adjustment system’s locking pins could be pulled out of their holes and the seat and its frame disassembled.
We dismantled the seat on the right in a similar way. It is identical to the seat on the left, but its mirror image. There we had to disassemble completely the seat height adjustment mechanism before the locking pins could be pulled out of their holes on the seat frame. Then the seat and the frame could be unfastened from each other. Both seat parts were taken to the DO-5 storage container to wait for further actions. Photos: Lassi Karivalo Translation: Erja Reinikainen. |
|
Avainsanat: aviation history, restoration, Tuesday Club, DO-5;DC-3, C-47, Dakota |
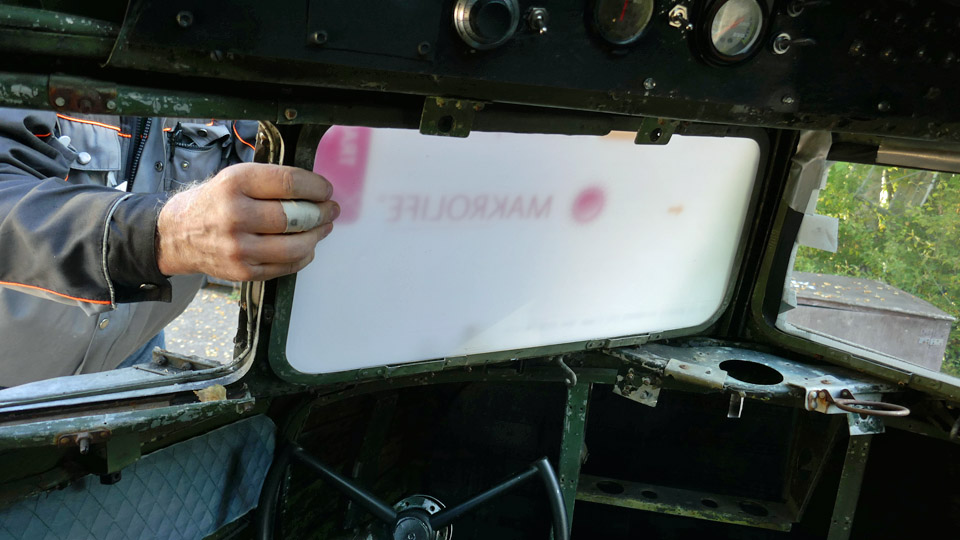
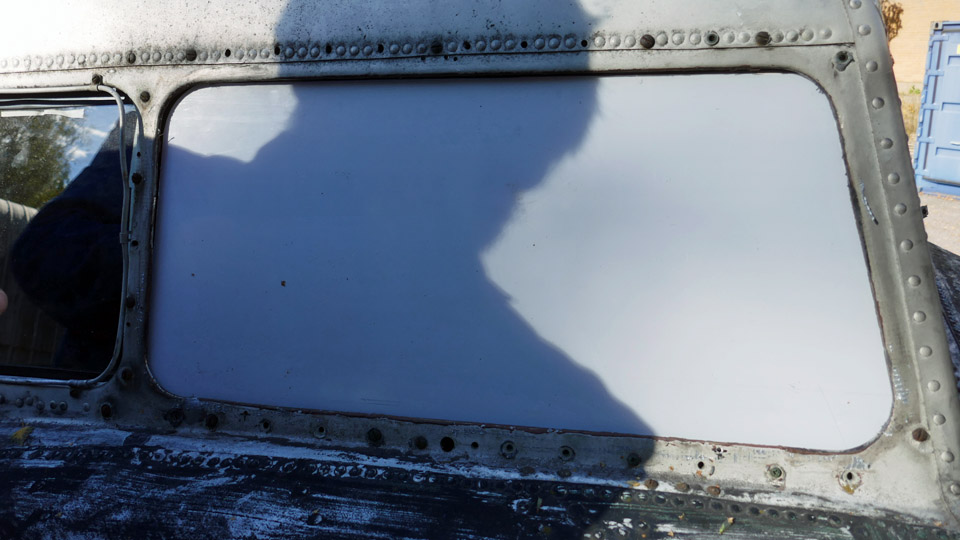
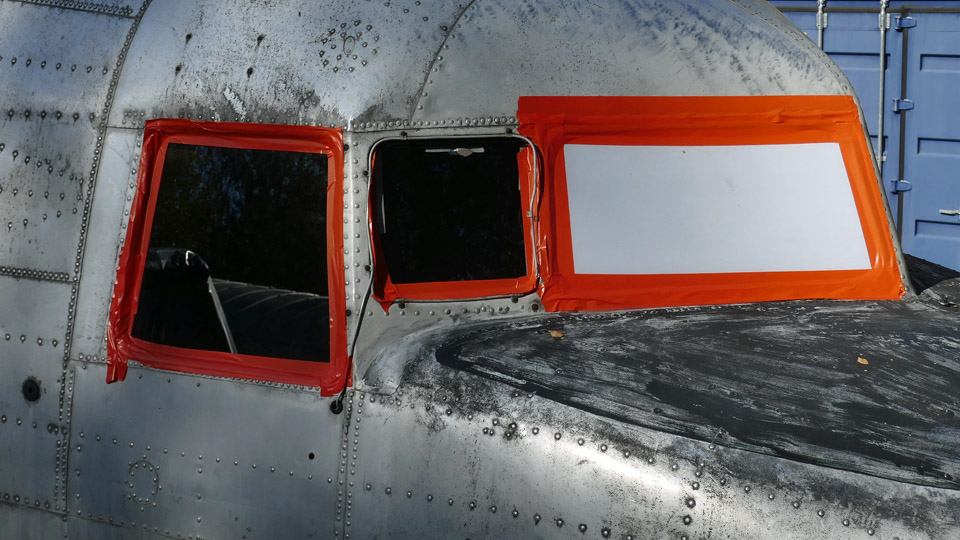
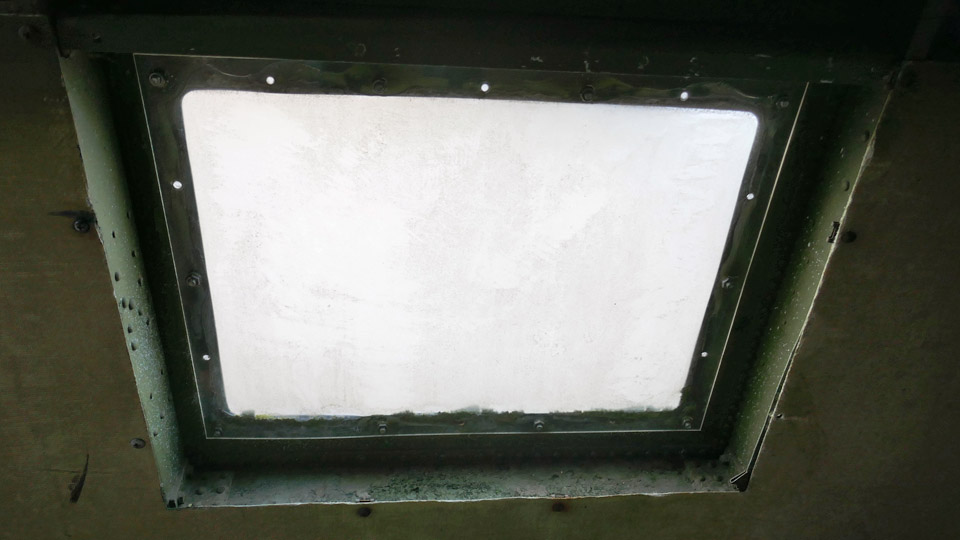
DO-5 cockpit windscreens to winter proof conditionSunnuntai 16.10.2022 - Tuesday Club member Work on the fuselage of the DC-3 (C-47) DO-5, owned by Aviation Museum Society Finland, have started promisingly at the Tuesday Club. At the moment we aim to concentrate on tasks that are possible to do regardless of the weather during the cold period and winter season. The fuselage is out in the open at the yard of the Finnish Aviation Museum. Furthermore, we have prepared the fuselage, which is out in the open, for the autumn rains and the blizzards of winter.
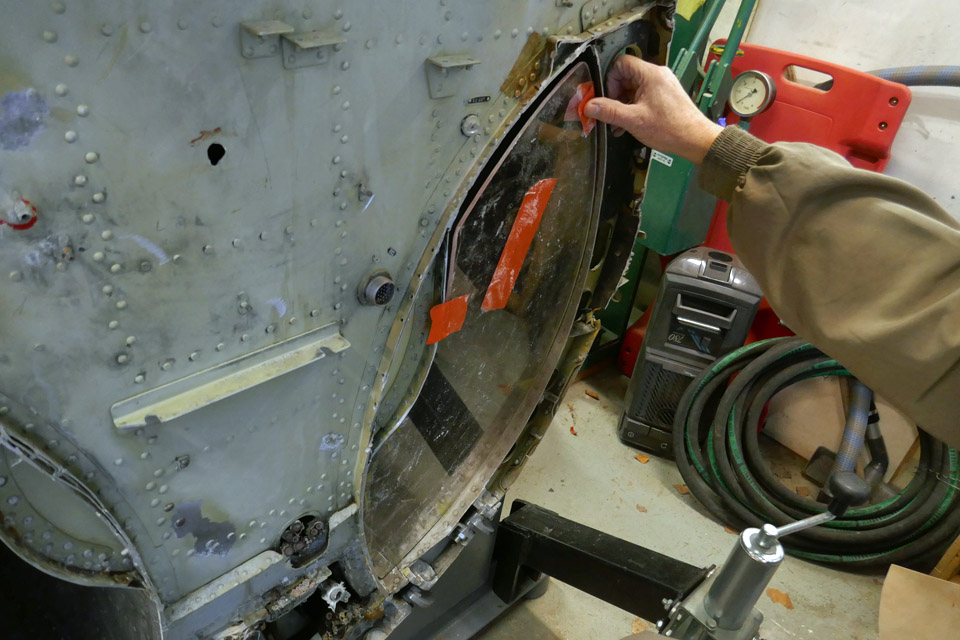
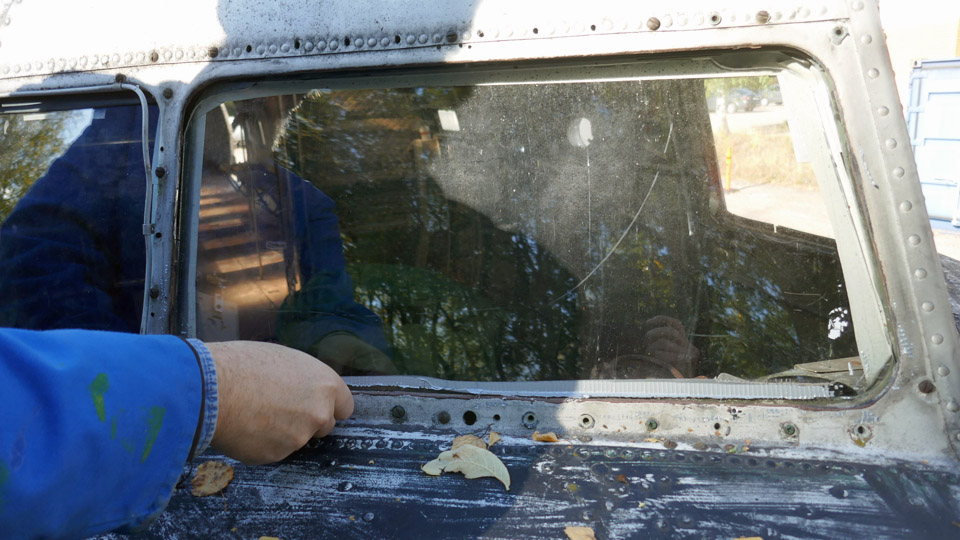
One such measure was to get the cockpit windows sealed so that rainwater and snow wouldn’t get into the cockpit. We had already earlier in the autumn covered the cockpit windows of the DO-5 with rainproof plastic, because the plexiglass panes fixed to the frames of the windscreens were too small to keep water out of the cockpit. Both the original windscreen panes of the DO-5 have been broken at some stage and been replaced with transparent 3 mm thick plexiglass panes.
To replace those undersized windscreen plexiglass panes before winter we had to get new plexiglass ones to fit properly to the windscreen frames. Although that wouldn’t be the procedure with a flying DC-3 aircraft, but to replace a broken or otherwise unusable windscreen pane, a completely new pane with frames would have been changed as a spare part. Such spares we don’t, alas, possess.
So the undersized windscreen plexiglass panes were detached and the chutes of both windscreens were cleaned of rust and dirt with a brush disc, attached to a battery driven drilling machine. To acquire new plexiglass panes, a window shaped template was made of 1,2 mm plywood. This template was cut so, that the template of the windscreen pane could just be slid into the chute of the frame through the windscreen opening.
The plan is to glue the new plexiglass pane to the chute with silicone. In the process of gluing the plexiglass pane will be supported so that it leans with each edge a few mm against the inner side of the frame chute. Thus the plexiglass pane would cover the whole windscreen opening and the silicone seam would become watertight.
WE had ETRA cut us two windscreen panes according to the plywood templates, from 5 mm thick UV-protected polycarbonate plexiglass. When we fitted them into the DO-5 windscreen chutes, after a bit of filing, we got the panes to click into place inside the windscreen frame.
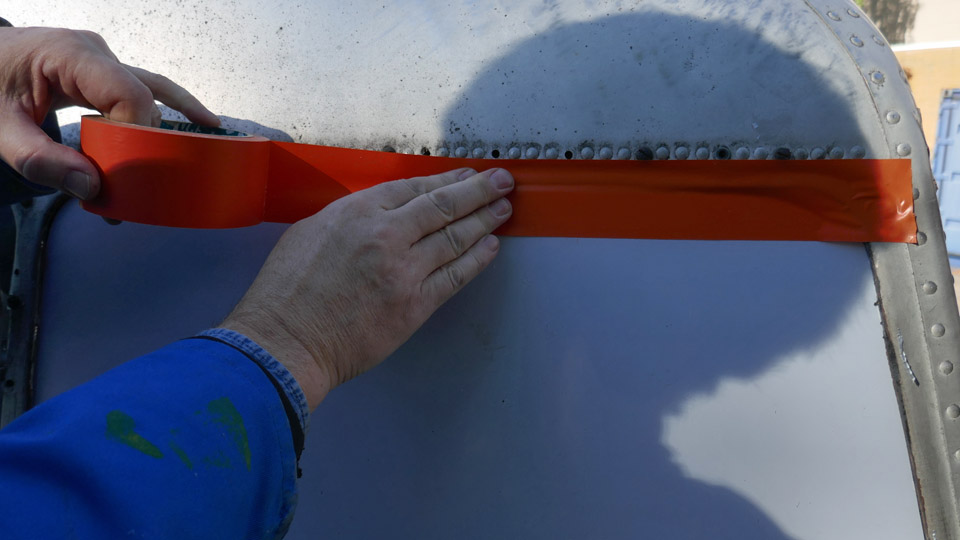
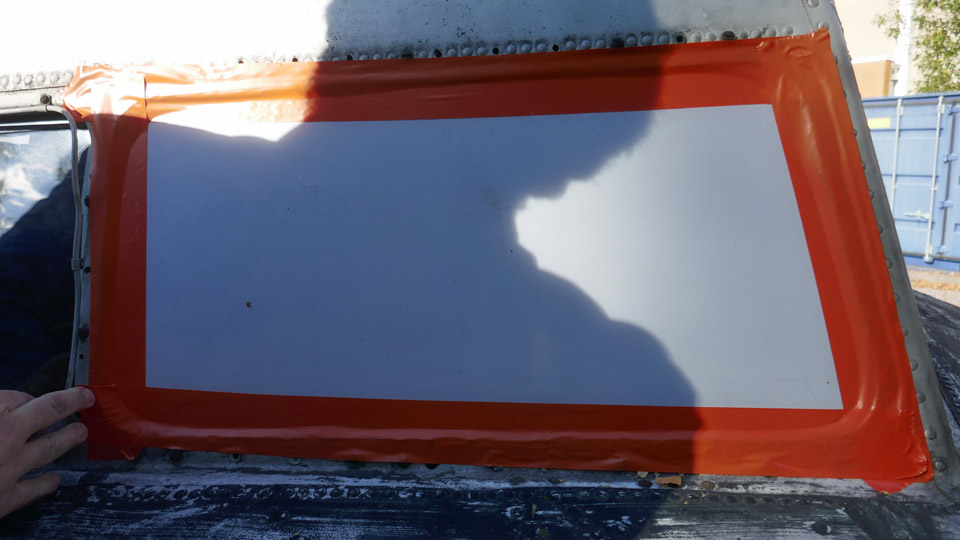
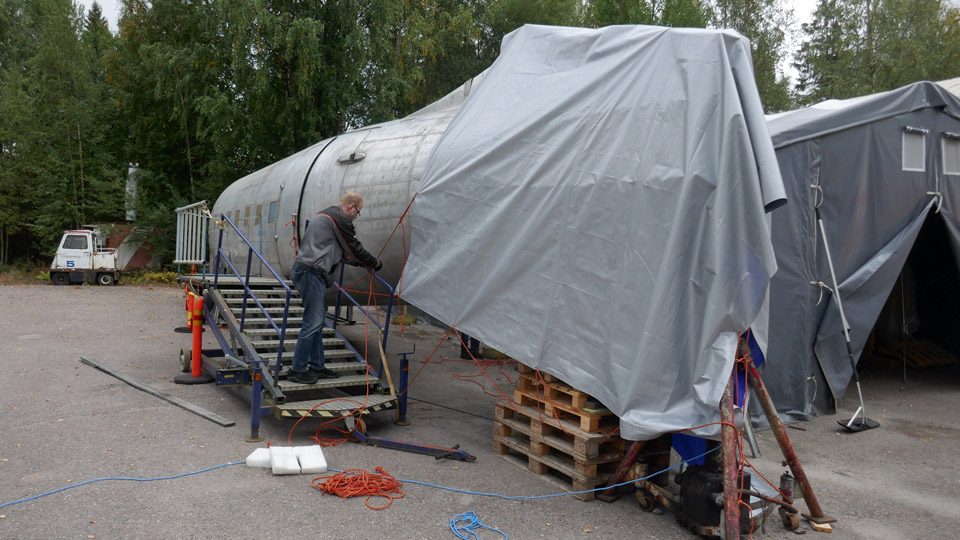
Because the autumn temperatures had sunk to about 10 degrees centigrade, we decided to postpone the gluing of the plexiglass panes to warmer weather next spring. Instead, we taped the new plexiglass panes, covered with protective plastic, on the outside of the aircraft with orange tape to the frames of the windscreens in order to stop rainwater or snow from getting into the cockpit. The tape covered completely the seam between the fuselage and the frame of the windscreen. We covered the seams of the cockpit’s side widows in the same manner, to prevent rain from penetrating into the cockpit through them.
Another preparation for winter was to cover the tail section with a protective tarpaulin. The vertical and horizontal stabilizers have been dismantled. Thus rain and snow have free access into the fuselage through the openings. We got hold of a large tarpaulin, with which we covered the tail section completely. Photos: Lassi Karivalo Translation: Matti Liuskallio. |
|
Avainsanat: aviation history, restoration, Tuesday Club, DO-5;DC-3, C-47, Dakota |
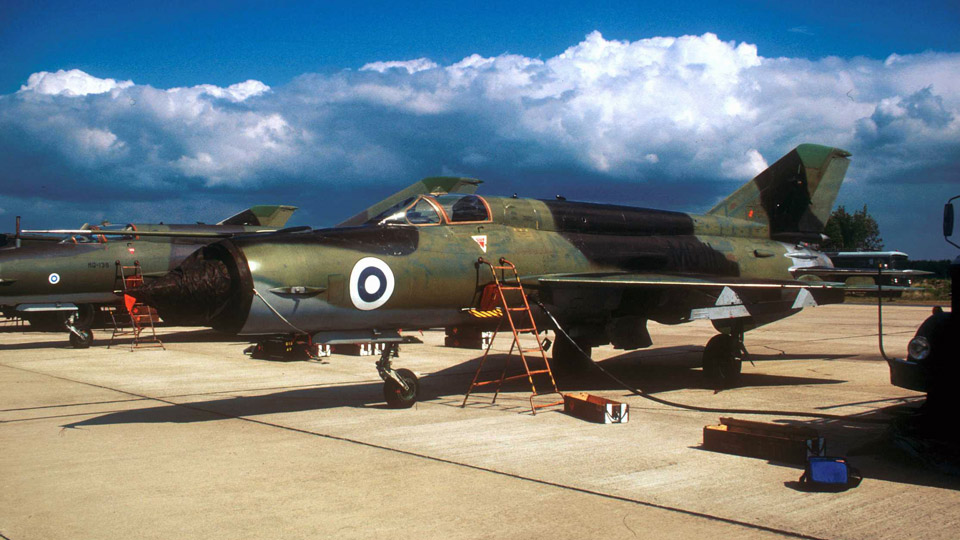
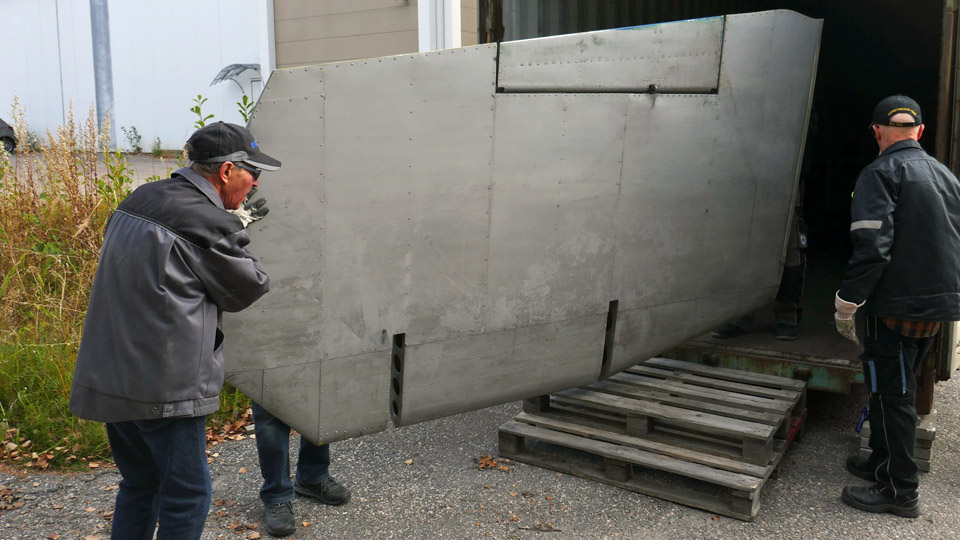
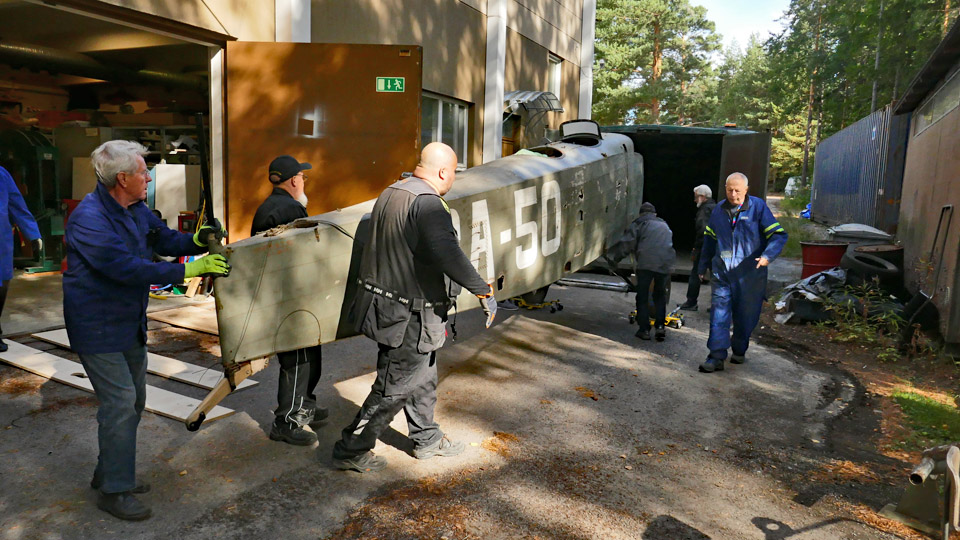
MiG-21BIS MG-111 cockpit is modified into experience simulatorSunnuntai 9.10.2022 - Tuesday Club member The MG-111 was the first MiG-21BIS fighter which was taken into use by the Finnish Air Force in 1978. This individual differed in certain characteristics from the BISes which the Air Force later received. In the first photograph the MG-111 is at the Oulunsalo shooting camp in June 1990. Notice the two little red Draken silhouettes on its vertical stabilizer, symbolizing the air victories over Drakens at the shooting exercise before the shooting camp.
Photo: Perttu Karivalo The MG-111 flew its last flight in 1993. In 1994 the aircraft was moved to the Finnish Aviation Museum to be stored. The last years the MG-111 stood outside, and in 2016 it was eventually cut to pieces as “canning material” on the museum yard. During the cutting process it was observed that the MG-111 was still in quite good condition. It is a pity that Finland’s first MiG-21BIS got an end like this.
However, not everything ended up as raw material for cans. The fuselage was cut in front and behind the cockpit and the cockpit part was preserved, the plan being that the cockpit is modified into a MiG-2BIS experience simulator. Aviation Museum Society Finland owns the cockpit and its modification work into an experience simulator has started.
Modifying the cockpit into a simulator means that the equipment and wires outside the cockpit and also partly inside it will have to be dismantled. The dismantling is necessary because space is needed for the simulator hardware and for its assembly.
The task for the Tuesday Club was to dismantle wires and equipment in the fuselage, in front of the cockpit and behind it. The dismantling began on May 24th. The work progressed well but it had to be interrupted for the summer break. The dismantling was continued on August 30th when Tuesday Club started its autumn season.
Emptying the equipment compartment in front of the cockpit of all the clobber was a time-consuming job. In a way this was easy too, because the order had been to disassemble and dismantle everything in the best possible way, without a second thought. This is why cutters, and even a hacksaw were used, in addition to the various kinds of screwdrivers and wrenches.
Some work was also needed when the various parts and wires were unfastened from the wall behind the cockpit and from the compartments behind the panels on the sides of the fuselage. Soon there were several boxes filled with disassembled clobber. The cut edges of the fuselage behind the cockpit were dangerously sharp. The edges were filed smooth to avoid injuries.
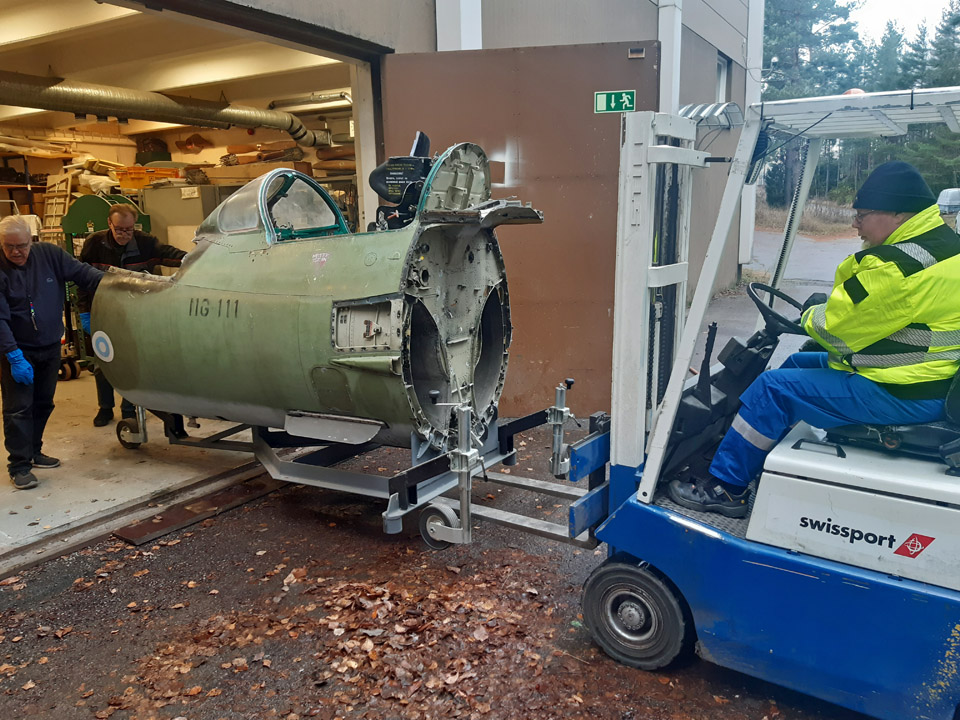
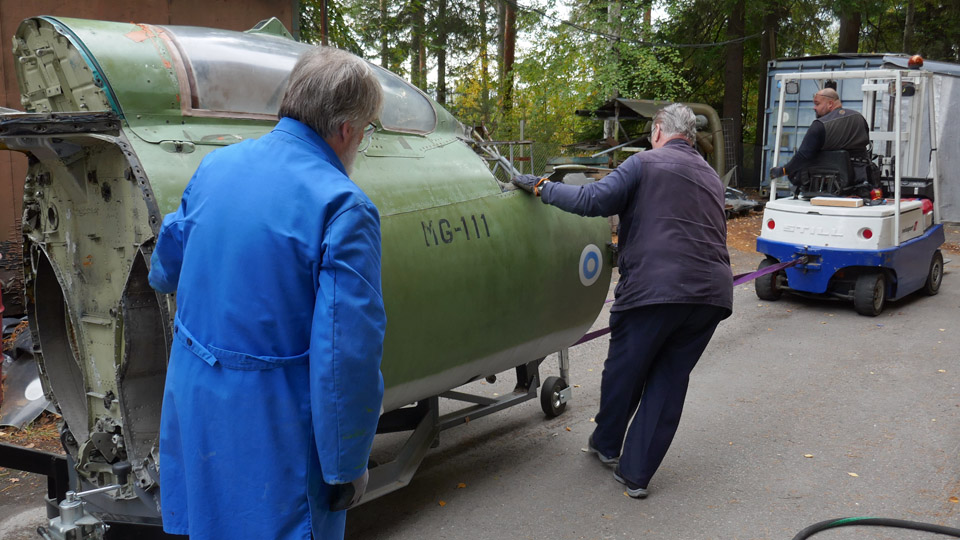
When the equipment and wires outside the cockpit had been disassembled, the cockpit part was towed with a forklift to be washed outside the Finnish Aviation Museum’s restoration workshop. Before using the pressure washer, the feed-through holes to the cockpit were plugged to keep the water outside the cockpit. The wash of the cockpit section was finished using brushes and cloths.
Photos: Antti Laukkanen. Now the cockpit section is waiting to be moved into the Finnish Aviation Museum. There the work will be continued by unfastening the instrument panels and the pilot’s seat, among others. When the simulator equipment is eventually assembled, the unfastened cockpit panels and the pilot’s seat will be returned into their places. Photos: Lassi Karivalo except separately otherwise mentioned. Translation: Erja Reinikainen. |
|
Avainsanat: aviation history, restoration, Tuesday Club, MiG-21BIS, MG-111 |
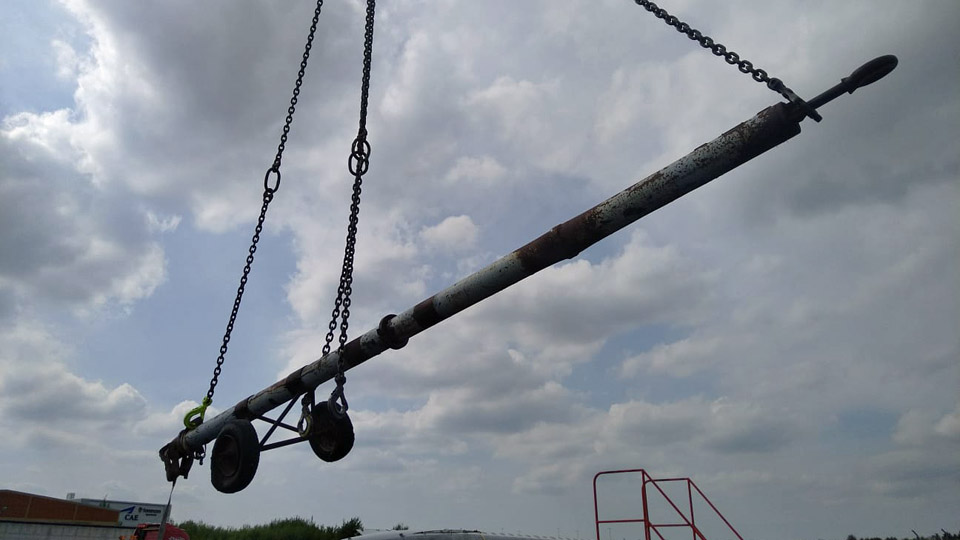
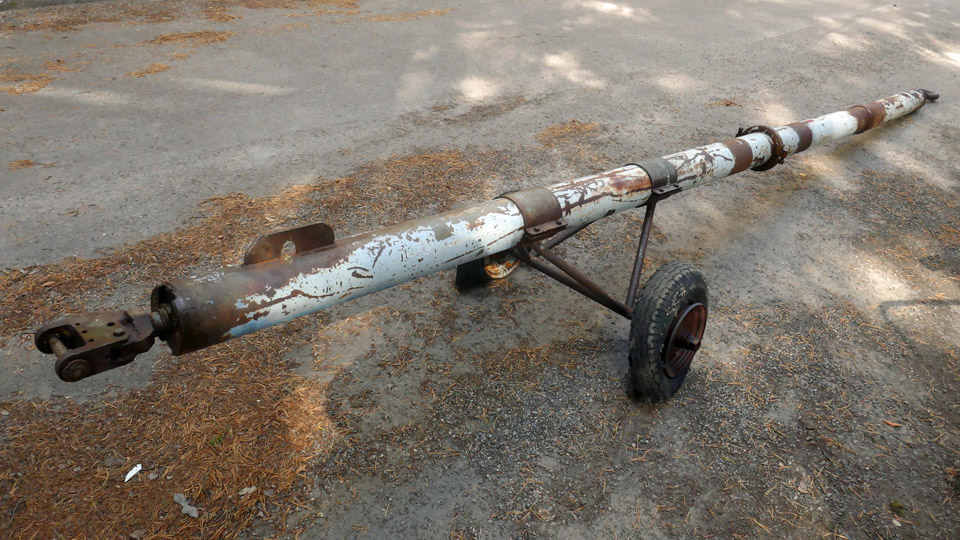
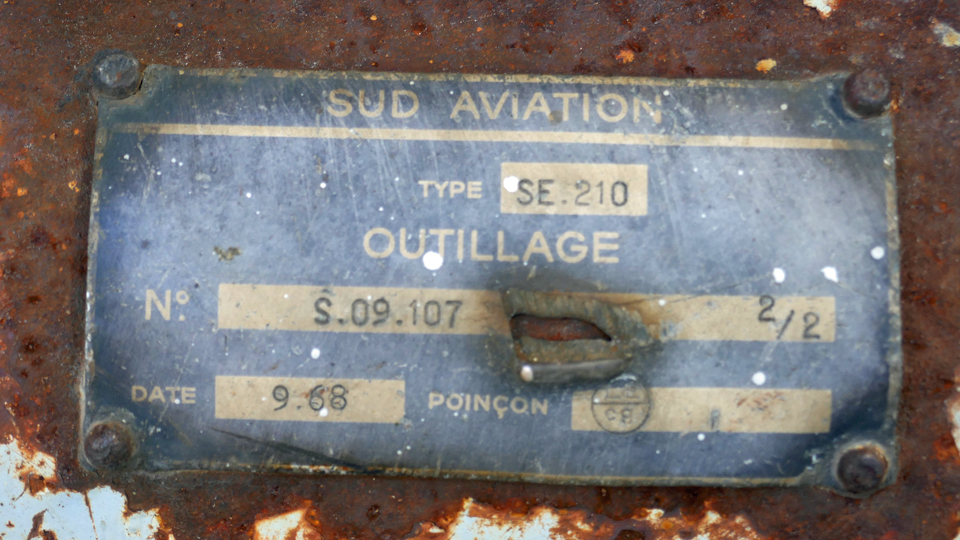
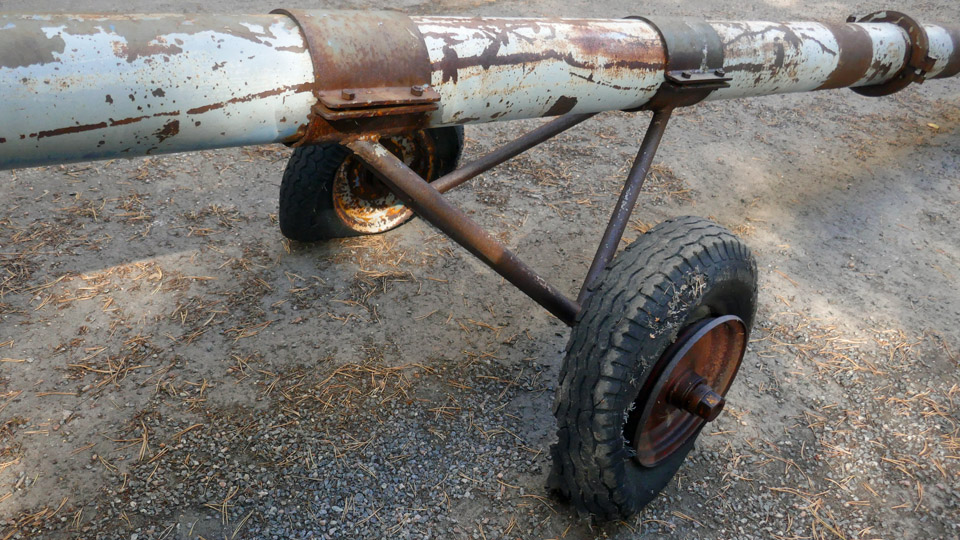
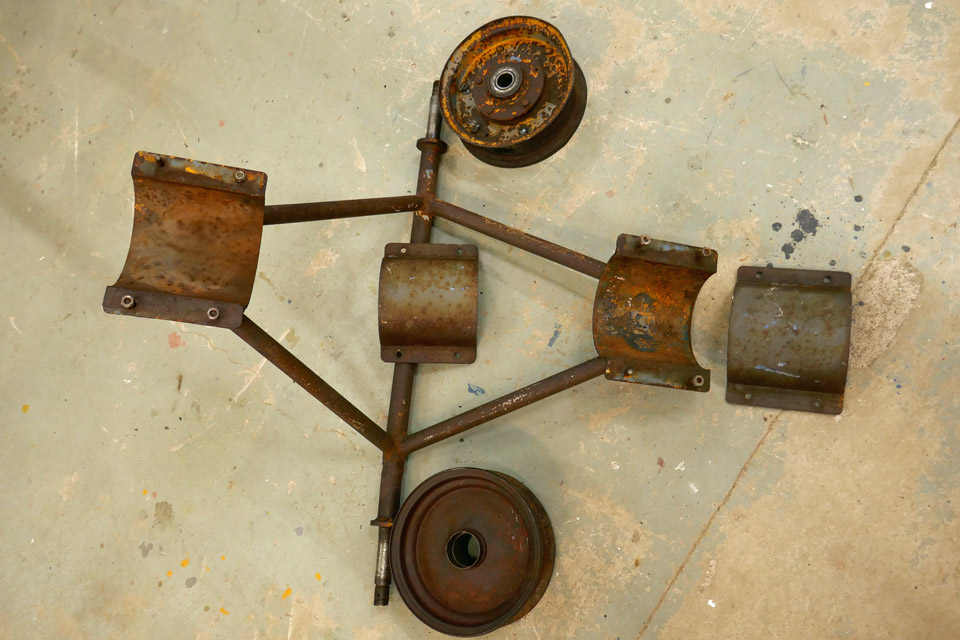
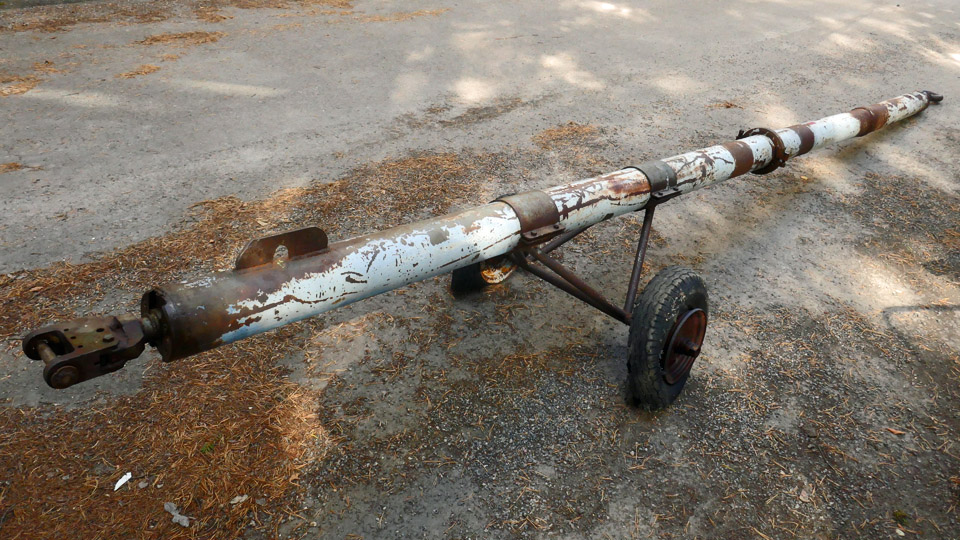
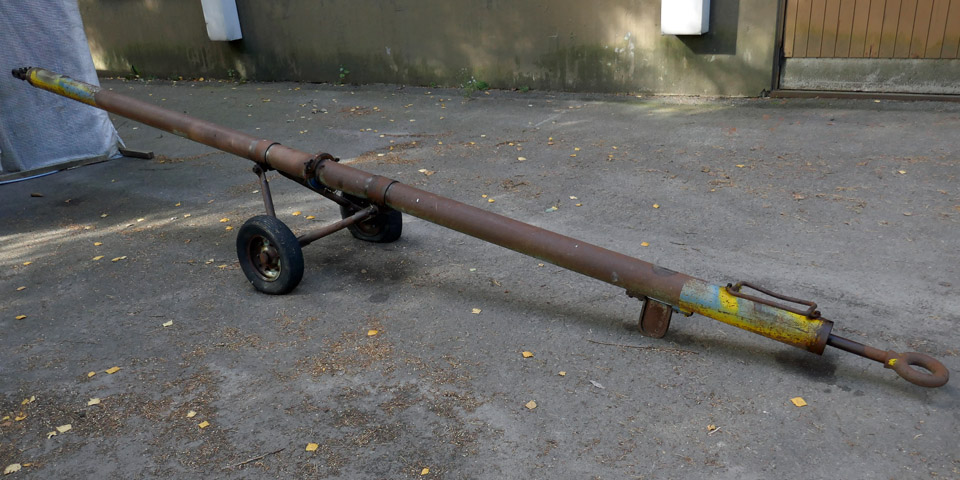
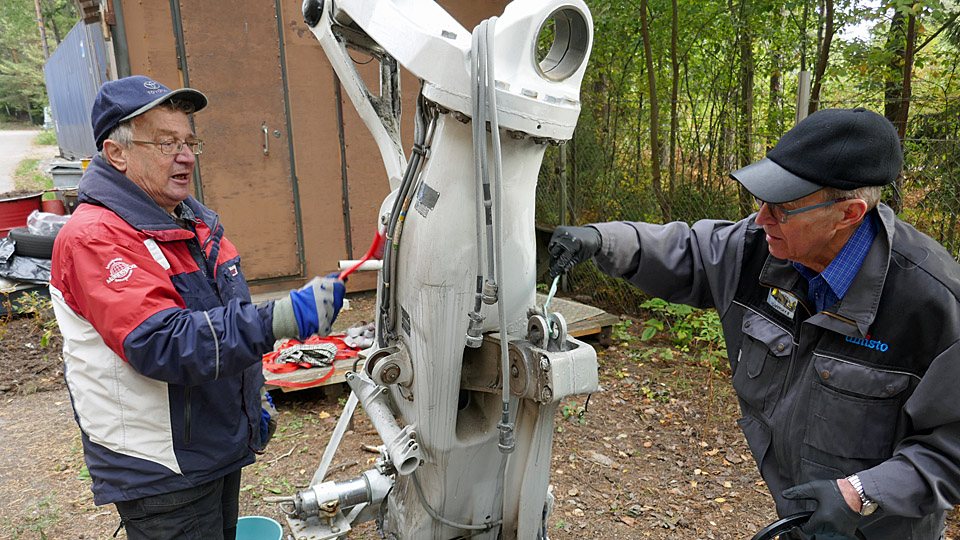
The Caravelle III towbar restoration beganMaanantai 3.10.2022 - Tuesday Club member In the restoration project of the Caravelle III (ex SE-DAF Sven Viking) owned by the Museum Society, which was brought from Arlanda to Turku, there is a small side line – like the proverbial gnat in the soup – of restoring the Caravelle’s derelict towbar. This tow bar is produced by the SUD AVIATION factory and is of the same production type, although of an earlier version, as the Super Caravelle towbar, used by Finnair, restored by the Tuesday Club into the colours of Finnair during the spring of 2022.
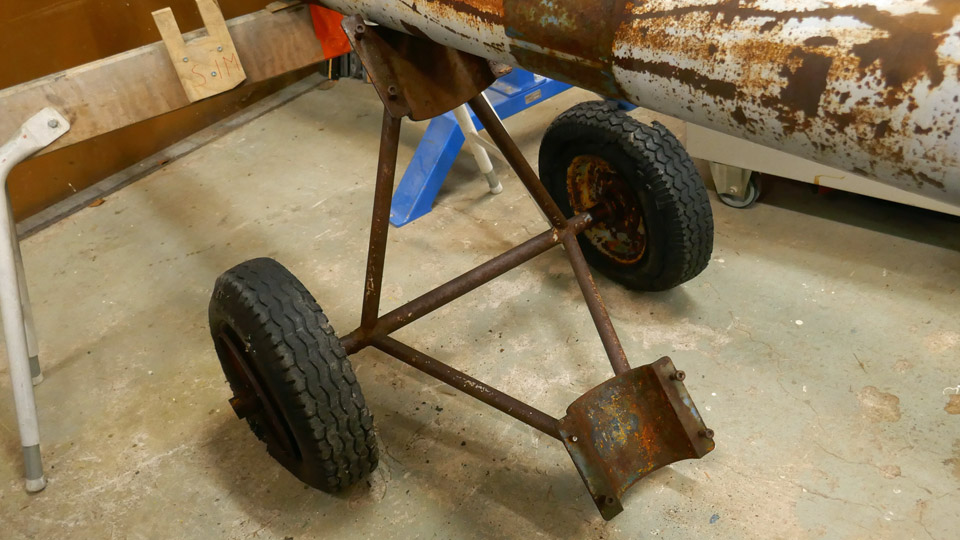
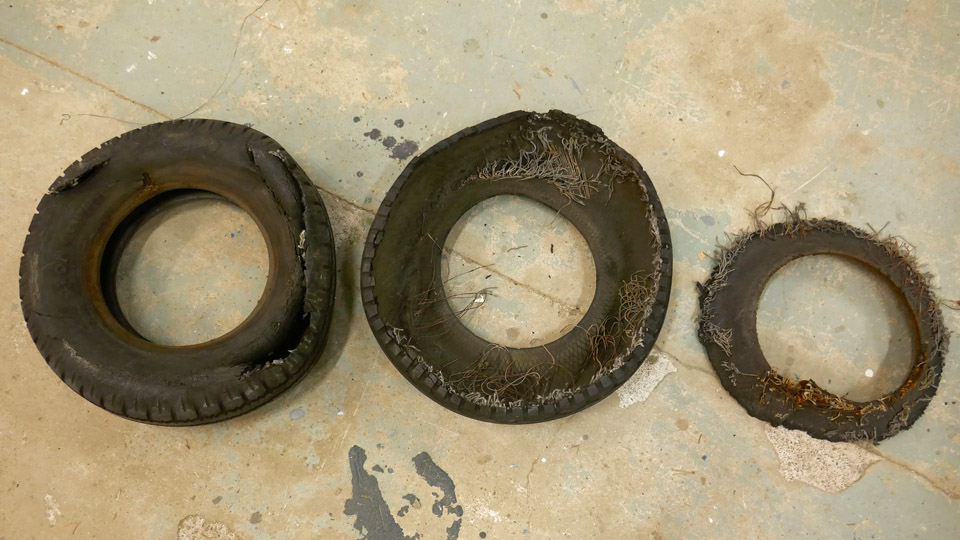
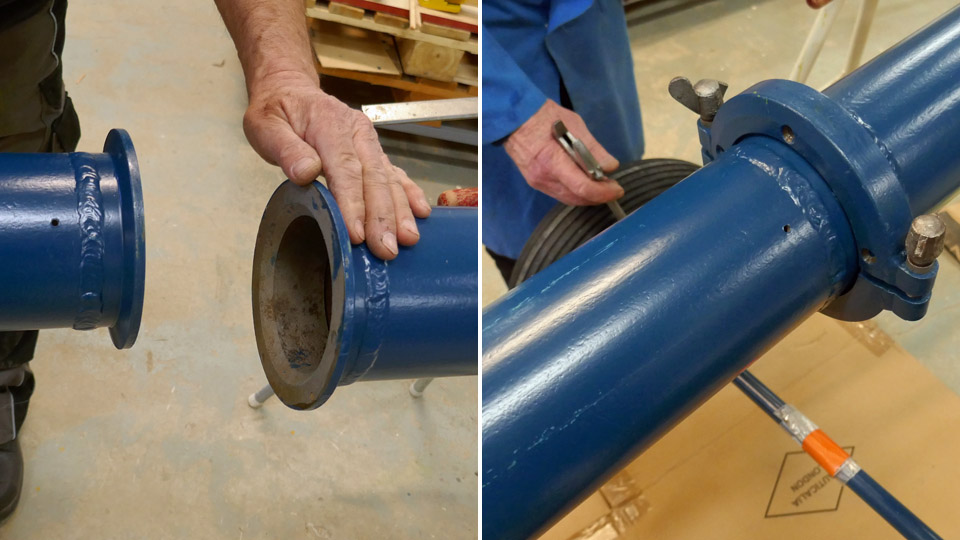
Photo: Pekka Simula. The towbar, brought along with the Caravelle III from Arlanda to Turku, is in much worse condition than the Super Caravelle towbar, which we restored. The rod of the towbar, wheel racks and the wheel rims are covered in thick rust. One of the rims is partly rusted through. The tires are shredded and thus unusable. It is also strange that the rims are quite different from one another. The rim halves of one wheel have been welded to form a solid rim. The halves of the other wheel rims have bolted together. The separate bearing hub is also attached to the rim with bolts.
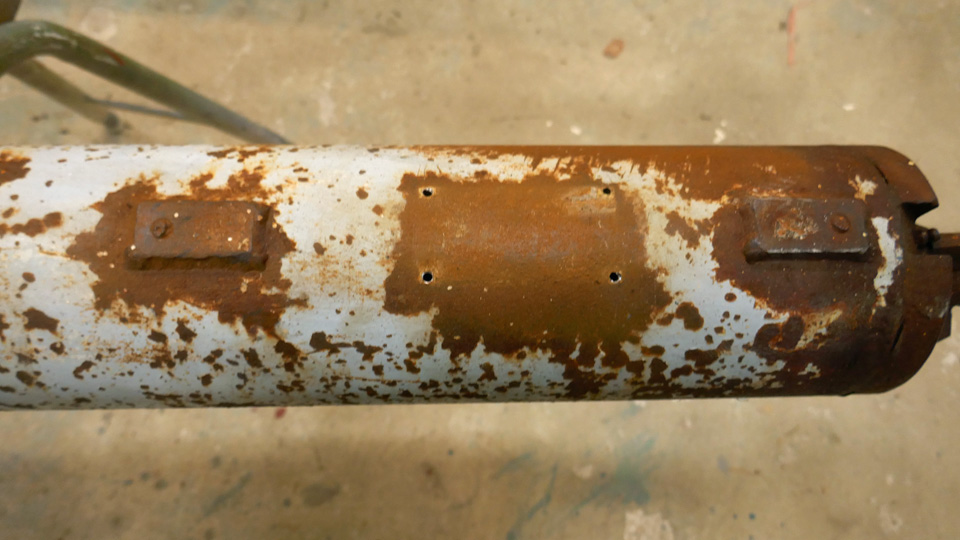
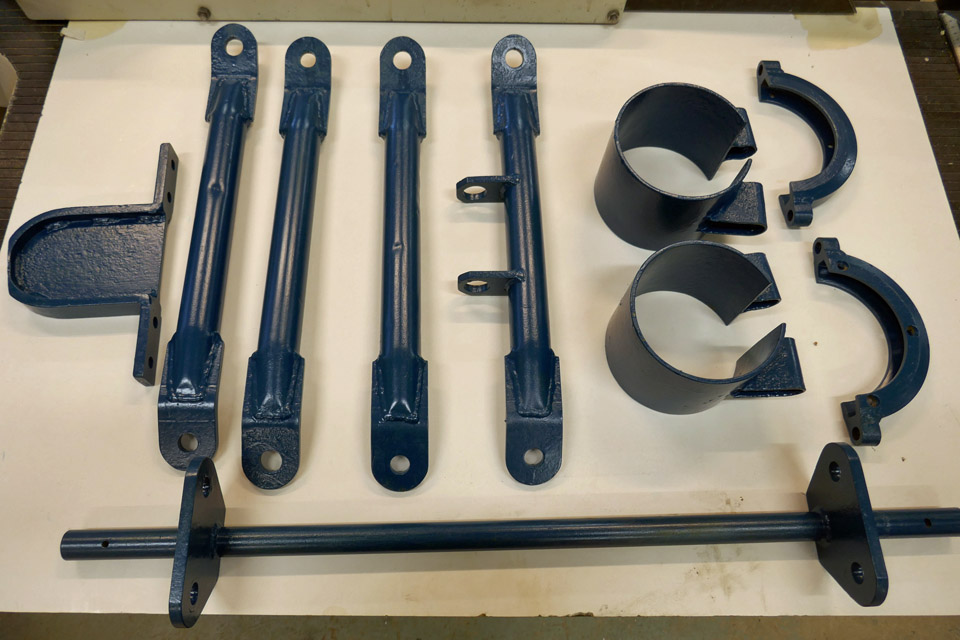
Both ends of the tow bar lack the rectangular handle bars made of metal rods. Only the places of the handle bars with their cut-off fastening screws are visible. A supporting flange has been welded to the rod, which tells us that the rod has been broken at some stage. Perhaps it’s been run over. We really have lots of work cut out for us in the future to restore the rod.
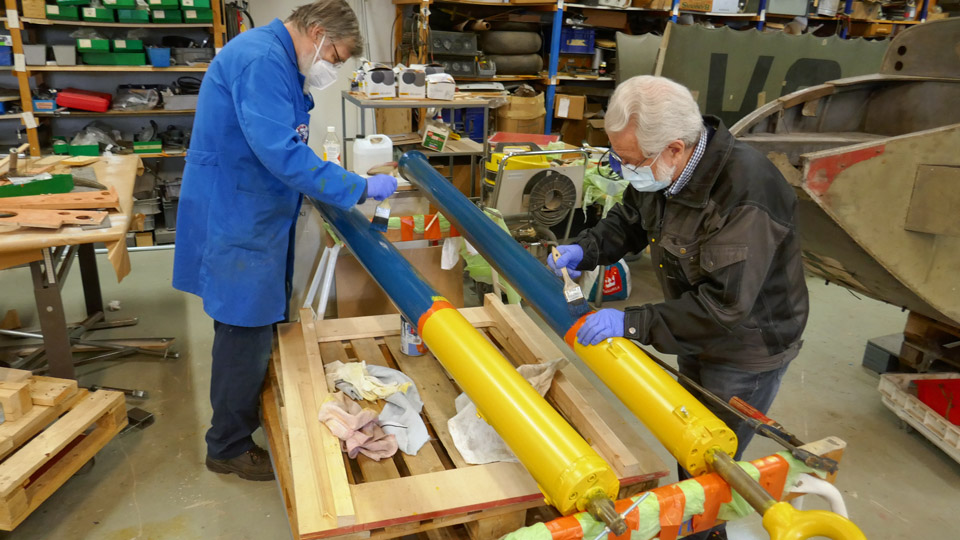
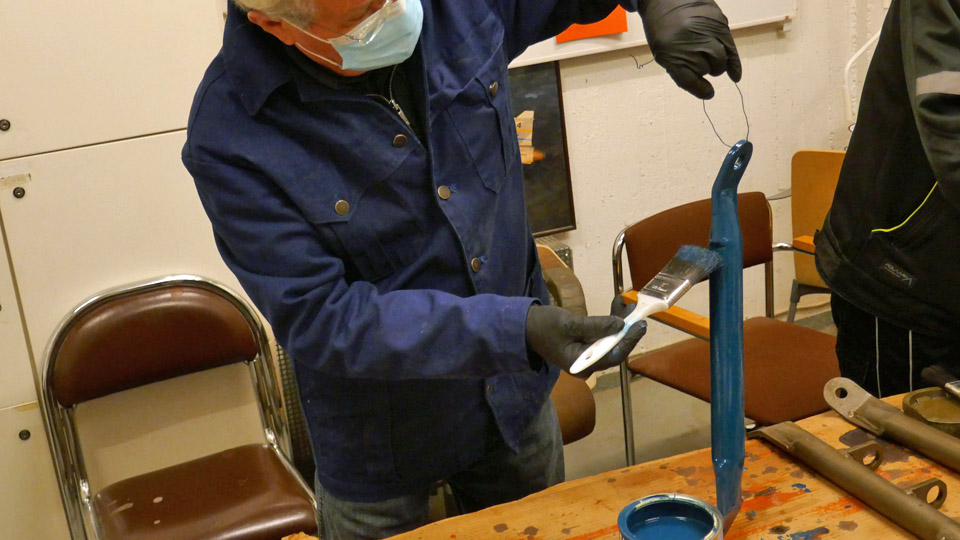
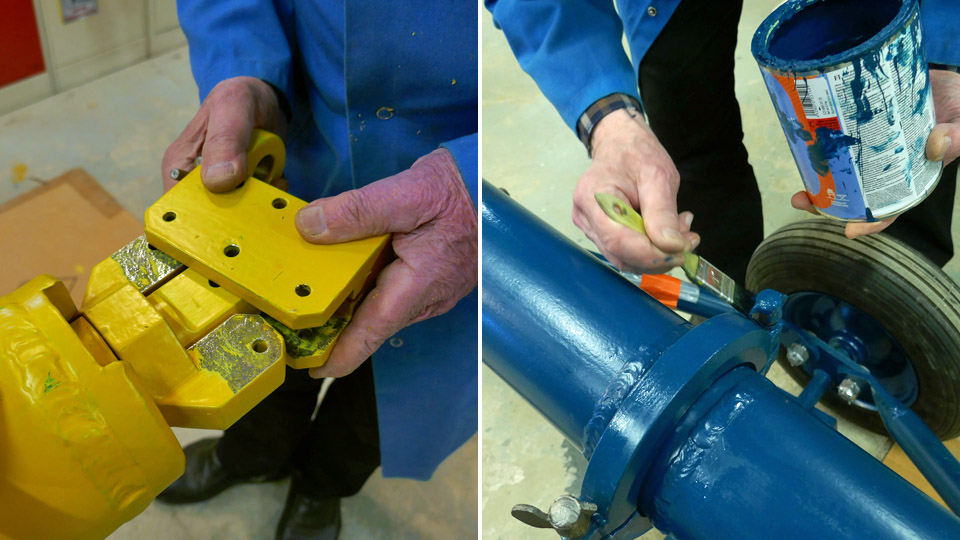
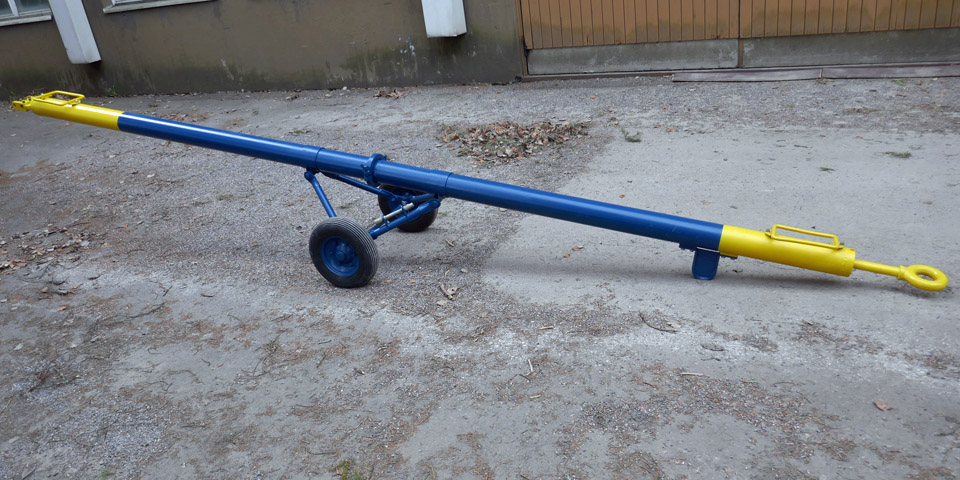
The Caravelle III towbar will not be restored in the SAS livery. It will be made to look like the towbar used by Finnair. Thus the livery of the towbar will be in harmony with the ex-SAS Caravelle III, which will be painted in Finnair colours and is to be put on display near the terminal of Turku Airport. The first Finnair jet airliners were of the Caravelle III type.
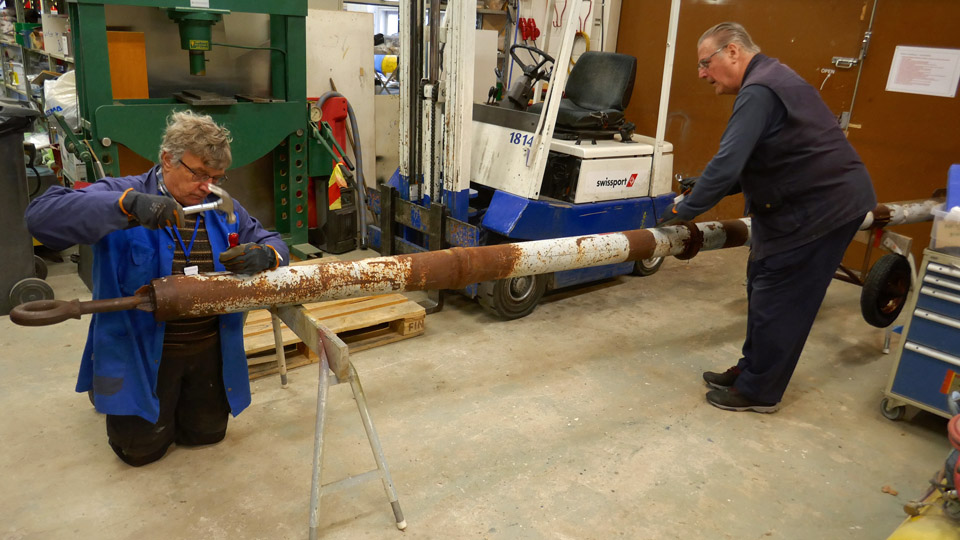
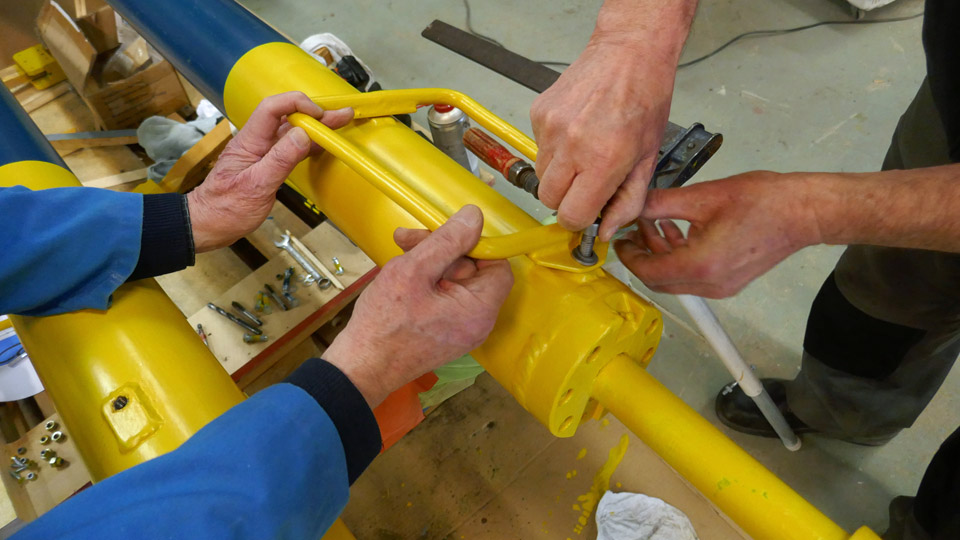
During the restoration the towbar will be dismantled. The rusty parts will be cleaned either by sand blasting or bathing in 30% phosphoric acid. The towbar will be painted “Finnair Blue “, apart from the ends. They’ll be painted with yellow high visibility colour. Before we started to unfasten the parts of the rusty towbar, the rusted bolts and nuts were sprayed with rust dissolving WD or CRC multi-purpose spray several times.
The dismantling began with loosening the manufacturer’s plaque, which was attached to the body of the towbar, in order to prevent it from getting damaged in the sand blasting of the body. To loosen the plaque the rusted and jammed screws in the corners were bored out.
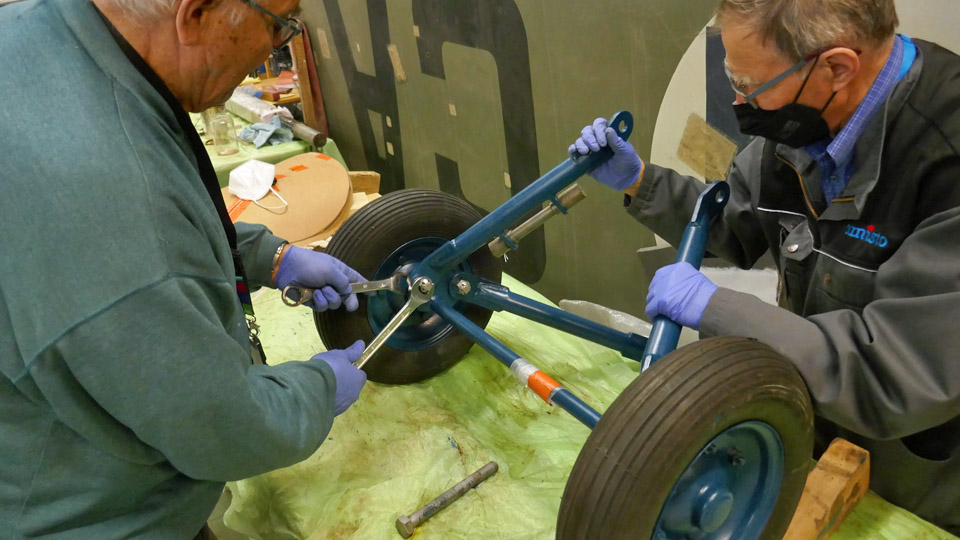
At the same time the dismantling of the towbar’s two wheel racks was started. The nuts of the wheel rack attachment flange bolts were surprisingly easy to open and the rack unfasten from the tow bar. The unfastening of the wheels from the axles followed after this.
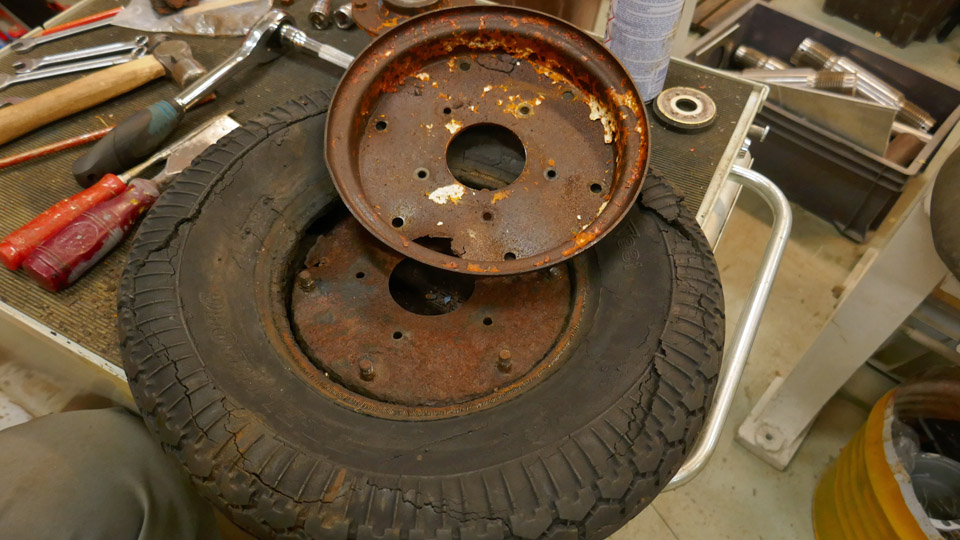
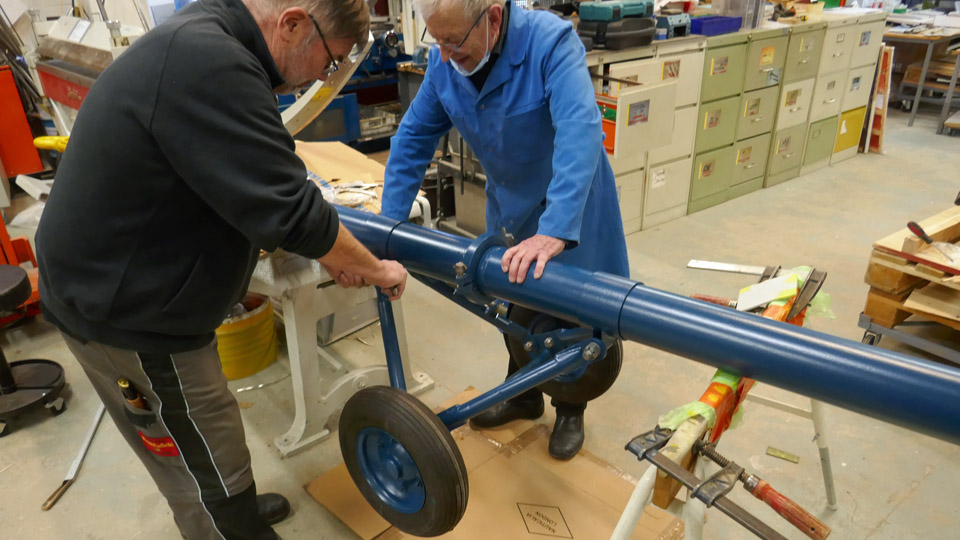
One of the wheels departed fairly easily from its axle. Also the bolts uniting the rim halves could be detached, ditto the bearing hub bolts. However, taking the tyre off the rim proved problematic. The tyre was as if glued to the rim from its one side. In the end the only way was to cut the tyre along the strengthening wire on the side of the tyre with a keyhole saw and yank loose the wire, that was glued to the rim. We found out that the wire in the side of the tyre had simply rusted solid to the rim.
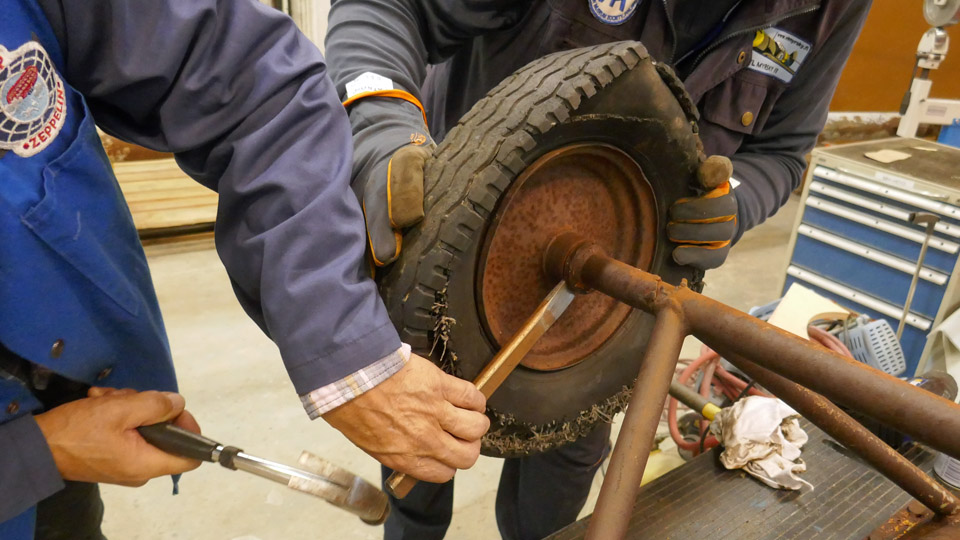
If the problem with one wheel was detaching the tyre from the rim, the other one was difficult to detach from its axle. Finally by using brute force we managed to dislocate the wheel, but at this effort the wheel bearings broke. The tyre was easy to take off from this wheel. The wheel racks with their rims are now ready for rust removal.
Because the rim of one wheel is partly rusted through, and the bearings of the other were destroyed when dislocating the wheel, we have to consider acquiring new wheels for the Caravelle III tow bar. Decision-making time will come, when we see what the rims look like after sandblasting. Photos: Lassi Karivalo except if otherwise mentioned. Translation: Matti Liuskallio. |
|
Avainsanat: aviation history, restoration, Tuesday Club, Caravelle |
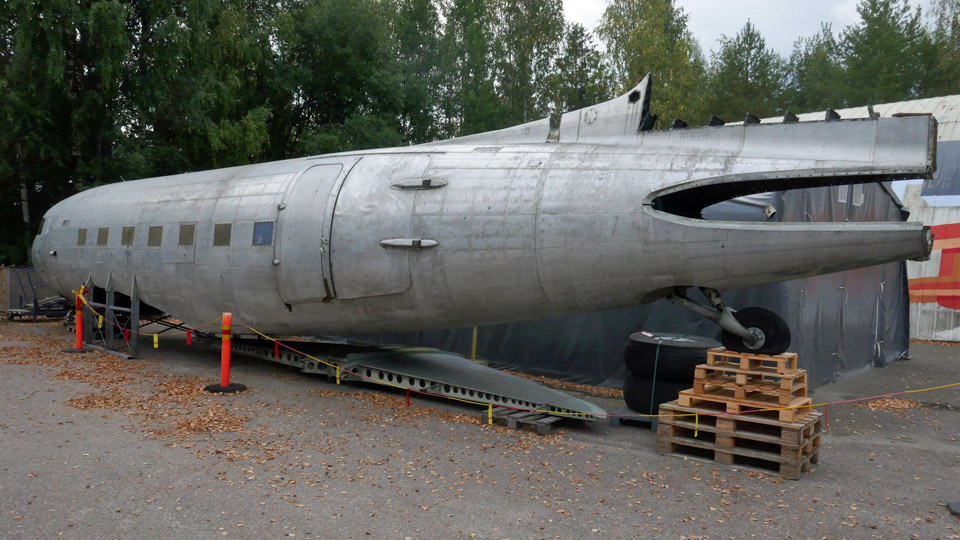
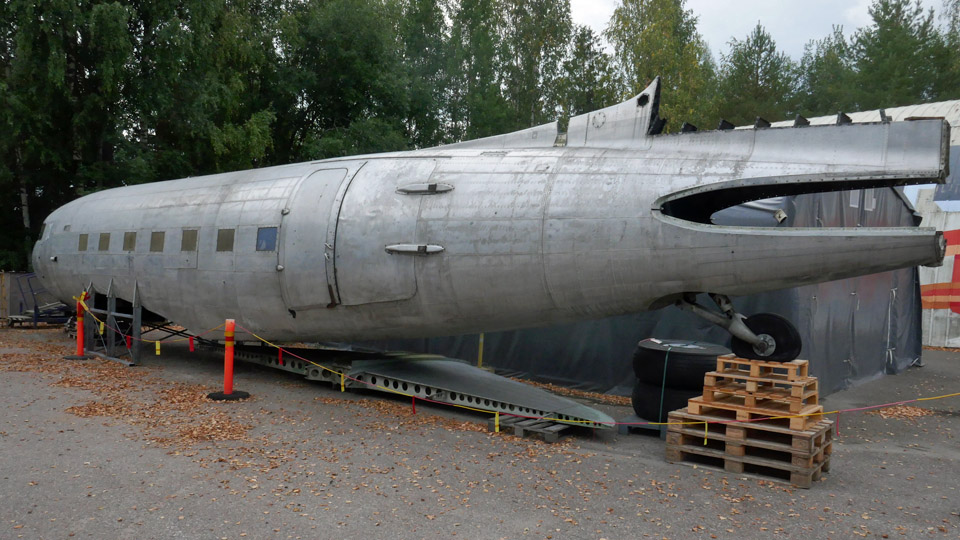
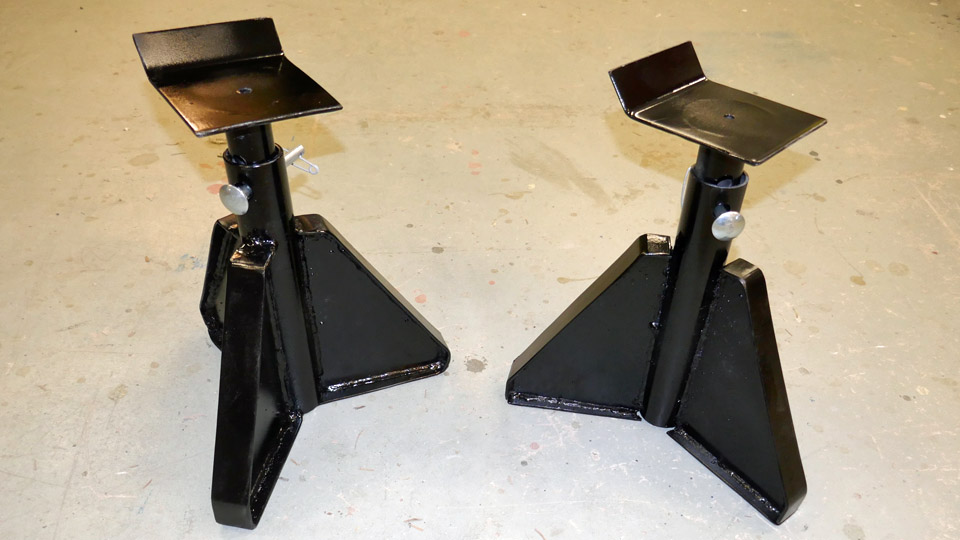
The Tuesday club is starting to restore the DO-5 fuselageSunnuntai 11.9.2022 - Tuesday Club member Aviation Museum Society Finland owns a DC-3 (C-47) DO-5 fuselage with elevators and rudder. The wings are still lacking. The fuselage of the DO-5 came to the possession of the Aviation Museum Society in 2018, otherwise the fuselage would have ended in the scrap yard. The ex- Air Force DO-5 last served as a ground training device with the parachute jumping school at Utti. The DO-5 fuselage owned by Aviation Museum Society has already been used as prop in two movies.
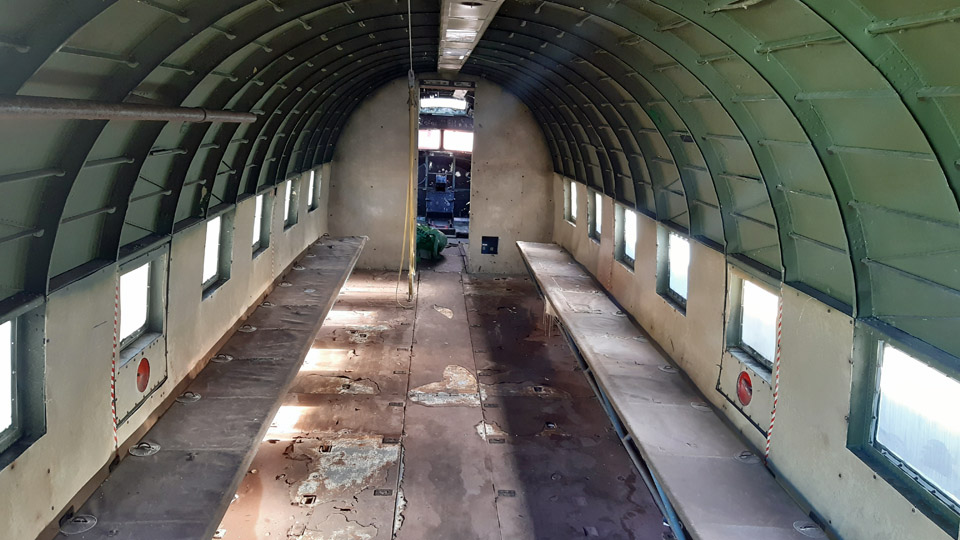
The intention of Aviation Museum Society is to refurbish the DO-5 fuselage so that it could be presented in different outdoor occasions. It would then be possible to get acquainted to the interior of the aircraft. The passenger cabin of the fuselage will be preserved in its existing parachuter training appearance with the canvas benches along the walls. The fuselage will be available to film makers’ needs in the future, too.
The fuselage refurbishment of DO-5 is beginning at the Aviation Museum Society’s Tuesday Club. This is why the fuselage is on the yard of the Finnish Aviation Museum. Well, it will not be ready tomorrow by far, for the club members have their work cut out for them with the refurbishment of the fuselage. But, maybe by the end of spring 2023 the work will be so much advanced, that we could dare to take the fuselage on display at the National Air Show at Turku. Well, time will show.
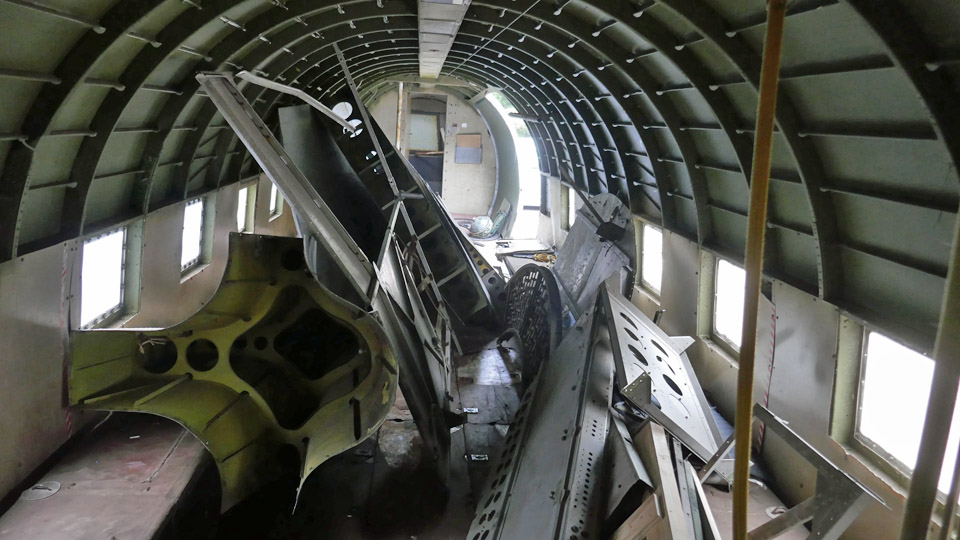
The beginning of the autumn season for the Tuesday Club has been spent on preparations for the DO-5 fuselage refurbishment. One of the tasks will be the removal of the vertical stabilizer, rudder, elevators, the rear cone, nose cone and other parts of the aircraft that were stored in the cabin, to a storage container which was brought to the vicinity of DO-5. The horizontal stabilizer, which was stored under the fuselage, was also moved into the container. The parts that had been in the cabin had to be taken away, because they filled the fuselage so that moving in there was difficult, dangerous even, not to mention working in the cabin during the restoration process.
In the restoration of the fuselage, we will concentrate at first on the cockpit. There we’ll have to, amongst other things, to seal the windows and possibly replace them partly with new ones, to detach the pilots’ seats for refurbishment, to clean the cockpit surfaces and remaining equipment and to paint the wall surfaces.
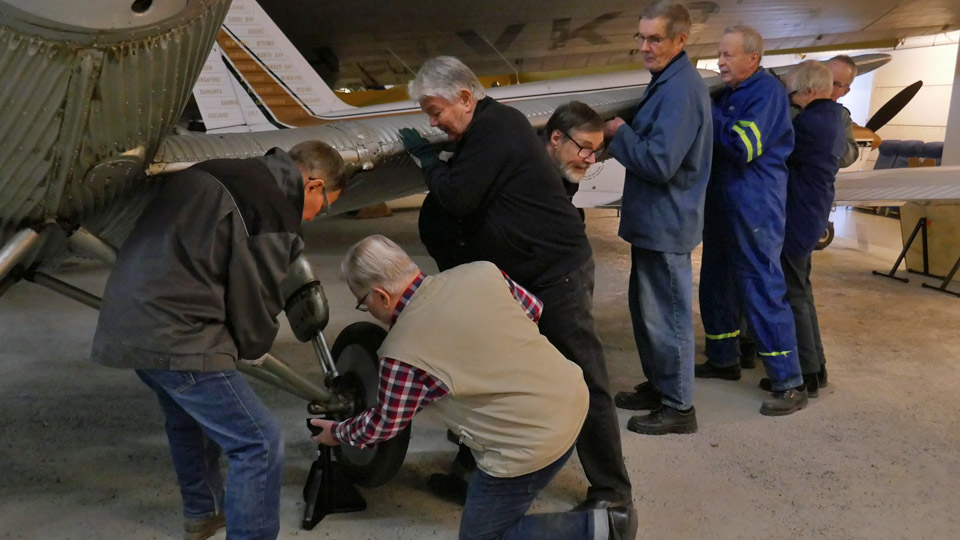
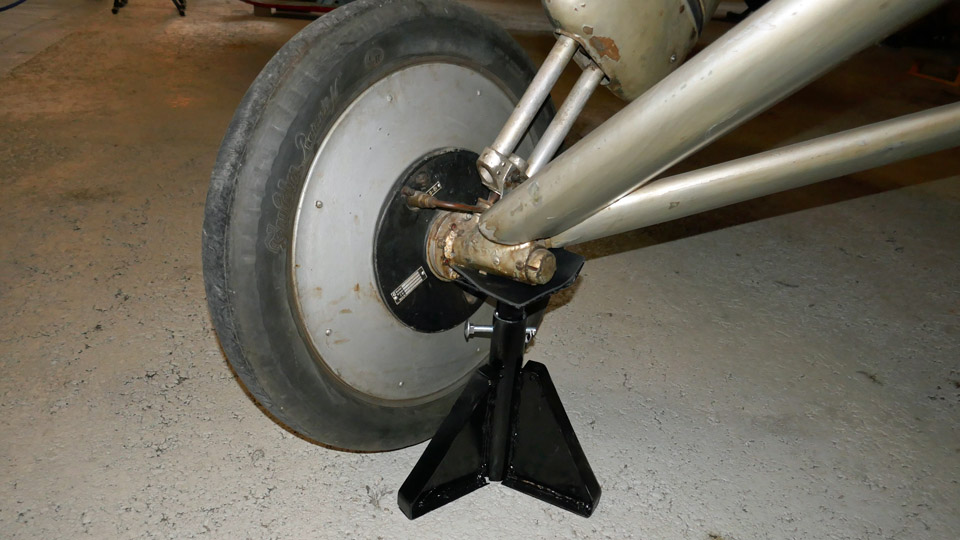
We have already accomplished something in the field of restoring, when the legendary DC-3 mechanic Pauli “ Speedy” Fallström replaced the broken tail wheel with a new one. Photos: Lassi Karivalo Translation: Matti Liuskallio |
|
Avainsanat: aviation history, restoration, Tuesday Club, DO-5;DC-3, C-47, Dakota |
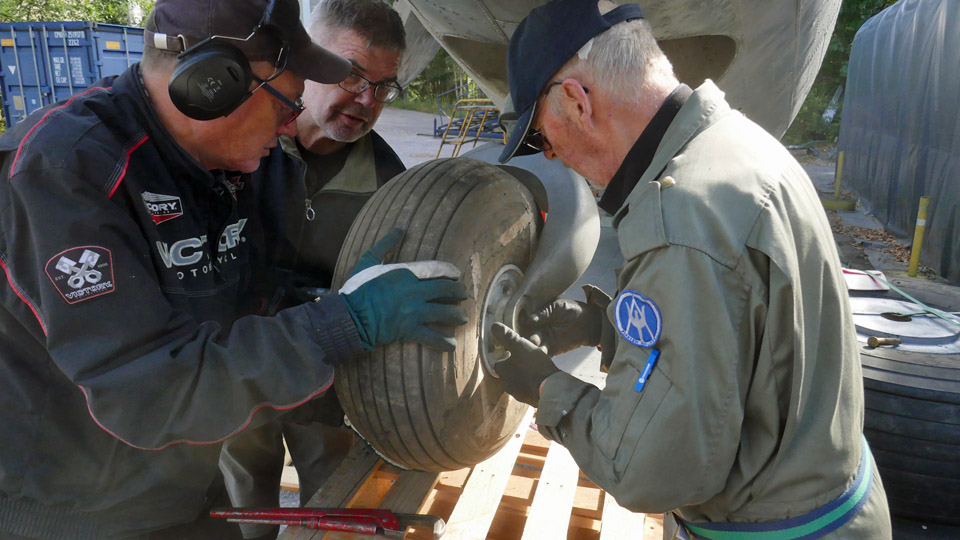
The autumn season for the Tuesday Club kicked offSunnuntai 4.9.2022 - Tuesday Club member The Tuesday club summer break ended on August 30th,2022, when club members gathered at the Finnish Aviation Museum to continue the projects left from the spring and begin a few new ones. The restoration of VL Myrsky II (MY-14) went on through the summer apart from a few weeks’ break.
The Caudron C.59 conservation goes forward amongst other things with getting the fabric covering of the lower wings ready and repairing the leading edge damage, covering the bare horizontal stabilizer and one of the elevators, and the refurbishment the 1920s aircraft wheels, which were obtained from the Air Force Museum. The Caudron’s fuselage, which had been under refurbishment at the Tuesday Club was returned to the Päijänne-Tavastia Aviation Museum at Vesivehmaa on August 30th to wait for a time when the conservation of the badly crackled paintwork of the fuselage can be fully attended to.
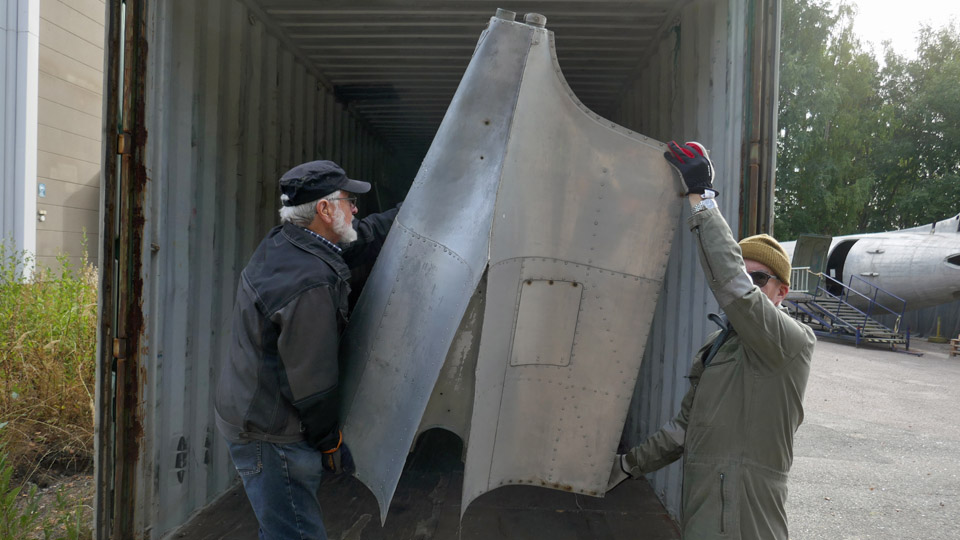
When the MiG-21BIS (MG-111) was dismantled on the yard of the Finnish Aviation Museum to be scrapped, Aviation Museum Society salvaged the cut-off cockpit part of the fuselage to be built as a MiG-21 simulator. The task of the Tuesday Club is to dismantle the gadgets and equipment outside the cockpit to make space for the simulator hardware. We started this work already at the end of the spring, and now we will continue to prepare the part of the fuselage with the MG-111 cockpit to be made into a simulator.
In 2018 Aviation Museum Society salvaged from being scrapped the fuselage of DO-5, an ex- Air Force DC-3 (C-47). The fuselage had last served with the parachute training school at Utti as a ground instruction device. The work of the Tuesday Club is to repair and tidy the cockpit, which is rather dilapidated and lacking equipment, seal the cockpit windows and renew the cabin widows, now opaque.
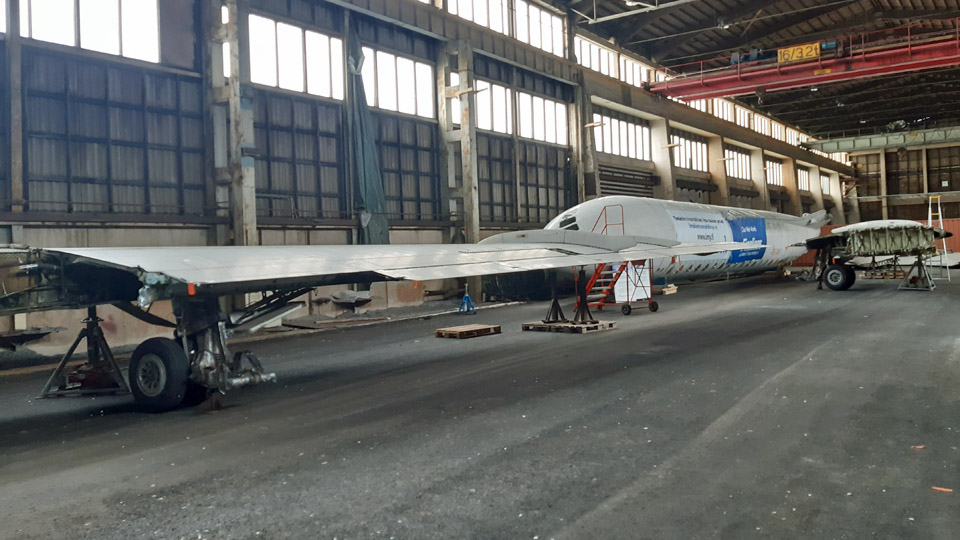
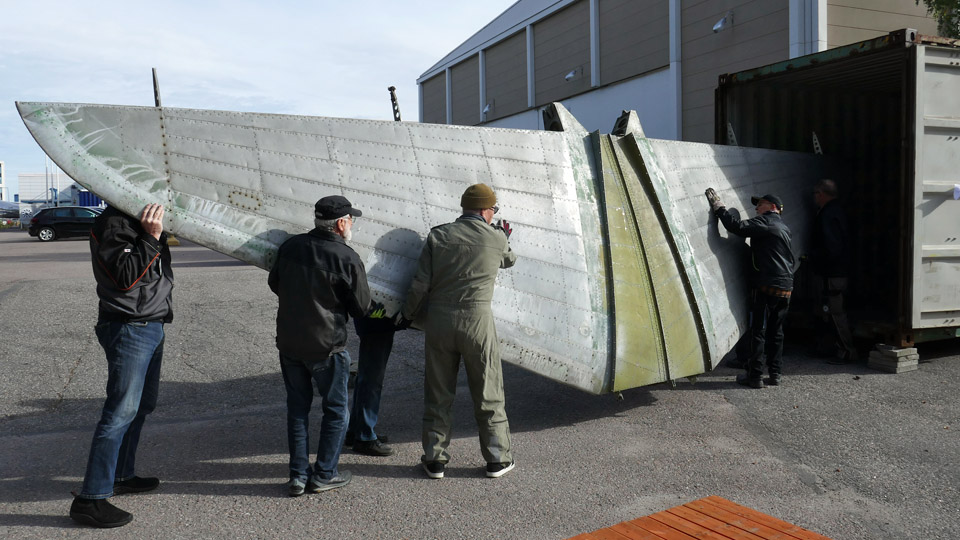
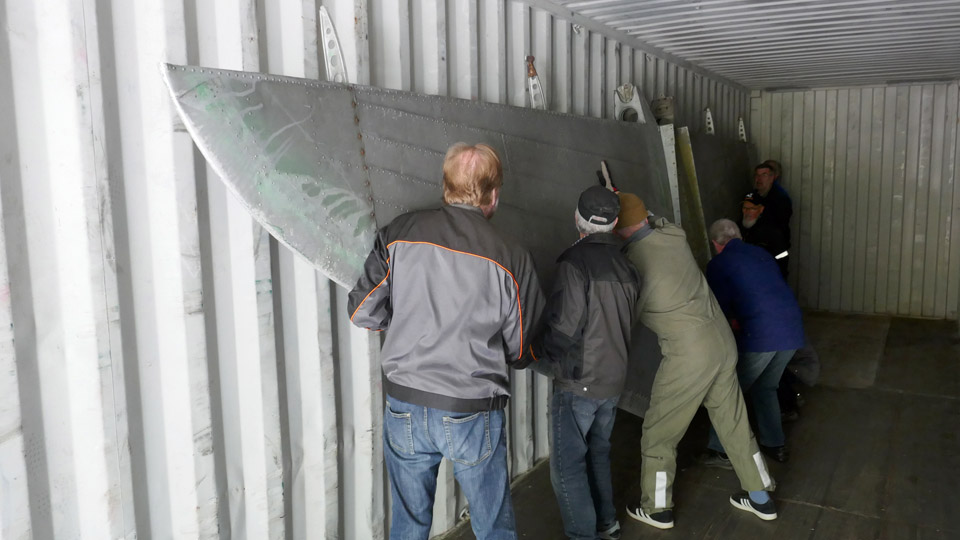
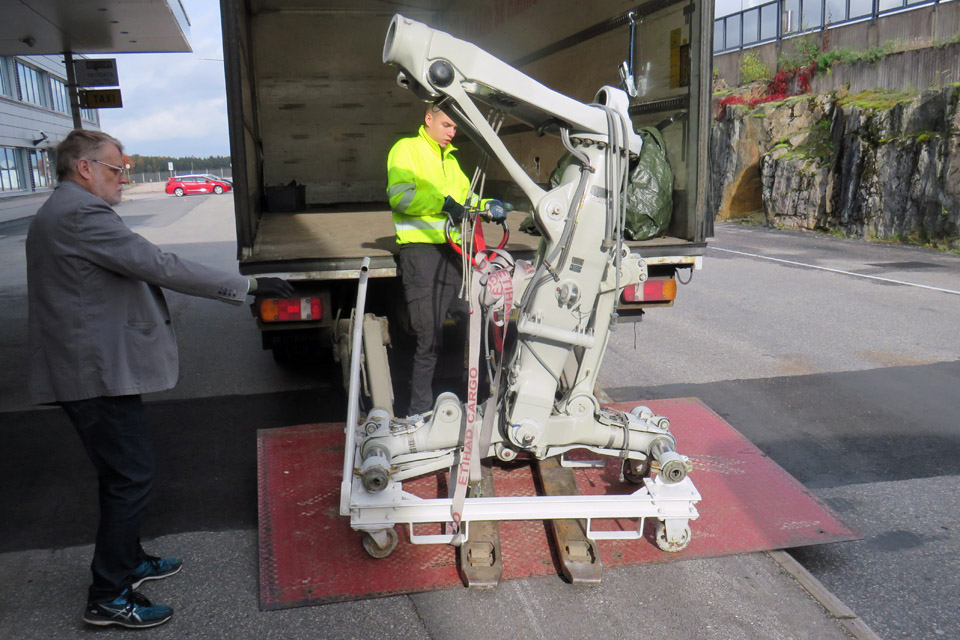
The Caravelle III (SE-DAF), acquired by Aviation Museum Society from Sweden, arrived on Friday August 19th from Arlanda to Turku and was taken to be refurbished into a harbour hangar in Pansio. At its time, the aircraft will be on display in Finnair colours by the terminal building at Turku Airport. Finnair used Caravelle III aircraft before changing into Super Caravelles.
The aircraft had stood by the side of Arlanda Airport since 1974 and was in a bad shape, as could be expected. The task for the Tuesday Club is to repair those damaged parts that for their size are suitable to be repaired in the repair shop of the Finnish Aviation Museum. These include, amongst other things, the somewhat damaged leading edge of the right wingtip. We also restored the Caravelle III tow bar, brought to Turku with the Caravelle, which was in a poor condition.
As usual, many other tasks will appear during the autumn season for the Tuesday Club to do, for the benefit of the Aviation Museum as well as the Aviation Museum Society. Photos: Lassi Karivalo Translation: Matti Liuskallio. |
|
Avainsanat: aviation history, restoration, Tuesday Club |
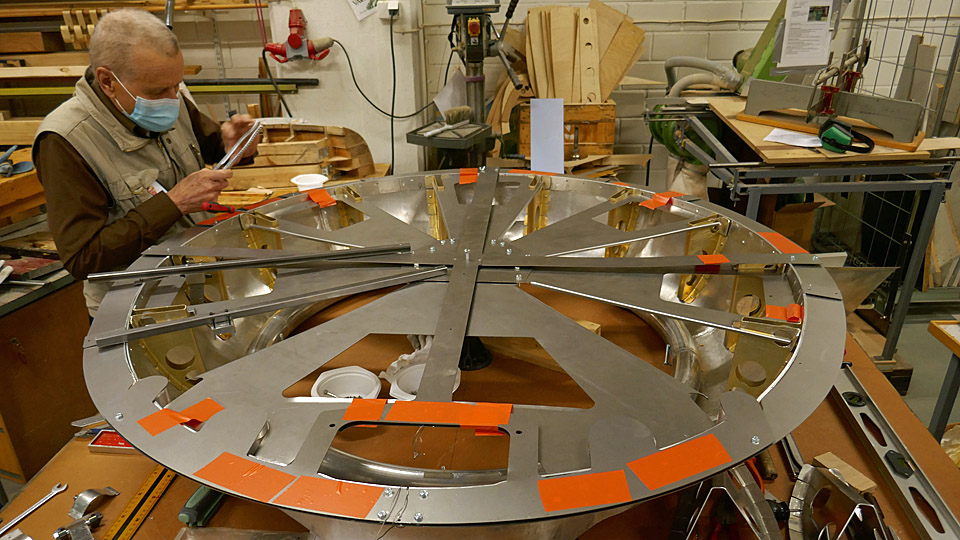
The fitting of Myrsky's NACA-ring bracket formers and brackets for rivetingTiistai 19.7.2022 - Tuesday Club member In the restoration of VL Myrsky II the construction of the engine cowling or NACA ring front part, which is demanding, has been under work already for a couple of years. The Myrsky engine cowling consists of the engine covering NACA ring’s solid front and rear parts and the openable engine cowlings between them. This blog deals with the installing of the bracket formers to be riveted to the solid front part of the NACA ring. Later in this blog the solid front part of the NACA ring will be called NACA ring for simplicity. The Myrsky’s NACA ring has proved to be very difficult to make, and we have not managed to avoid extra work. This was caused by amongst other things the uncovering of the lost Myrsky major series NACA ring drawings at the end of last year. They differ especially in the upper part from the initial series Myrsky’s NACA ring drawings, according to which we have been building the MY-14 NACA ring. The difference between the drawings was, that in the major series NACA ring the diameter of the upper part of the ring is larger than that of the initial series. Because of this, the NACA ring that we had built had to have its upper part diameter increased, so that it would correspond to the shape of the major series shape of MY-14. The enlargement was possible by forging the upper part of the aluminium ring to the measurements of the major series. There are 14 bracket formers in the NACA ring altogether. Of those, ten are situated in the part of the NACA ring, which equates the rotation block. Four bracket formers are situated aside from the rotation block in the expanding upper part of the NACA ring. The opening of the air horn and the flame tubes of the four machine guns are situated in this area.
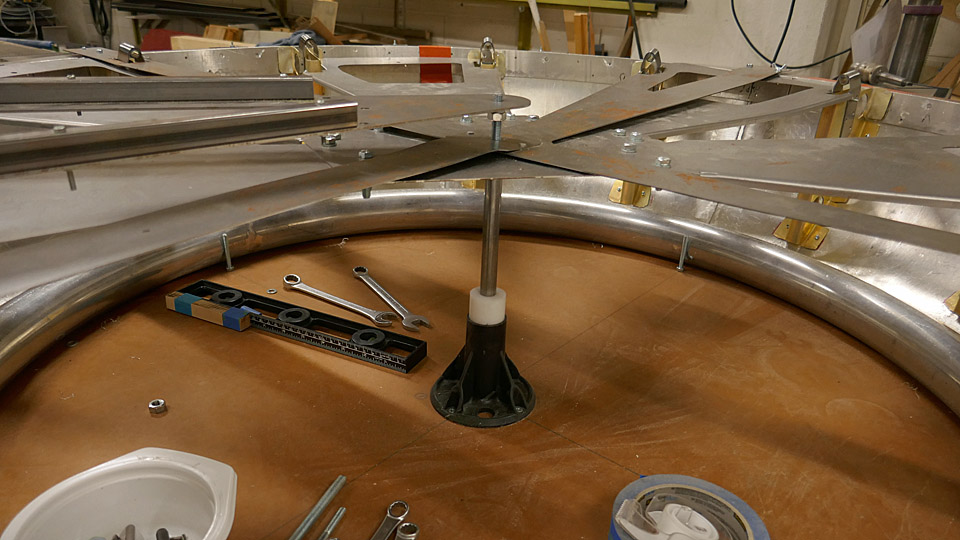
At the same time a jig was made out of a steel plate, to assist in focusing the bracket formers to their places. With the aid of a set up jig, which was made out of steel plates and locked in the “central hub” of the assembly table, two bracket formers can be positioned into place. After that the jig is moved forward to position and install the next bracket formers. The positioned bracket formers were fastened to the NACA ring with a couple of small bolts. The final fastening will be done by riveting.
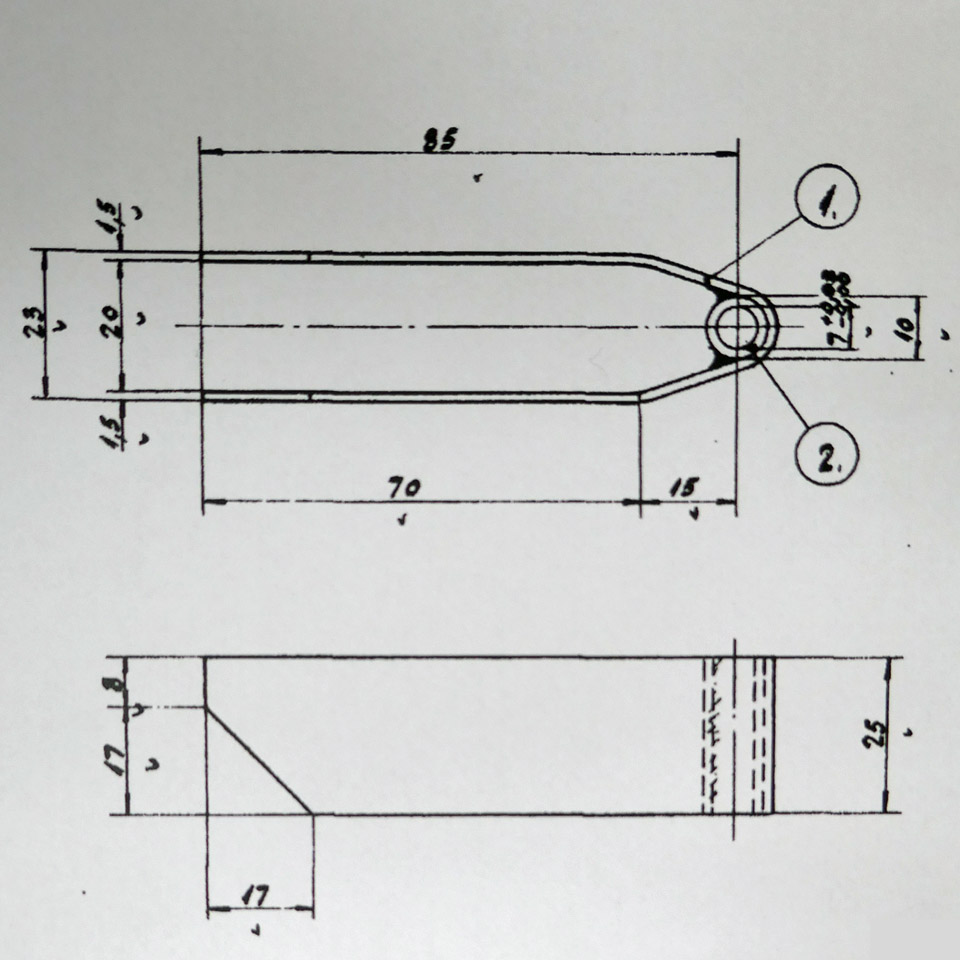
When the chromated 10 bracket formers had been installed, the actual brackets were installed at their tips, with which the NACA ring is locked with connection pieces to the eyes of the valve housing of the engine. The bracket on the former is a prong-like piece, bent from 1 mm steel plate, which has a welded socket for the fastening bolt at the end.
The brackets are installed at the end of the formers at an angle of 7.5 degrees. So they will meet the valve housing eyes to fasten the NACA ring to the engine. The brackets of the formers and the eyes of the valve housing are locked to each other with connecting pieces. The connecting pieces are fastened with bolts to sockets at the end of the former and with two bolts to the holes of the eyes in the valve housing.
When all ten chromated bracket formers with their brackets had been installed in place, the shaping work of the four bracket formers and their brackets to be installed on the upper part of the NACA ring was started. The bracket formers by the outer flame tubes are distinctly shaped more open-angled, compared with the other V-shaped bracket formers, to enable the flame tubes inside them. The bracket formers that are fixed on either side of the air horn differ from the other bracket formers in shape. In a way they are only half-sized compared with the other V-shaped formers.
First the open-angled bracket formers at the flame tubes were shaped to be installed. They were fastened tentatively in place with the aid of a jig, made especially for these two brackets. After this the shaping of the prongs, attached at the end of the bracket formers with sockets, so that they could be shaped into the form of more open bracket formers. The position of these brackets differs from the other bracket formers so that the bracket is right at the top of the bracket former. The installing of the bracket formers of the NACA ring upper part are still under work. Photos: Lassi Karivalo Translation: Matti Liuskallio. |
|
Avainsanat: aviation history, restoration, Tuesday Club, MY-14, VL Myrsky |
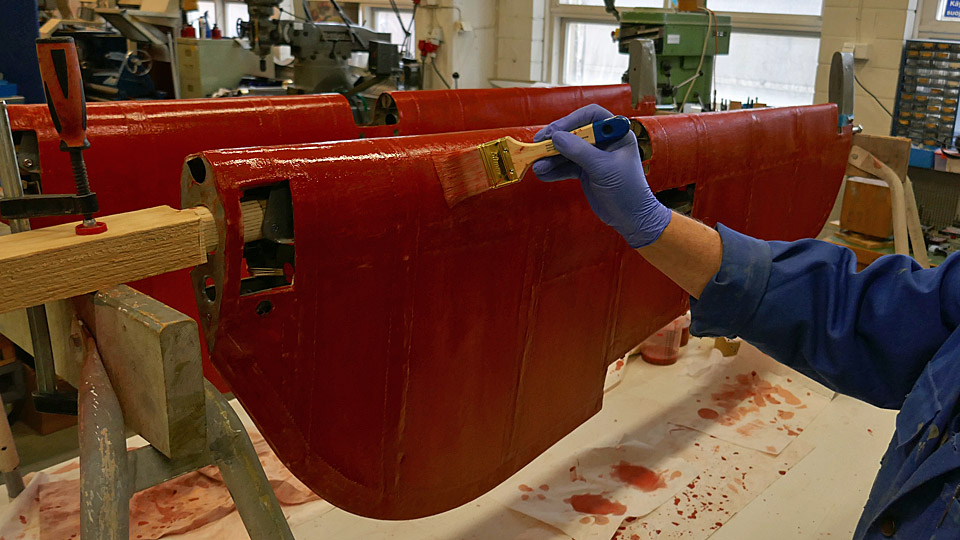
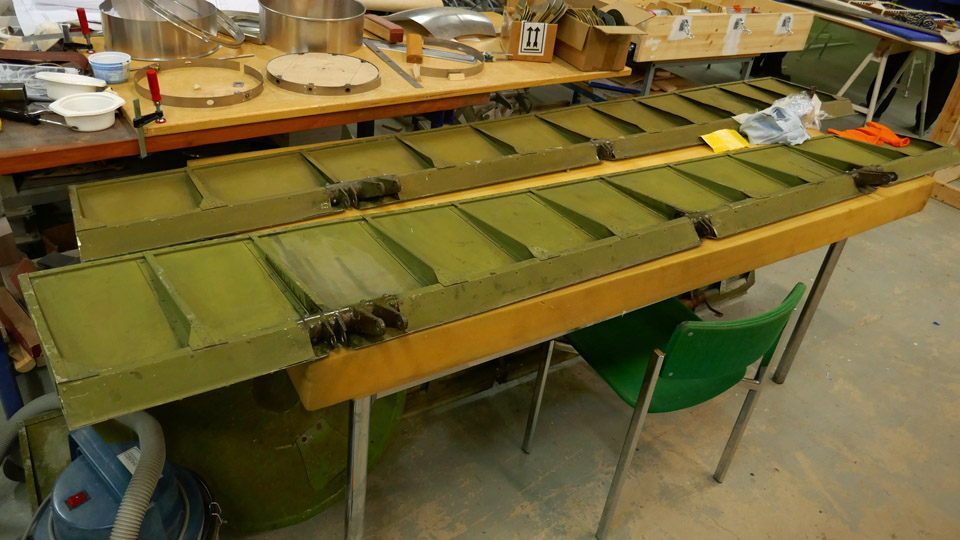
The Myrsky elevators? primingKeskiviikko 6.7.2022 - Tuesday Club member The VL Myrsky II (MY-14) elevators’ coating, which had started in April was finished at the beginning of May. As coating fabric, a 165 g/m2 linen fabric was used.
After the elevators were finished, the fabric was tightened to resemble a drum top with NC-SPEED nitro cellulose varnish. The varnish was dyed red with iron oxide. The tightening of the fabric was done phase by phase. It began with 50% thinned varnish. Thinner 8 was used for the purpose. From that we continued through 75% varnish to a full 100% varnish. Unthinned varnish was applied twice to the fabric cover of the elevators.After the elevators were finished, the fabric was tightened to resemble a drum top with NC-SPEED nitro cellulose varnish. The varnish was dyed red with iron oxide. The tightening of the fabric was done phase by phase. It began with 50% thinned varnish. Thinner 8 was used for the purpose. From that we continued through 75% varnish to a full 100% varnish. Unthinned varnish was applied twice to the fabric cover of the elevators.
Between the times of doping, the fabric surfaces were sanded smooth. After every application of varnish, the fabric tightened more. After four layers of varnish the fabric of the elevators had tightened to the wanted drum top level.
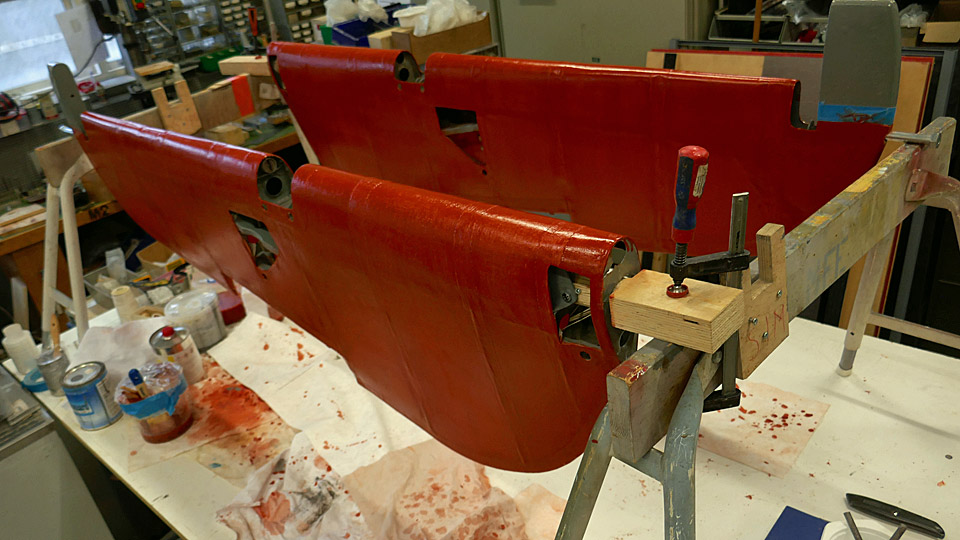
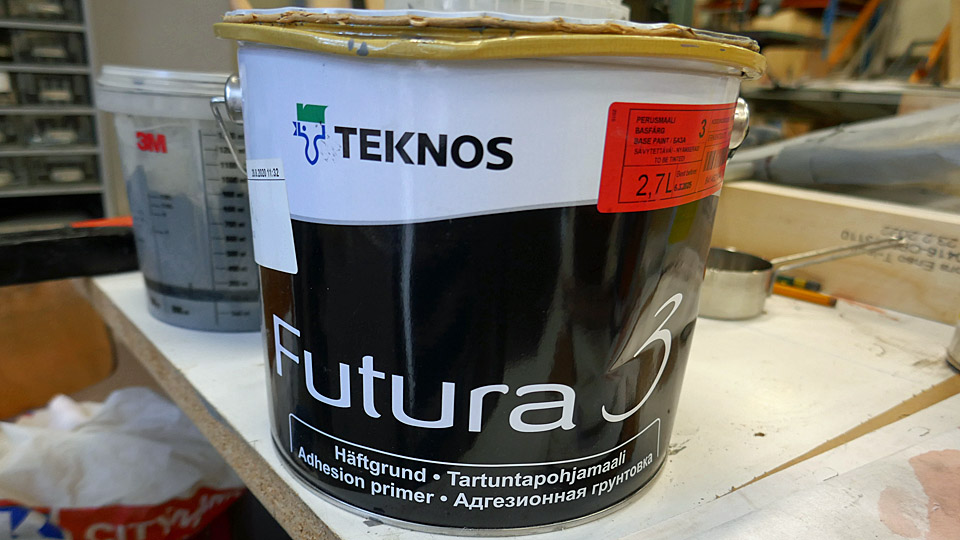
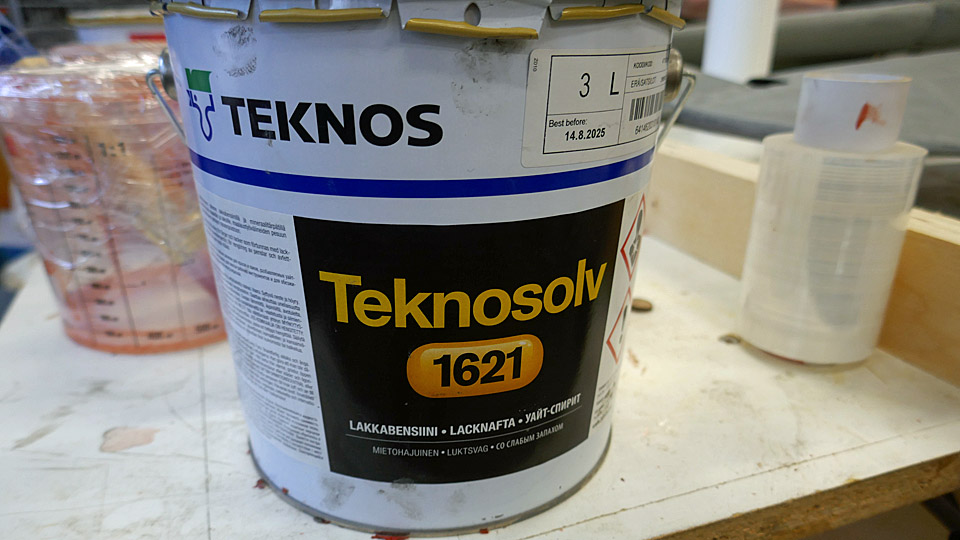
After tightening of the covering fabric, it was time to prime the elevators. TEKNOS Futura3 primer was chosen, and Teknosolv 1621 white spirit as thinner.
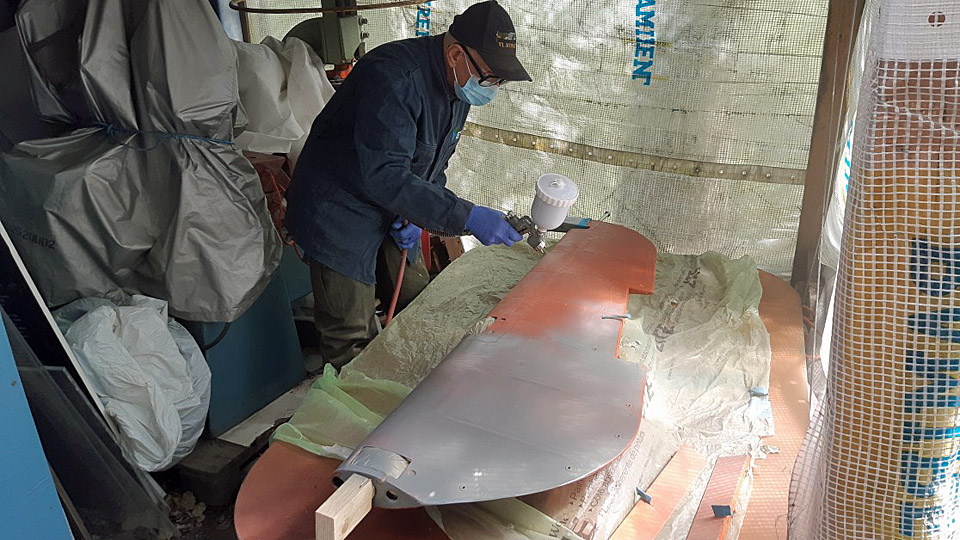
The priming was done by spraying, using the Futura 3 which was thinned to 75%. Before spraying, the openings in the elevators were covered to prevent the paint to get inside the elevators.
After spraying, the surfaces were sanded manually. At the same time, it was noticed that there was a slight depression on the trailing edge side of the elevator, along the whole length of it. Filler was applied to this area. After the filler had dried, the area was sanded to the form of the curvature of the elevator profile.
The second layer of the primer was also done with 75% Futura 3 primer. After spraying the surfaces of the fabric were sanded smooth. Special care was taken to the serrated edges of the protective strips on the sewn seams, so that the serrated edges could be sanded, so that they no longer feel like uneven spots on the surface of the fabric.
The elevators of the Myrsky have now been primed twice. We are debating that a possible third layer of primer could be sprayed on the surface of the elevators. Photos: Lassi Karivalo Translation: Matti Liusvaara. |
|
Avainsanat: aviation history, restoration, Tuesday Club, MY-14, VL Myrsky |
Super Caravelle tow bar restoration completedTorstai 12.5.2022 - Tuesday Club member Owned by the Aviation Museum Society and badly rusted, the Super Caravelle towbar was taken in the Tuesday Club for restoration six months ago. For the restoration the bar was dismantled. By March the parts had been cleaned of rust, so the surface treatment of the tow bar, that’s to say painting, could be started.
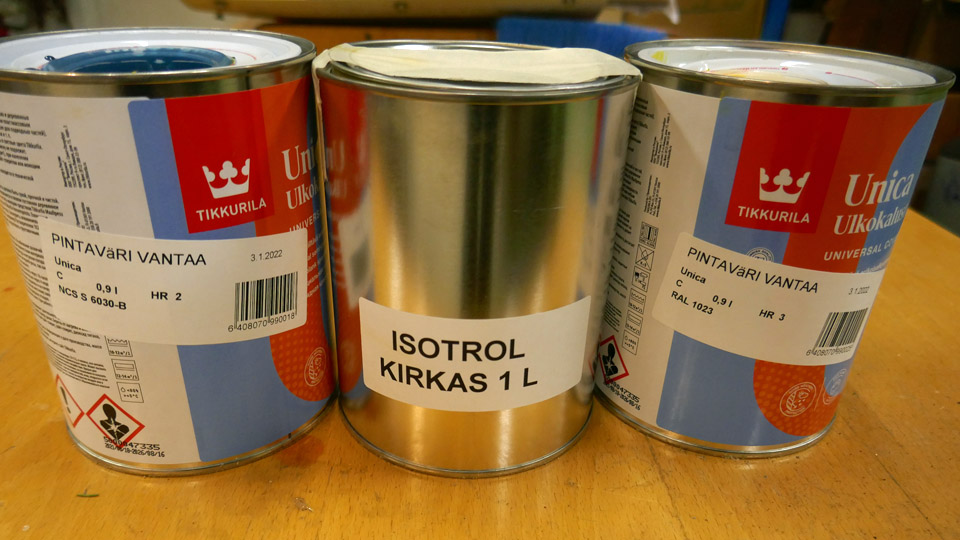
The towbar is to be painted in original colours of the Finnair era. The main colour has been “Finnair Blue”, but the ends have been painted with yellow high visibility colour. The original hues could be determined by a firm called “Pintaväri” from the paint residue still to be seen on the surface of the steel. The blue was found to be NCS S 6030 B and the yellow RAL 1023. For the paint, Tikkurila Oy manufactured Unica Outdoor furniture paint, was chosen. As the primer, a translucent Isotrol-lacquer was chosen, as it protects the parts from rusting.
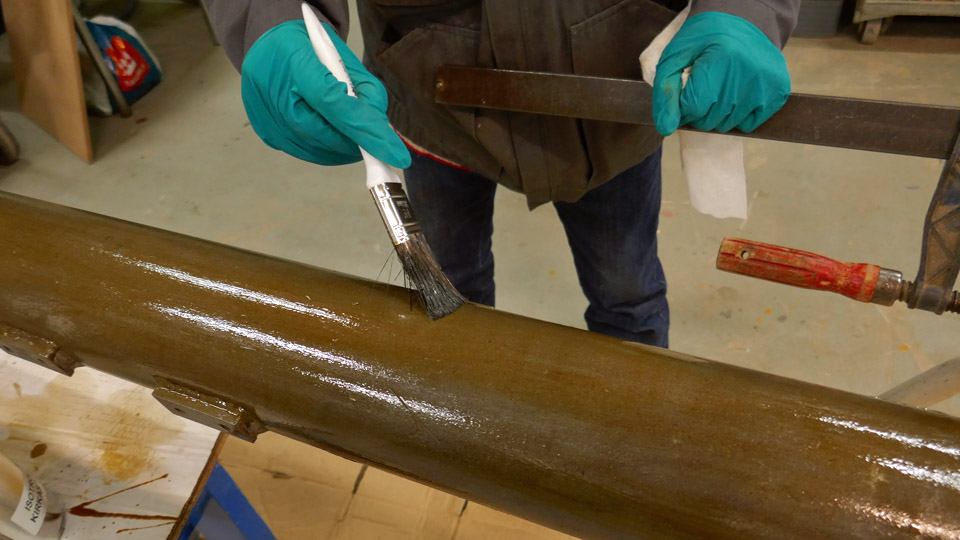
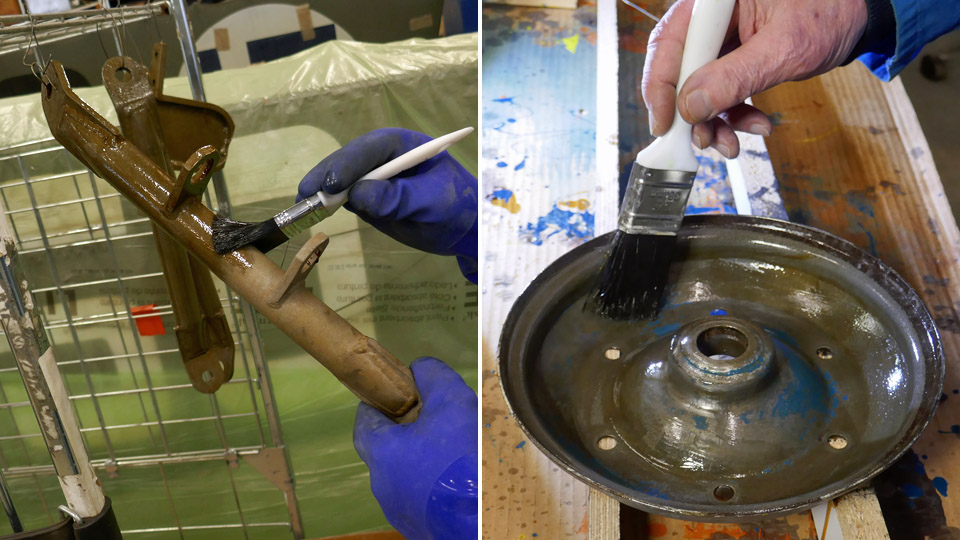
Before the surfaces were treated with the primer, they were wiped with Sinol-water solution. After this, the parts of the tow bar received as a primer the translucent Isotrol. After the Isotrol had dried, the surfaces were lightly sanded, vacuum cleaned and wiped again with Sinol-water solution.
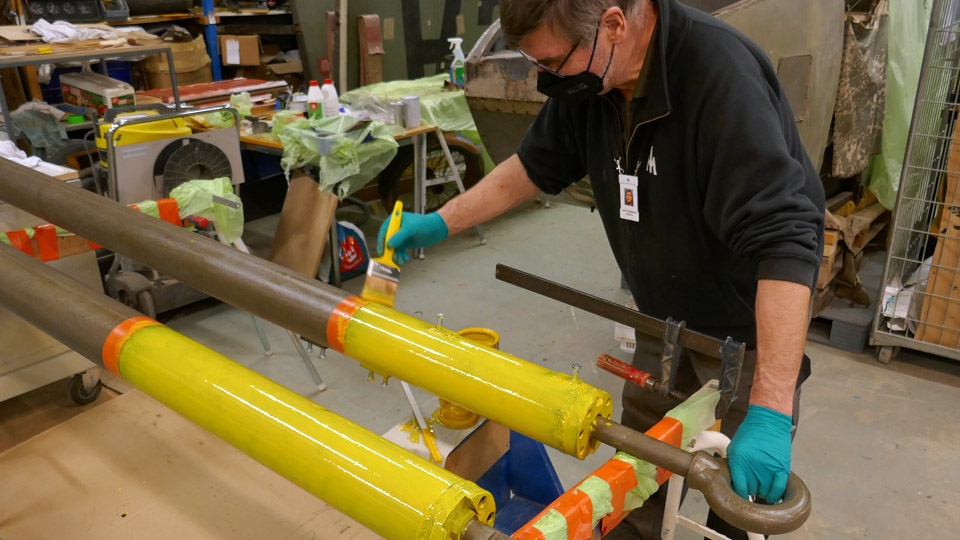
First the ends of the tow bar were painted yellow. The length of the high visibility area at the loop end of the tow bar has been 50 cm, and at the connector end 73 cm. The area to be painted was bordered with painter’s tape. The loop headed towing bar was also painted yellow and the nose gear connector at the other end likewise.
When painting with the yellow, it was noticed that the yellow paint covers insufficiently, especially when painted on the dark steel surface which has been painted with translucent Isotrol lacquer. The yellow had to be applied up to five layers, before the result was satisfactory. The inability to cover is an annoying feature of yellow paint. The yellow paint would have covered better, if we’d had the good sense to use light grey Isotrol to prime these parts. On the other hand, when we started to paint the parts of the bar with blue Unica paint, we noticed that the paint had an excellent cover from the first layer on. The covering abilities with the same paint differ greatly depending on the difference of the pigment.
When all the parts of the towing bar had received a new coat of paint, the assembly of the towing bar started. First the wheels were connected to the axle, after which the support arms of the wheels were fixed from the lower ends to the flanges in the wheel axles. The wheels were fastened from their support arms to the two broad flanges. At the same time with assembling the wheels, handlebars were screwed to both ends of the tow bar, to lift or move the tow bar by hand.
Now we were ready to attach the halves of the 4,7 m long bar to each other. They were locked into each other with a collar tightened around the attachment point. At the same time the upper ends of the support arms of the wheels were fastened to the collars on the tow bar.
The camber and caster angles of the wheel support arms were adjusted to make the wheels go straight. A connecting piece was fastened to the aircraft end of the tow bar, from which the bar was connected to the nose gear with a pin. Finally the bolt and nut ends of the support arms of the wheels were painted blue.
The rust covered towbar of the Super Caravelle had been restored in the Tuesday Club to its original livery. The change compared to the rust covered one was remarkable. The towbar will still get an original white Super Caravelle-like logo on its side. Somehow, it’s fitting to this time, that the towbar is in the Ukrainian colours. Photos: Lassi Karivalo Translation: Matti Liuskallio. |
|
Avainsanat: aviation history, restoration, Tuesday Club, Caravelle |
Other work than restorationKeskiviikko 6.10.2021 - Tuesday Club member The Tuesday Club does not only do aircraft restoration projects - the team carries out also other assignments, which are connected to the activities of the Finnish Aviation Museum and the Aviation Museum Society.
During the autumn the dust removing work has been started in the Finnish Aviation Museum’s Hall I and Hall II. A major dusting the museum aircraft surfaces was done about three years ago. Now mainly the surfaces of the aircraft on the museum floor are cleaned, because the dusting of the aircraft hanging from the ceiling requires a lifting platform, which isn’t available at the moment. The surfaces of the aircraft in Hall I are already bright and clean for the visitors to admire.
There are some aircraft fuselage frames and rear fuselages stored on the yard of the Aviation Museum. These include the rear fuselages of Bristol Blenheim (BL-180) and Douglas DC-3 (OH-LCA). Of the Blenheims which were in use in Finland, the BL-180 belongs to the series V. The OH-LCA was destroyed in 1963 when it hit the trees when landing on the Maarianhamina airfield. During the years the tarpaulins which have covered the rear fuselages have ripped and decayed and they were renewed. The DC-3 tarpaulin was replaced already earlier this year. The Tuesday Club team helped the museum staff to remove the torn tarpaulin from the BL-180 fuselage and covered it with a new one.
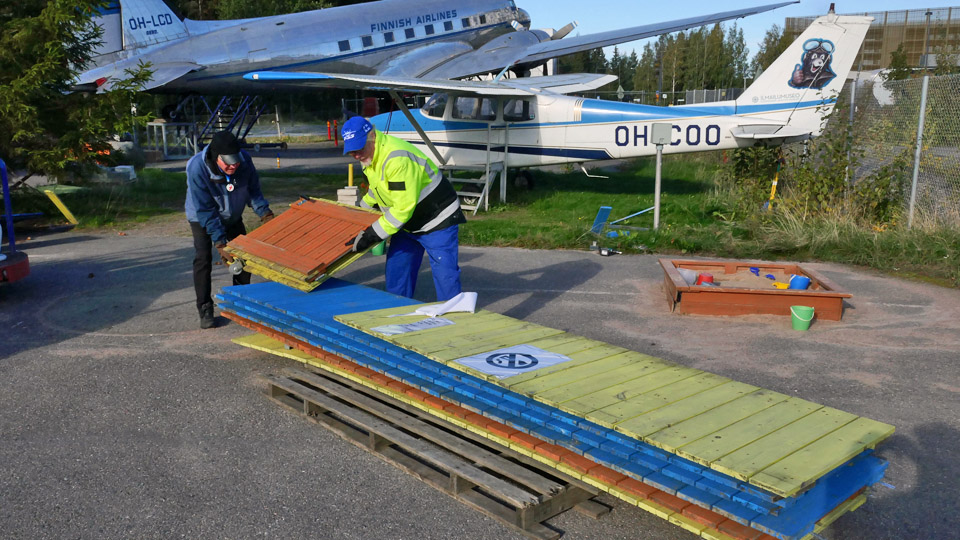
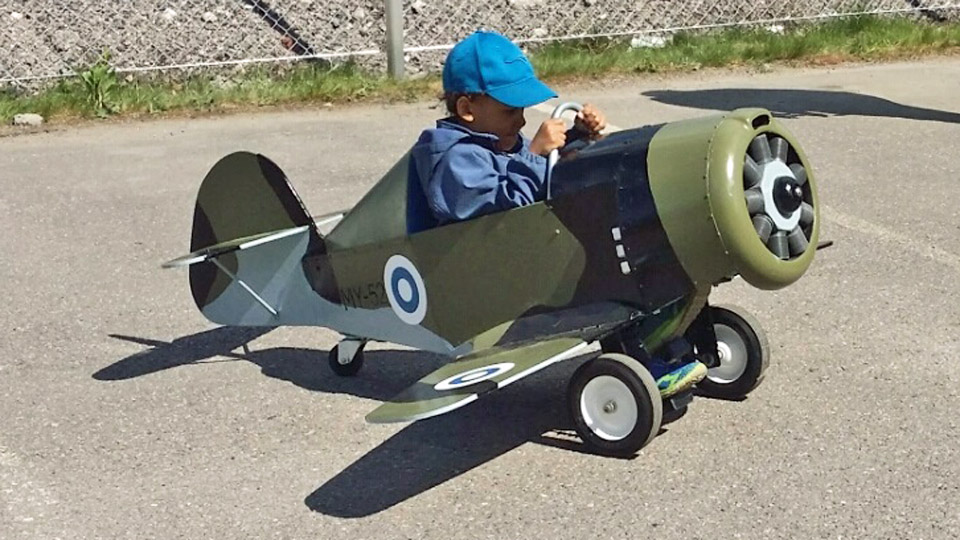
During the summer there is a fenced Children’s World outside the Finnish Aviation Museum. There young visitors can drive around on the pedal aircraft, made by the Tuesday Club, or “fly” in the real Cessna 172 Skyhawk (OH-COO), which was purchased for this purpose. In the autumn the Children’s World was closed and prepared for the winter. The Tuesday Club team helped the museum staff to take down the surrounding fence and to move the Cessna under the wing of the neighbouring DC-3 “Lokki” (OH-LCD) for the winter.
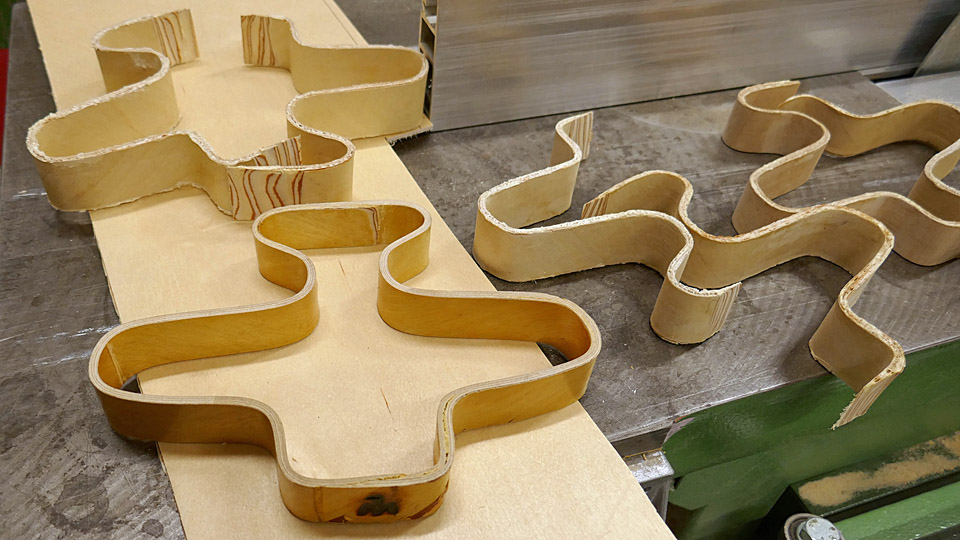
The Tuesday Club team has made aircraft-shaped pot coasters which have been for sale in the Aviation Museum shop as well as in the webshop of the Aviation Museum Society. These popular pot coasters ran out, but more will be made during the autumn.
Photo: Janne Salonen.
Photo: Janne Salonen. The Aviation Museum Society’s Caravelle-project has now taken a step forward as the airport company Finavia and the Aviation Museum Society have agreed that the Sud Aviation SE 210 Caravelle III, which has been standing in Arlanda in Sweden, will be placed on display at the Turku airport. A taste of Caravelle has already been sent to Turku: the main landing gear of a Super Caravelle. The landing gear is owned by the Aviation Museum Society, and it was cleaned at the Tuesday Club before it was delivered to the Turku airport terminal and placed on display there. Photos: Lassi Karivalo except if separately otherwise mentioned. Translation: Erja Reinikainen. |
|
Avainsanat: aviation history, restoration, Tuesday Club |
Other than restoration activities in Tuesday ClubMaanantai 23.3.2020 - Member of Tuesday Club The Tuesday Club of the Finnish Aviation Museum Society is mainly connected to restoring and repairing old aircraft and placing them on display in the aviation museums. Mainly this is naturally true, but the Tuesday Club is involved in various other activities which support the functions of the Aviation Museum or the Aviation Museum Society. This blog introduces some examples of these activities. Legs for large display monitorsThe Aviation Museum Society purchased six large display monitors, second-hand but functioning, to be used in different in public events connected to aviation. The bargain didn’t include legs which are needed when the display is standing on a table. Therefore the Tuesday Club team was given the task to make two legs for each display.
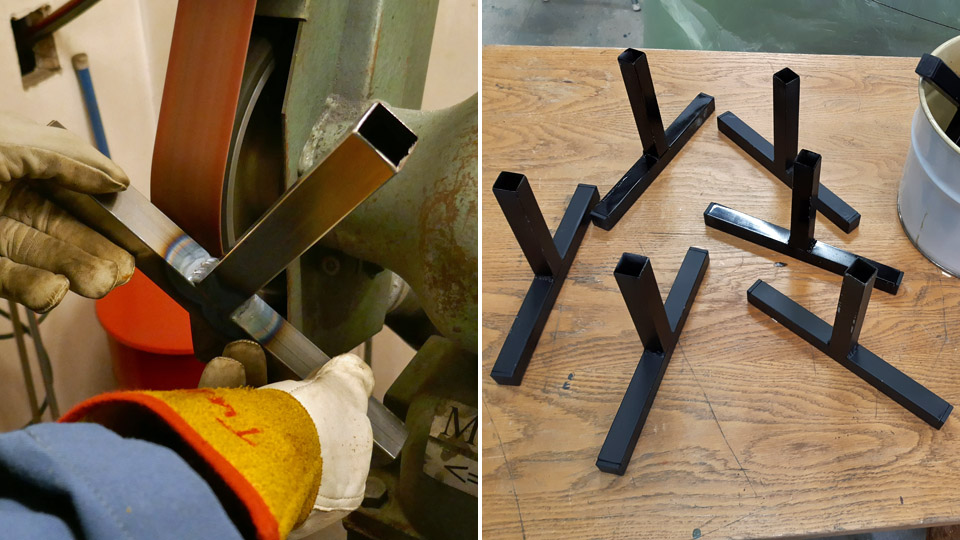
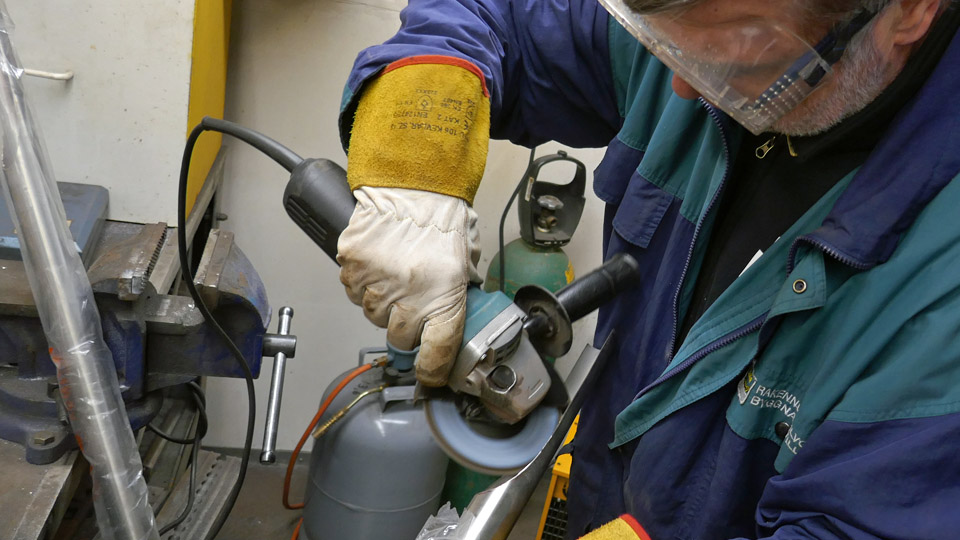
The team decided to make T-shaped legs from metal tube. The legs could be installed into the holes in the lower edge of the display and unfastened after use. The team acquired rectangular metal tube with suitable dimensions and cut it into pieces which will be welded together to form the T-shaped leg. For each display two tube pieces were needed for the horizontal legs and two pieces for the vertical supports. A total of two dozen tube pieces were cut for the six displays.
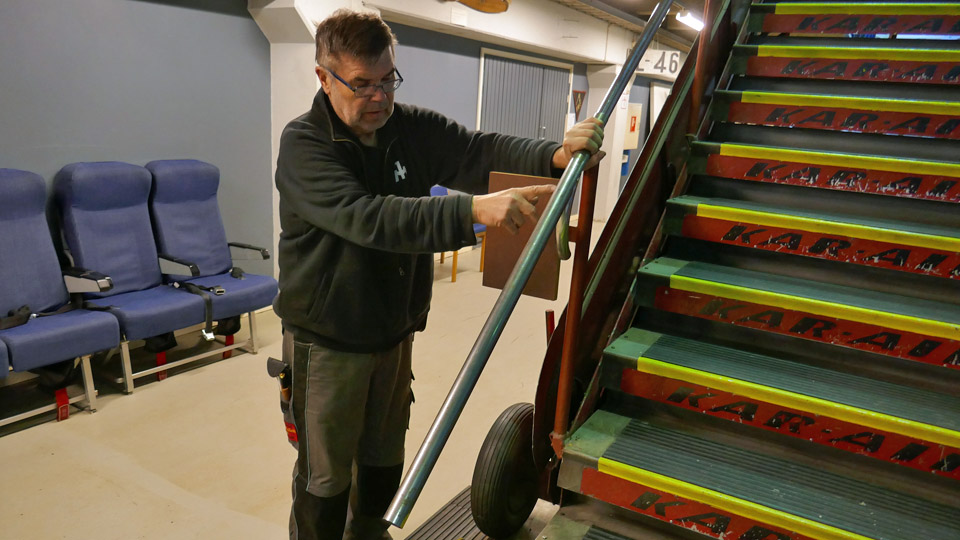
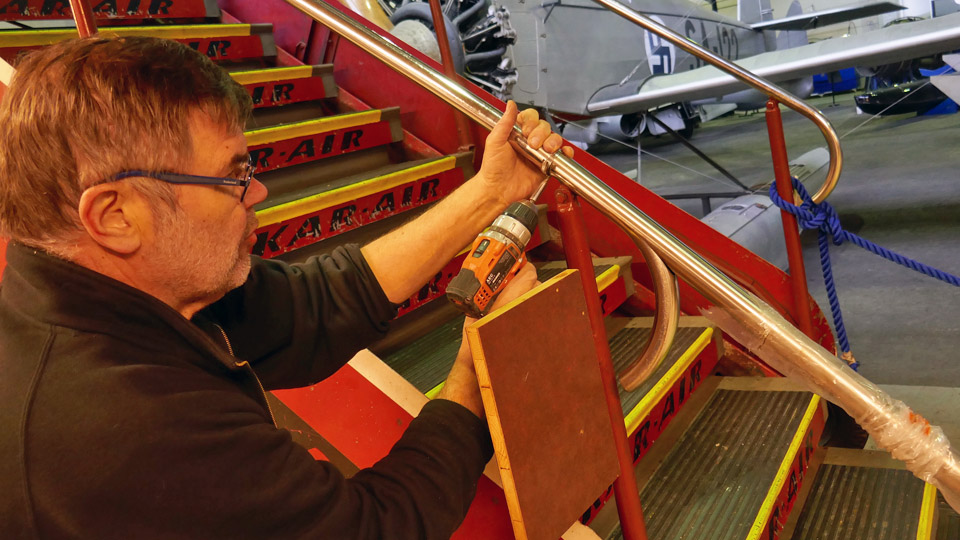
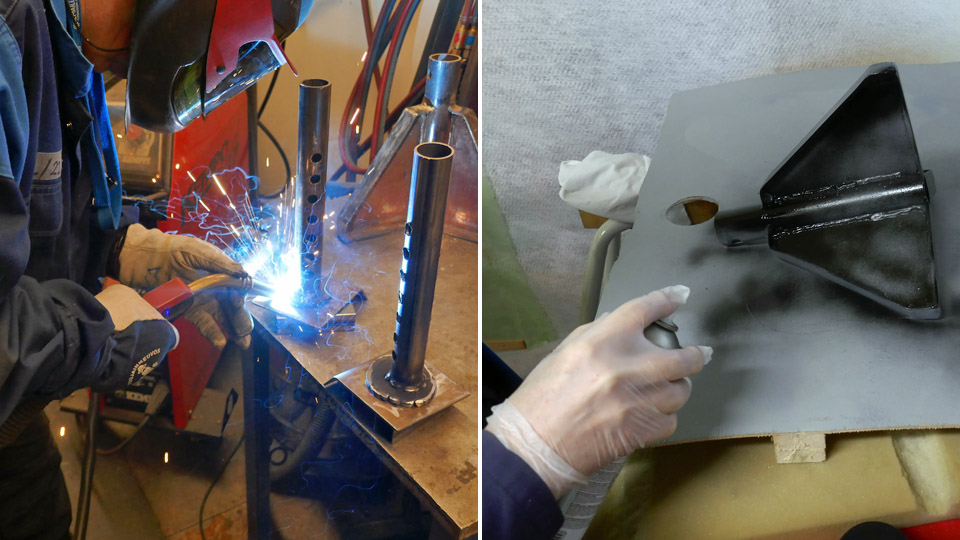
The 12 T-shaped legs were welded in the welding space outside the Finnish Aviation Museum. The welded seams and the ends of the tubes were ground smooth and then painted black. Finally the square tube ends of the legs were plugged using black plastic plugs. Now all six displays had their legs ready and they can be used in the different aviation events. Extending the guard railing of the stairsVisitor safety is important for the Finnish Aviation Museum. When inspecting the safety issues, a shortcoming was noticed on the stairs leading to the balcony of the I Hall. The guard railing of the stairs was shorter than the staircase. This may be dangerous for the visitor when the railing suddenly ends and there are still more stairs to walk. The museum decided to build extensions to the railings.
For the new railings the Tuesday Club team acquired stainless steel tube, which is strong enough and has a glossy polished surface which doesn’t need additional polishing. The tube will be connected to the existing railing tube using a lapped joint.
The lapped joint is made by cutting away the lower part of the tube at a length of about 30 cm. The open curved end of the railing tube can be pressed tightly on the original handrail and fastened with brackets on the vertical balustrade. The joint of the stainless steel tube on the original handrail will be made first on one railing to test how it works. When the joint has reached the desired form and appearance, the other three railing extensions can be made according to the model and using serial production process. The first joint is already in the testing phase.
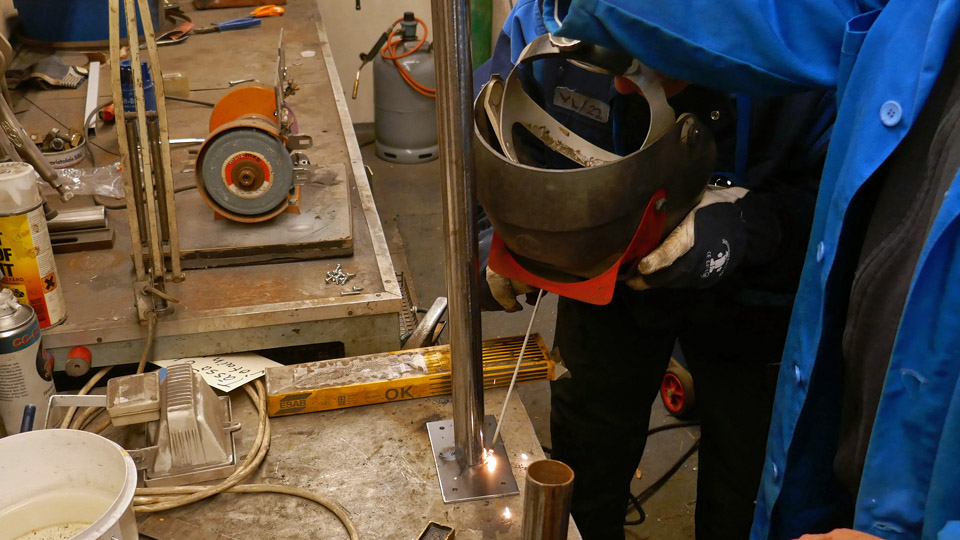
The extended handrails will naturally need their own vertical balustrades. The balustrades will be made from ordinary steel tube which was cut into four pieces. Fastening plates were welded onto the lower end of each balustrade tube. Fastening brackets for the handrail will be welded to the upper ends of the tubes.
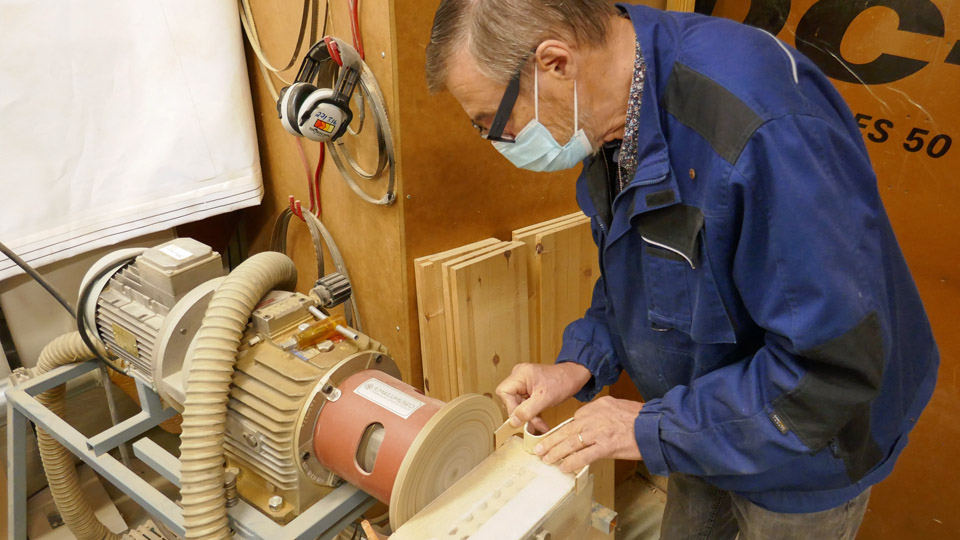
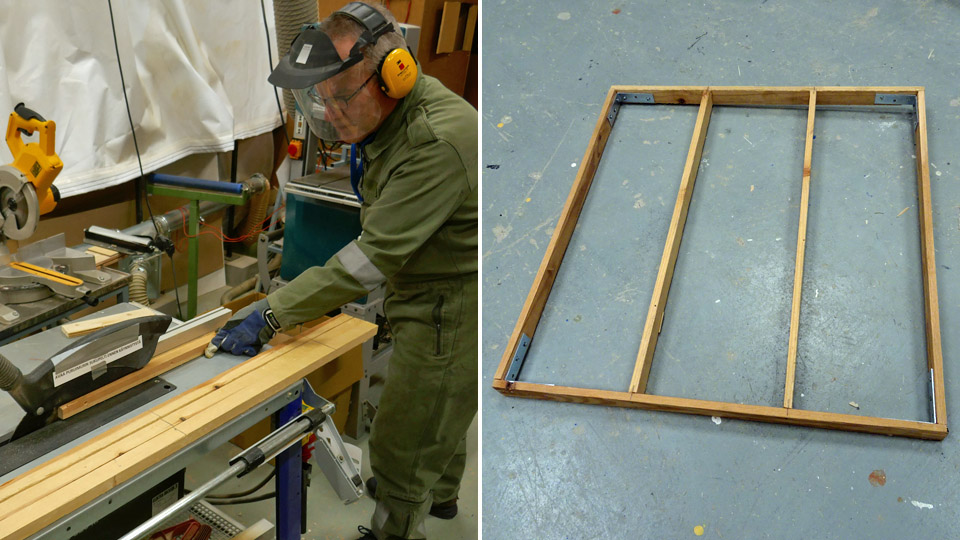
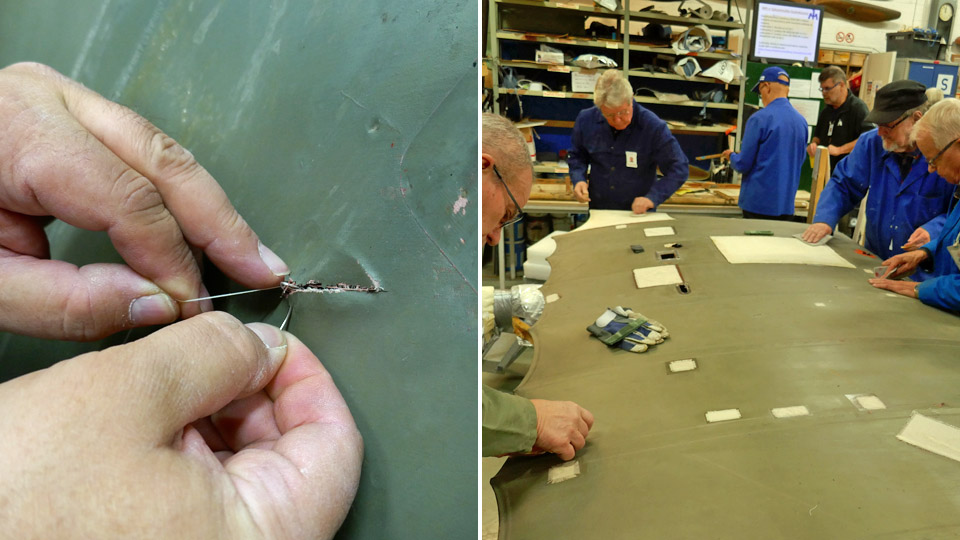
Now the guard railing extension project is at the phase where the joint of the extended handrail and the existing handrail is finalized and the balustrade tubes are made. However, the corona virus pandemic interrupted the Tuesday Club activities at the Aviation Museum and the work will be continued when the pandemic is over. Paint testsThe Tuesday Club is working on the restoration of the VL Myrsky II (MY-14) fighter and the Caudron C.59 advanced trainer plane and the rotor blades of the SM-1 helicopter (HK-1) are being repaired. Each project is now reaching the painting phase. The exact paint type and colour originally used on the Caudron and the helicopter rotor blades are not known. Also the fabric-covered parts of the Myrsky will require paint tests. The test is not only about paints but also different kinds of cotton and linen fabrics will be tested how they fit the needs. The Tuesday Club team decided to make a dozen wooden frames, covered with fabric, for testing the paints and different kinds of fabrics and for choosing their combination.
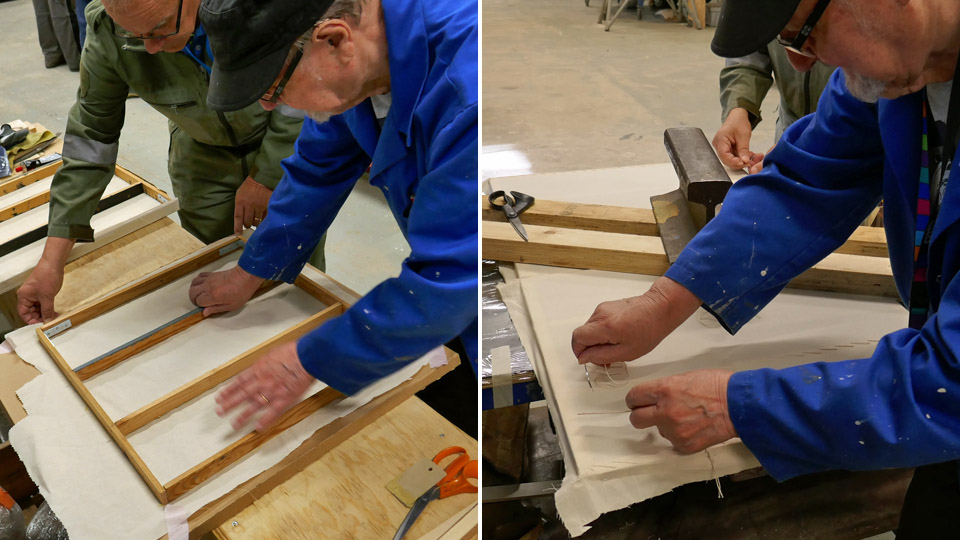
Suitable batten material was found in the wood storage of the restoration space and it was cut to measure. The battens were connected to form frames of 50x50 cm. The frames were covered with four different kinds of cotton fabric and a linen fabric. On some frames the fabric was properly sewn, as it would be when covering an airplane with fabric. On other frames the fabric was fastened using a stapler.
When the frames were ready, the fabric was tightened using nitrocellulose varnish. The fabric has to be tightened before the paint tests. The fabric has to be covered with the shrinking dope several times before it is tight enough. The shrinking procedure is started with thinned varnish (50% varnish, 50% thinner) and finished with plain varnish.
The shrinking process was left unfinished when the corona virus pandemic interrupted the Tuesday Club activities. Hopefully the pandemic is soon over and the team can return to their normal routines. Photos: Lassi Karivalo, translation: Erja Reinikainen. |
|
Avainsanat: aviation history, restoring, old aircraft, Tuesday Club |
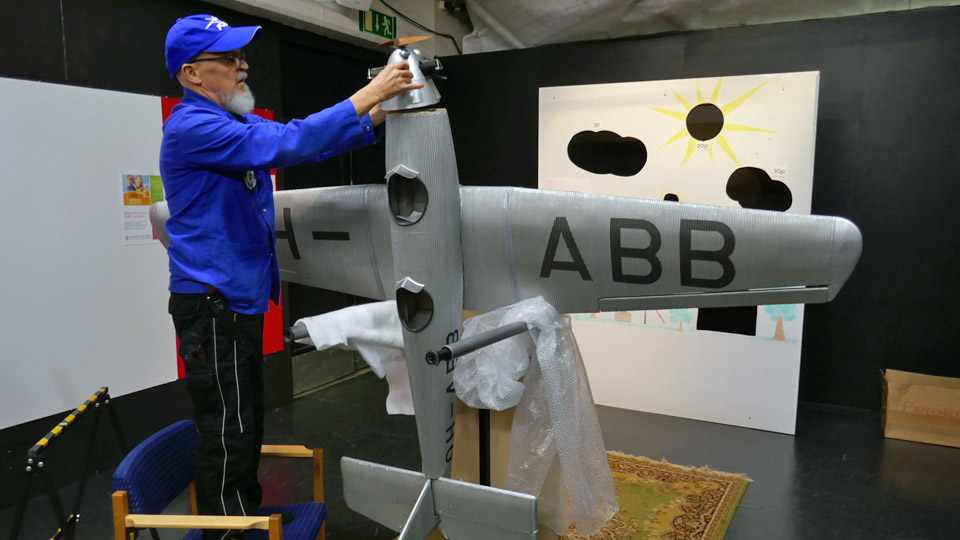
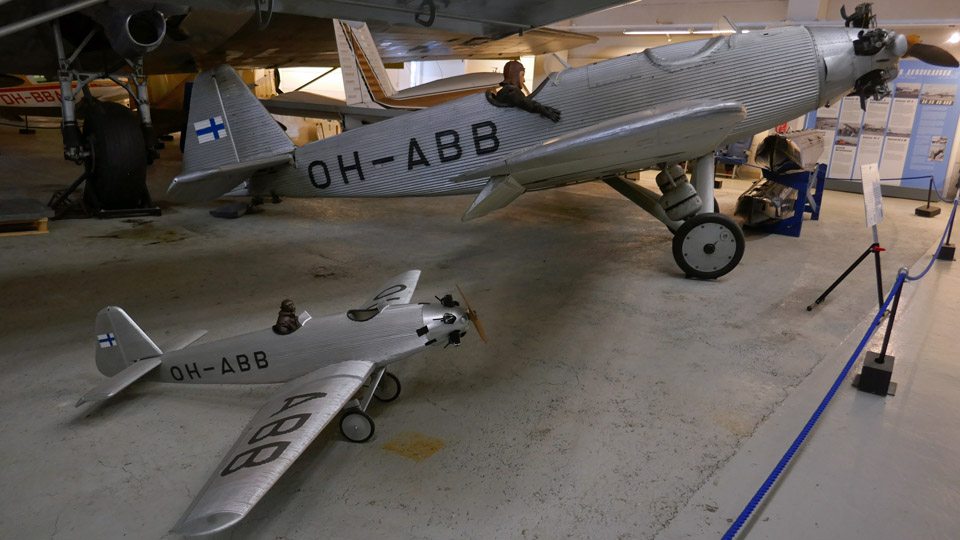
Metal trestles for Junkers 50A Junior and repairing of Junnu's modelKeskiviikko 18.3.2020 - Member of Tuesday Club The Junkers 50A Junior was on display at the Helsinki-Vantaa airport for many years, but it was returned to the Finnish Aviation Museum about a year ago because of the refurbishment works in the airport terminal. This aircraft is the famous OH-ABB, registered on 6.3.1931 by Väinö Bremer, who flew several long distance flights on this plane. In 1932 one of his flights reached from Finland all the way to Cape Town in South Africa and back.
So far Bremer’s Junkers has been in storage at the Finnish Aviation Museum and hidden from the public. Now the “Junnu” has been placed on display in the II Hall of the museum. At the moment the museum is closed because of the corona virus epidemic, but the plane can be admired later. The plane was moved and assembled by the museum’s hot air balloon volunteers together with the museum staff.
The Junkers is standing in the II Hall on its landing gear wheels with its full weight, so the Tuesday Club team decided to make metal supports under the landing gear wheel axles. This is a normal procedure for aircraft which are on display in aviation museums. When the metal trestles bear the weight of the plane, the tires won’t be damaged when the plane stands on display for many years.
The Tuesday Club team was surprised to find half-finished metal trestles in the corner of the restoration space in the Finnish Aviation Museum. These trestles could be modified to fit the Junkers 50A Junior. The trestles were covered with rust and the surfaces needed to be cleaned. The tube-shaped adjusting spars inside the trestles had to be modified to fit the new purpose. The trestles were sprayed with black varnish paint.
The team took the modified metal trestles to the II Hall in the Finnish Aviation Museum and managed to lift the Junkers so that the trestles could be installed under the wheel supports on both sides.
The Tuesday Club team had also another task concerning Junkers Junior. A model of the Junkers OH-ABB has been on display in the II Hall of the Finnish Aviation Museum. Its skin is made of corrugated cardboard to imitate the real corrugated metal sheet covering of the Junkers. The scale of the model was actually defined by the size of the “waves” of the corrugated cardboard.
The engine of the model had been damaged during the years and it had come loose and also the cylinders and some parts had broken. The Tuesday Club team repaired the engine and fastened it back into place.
The model was taken back into II Hall and placed beside the real Junkers 50A Junior (OH-ABB). Now the model and real aircraft are side by side, on display, with a pilot sitting in the cockpit. Photos: Lassi Karivalo Translation: Erja Reinikainen |
|
Avainsanat: aviation history, restoring, old aircraft, Tuesday Club, Junkers 50A Junior, OH-ABB |
Tuesday Club has started its 31th year with many activitiesMaanantai 10.2.2020 - Member of Tuesday Club
In the beginning of the year it is appropriate to summarise the activities of the Tuesday Club in the previous year. In the summer the Tuesday Club team finalized the restoration of the I.V.L. K.1. Kurki aircraft, after three years of work. The Kurki was assembled and placed on display at the Päijänne-Tavastia Aviation Museum in Vesivehmaa. As the Kurki-project had come to an end, a new project could be started: Caudron C.59 (CA-59) will be restored for display. The restoration of the VL Myrsky II (MY-14) was started six years ago and the Tuesday Club team worked on it in 2019 as well. The fourth project in the Tuesday Club was to repair the two broken rotor blades of the SM-1 helicopter. Also some additional minor tasks were given to the Tuesday Club team and the year was rather loaded with work. Over 7 000 work hours were done during the year. The team has continued with the ongoing tasks in the beginning of this year. Repairs of Caudron’s fabric-covered wings
The main tasks at the moment in the Caudron C.59 advanced trainer plane restoration project are the repairs of the holes and tears in the fabric covering on the lower wings. This is not a minor project, because there were 66 holes to mend on the lower port wing and about 50 on the starboard wing. It is very sad to see how badly the Caudron’s wings have been treated during the 90 years of storage.
The holes and tears on the lower port wing have already been repaired. The edges of the tears were connected with stitches and a fabric patch was glued on the sewn area. Nitrocellulose varnish was used for gluing the patches and it smoothed the repaired fabric when shrinking. Historical values have to be considered when the holes on Caudron’s wings are repaired. If the fabric covering of the wing had been damaged with over 50 holes when the aircraft was still in use, the whole wing would have been covered with new fabric. At the moment the Tuesday Club is working on the lower starboard wing. The fabric surfaces were cleaned and then the repairs of the holes could be started. In addition to the work on the wings, the repair of the horizontal stabilizer is going on. The horizontal stabilizer had to be dismantled to repair the damages and now it is being re-assembled. SM-1 helicopter’s rotor blades were repaired
The repair work on the PZL SM-1SZ (HK-1) helicopter’s rotor blades was started a year ago. Now all the damaged areas have been repaired, i.e. covered with new fabric and treated with shrinking varnish. The damaged areas were located in the fabric-covered areas of the blades. Now the new fabric areas have been smoothed using nitrocellulose varnish and are waiting to be painted. When the original paint type and colours have been defined, the new fabric areas can be painted. The upper surface of the blade will be painted dark green and the lower side will be pale blue.
Myrsky’s restoration work continues for one more yearThe aim is to complete the restoration of Myrsky MY-14 in March 2021 when the aircraft will be placed on display. The schedule is tight, but the restoration teams are working hard in the Tuesday Club and in the Finnish Air Force Museum in Tikkakoski.
In the Tuesday Club the main emphasis is on the restoration of the two wing halves. Both wings are under construction in the restoration space at the Finnish Aviation Museum. The leading edge of the starboard wing has been almost covered with new plywood and the trailing edge area on the upper surface will be covered soon. The starboard wing will soon be ready for the surface preparations, which are needed before painting. The work on the port wing is about one month behind the starboard wing. There is still some work needed on the port wing before the flap compartment on the trailing edge is ready, the flap is completed and the leading edge is covered with new plywood.
Photos: Lassi Karivalo Translation: Erja Reinikainen. The repairs of the Caudron’s fabric-covered wings |
|
Avainsanat: aviation history, restoring, old aircraft, Tuesday Club |
Ilmailumuseot.fi - Aviationmuseums.fi